- Joined
- Aug 29, 2012
- Messages
- 2,691
- Location
- Good Ol' US of A!
- Vessel Name
- Pau Hana
- Vessel Make
- 1989 PT52 Overseas Yachtfisher
Our 1989 vessel was sorely in need of new gauges- the original VDO gauges were failing, and I couldn’t rely on the information presented.
New gauges and senders (dual station) added up to over $1k, and I decided to make the change to NMEA2k integration.
Research led me to 3 contenders- the Noland RS-11, Actisense EMU-, and Chetco Digital Seagauge Pro. Weighed the pros and cons or each, and decided to go with the Chetco.
And...I’m glad I did. A call to Chetco Digital, and I’m talking to Joe- the owner, designer, and programmer. He’s not a one man show, but from the first conversation I was convinced that I was in good hands.
Placed the order, and then started the project:
Simple, eh?
The easy part was the lower helm refit- remove the 12”, modify the hole, install the 16”. Updated the 16” to Lighthouse 3 so it would interface with the Axiom units on the flybridge. Done .
.
Next, I installed the Chetco unit. The thing is robust- about the size of a paperback book. It comes pre-programmed based on your specific needs, and has 4 ready to install wire looms (power/ethernet, pulse/tach for mains and gender, 12 analog inputs, and 12 digital switch connections plus alarm connections). Another easy part- remove the sender leads from the existing gauges, connect the requisite analog leads to the Chetco, connect the NMEA backbone, and power it all up.
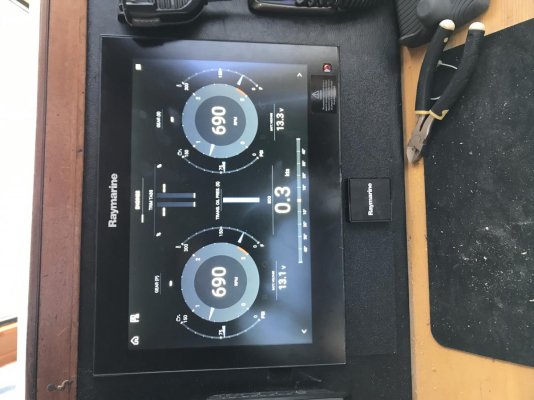
The system showed all gauges right away in the included vDash software. A call to Joe, and the required tweaks were done to have the info show correctly on the Raymarine.
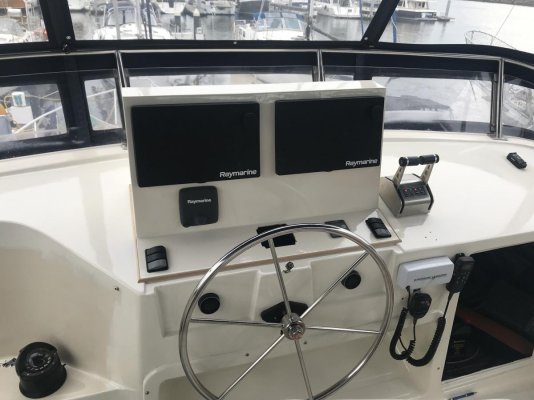
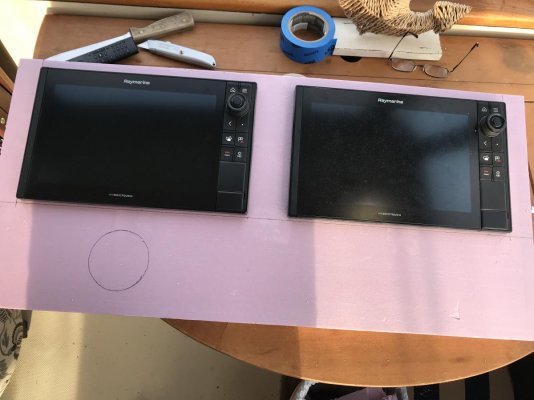
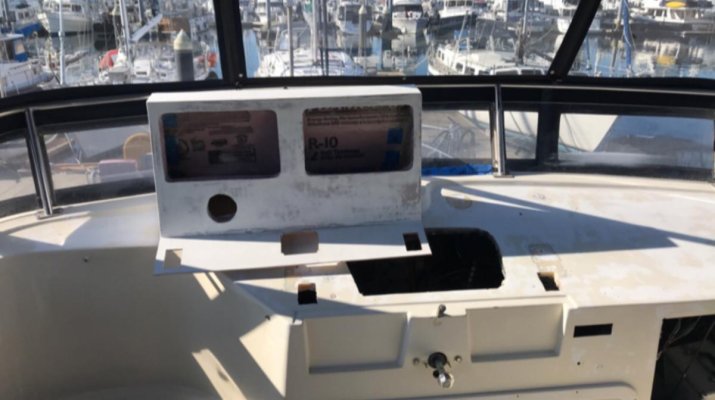
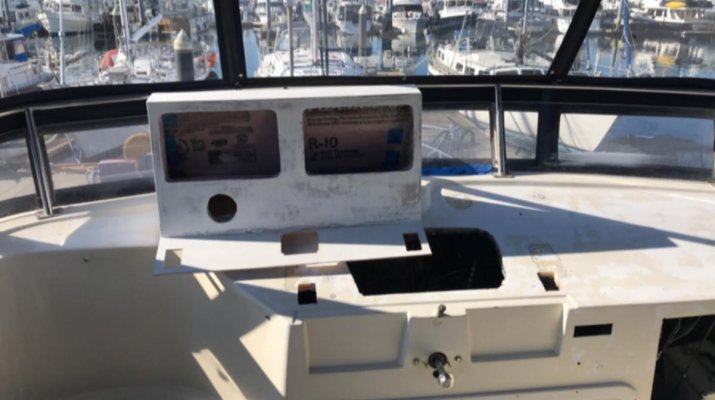
Next- the flybridge. I used 2” pink structural foam to mock up the housing- I was going to make a plug, but the foal worked so well that I used it as the base. Figured all the angles, made the cuts, and soon had a perfect base to lay the fiberglass on. Followed the glass with 1/4” ply for additional strength, then added additional layers of glass and resin. Cut the openings for the Raymarine head units and autopilot and set aside.
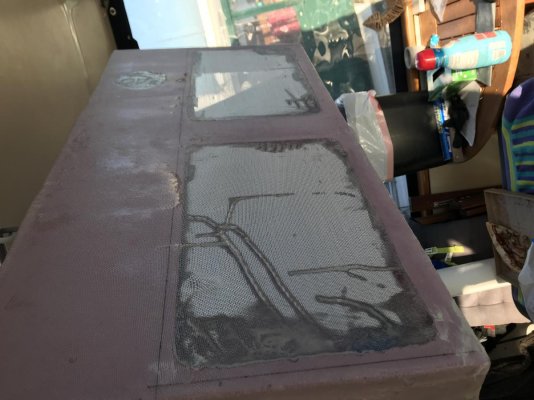
After that, I stripped and filled in all the holes in the helm area from old installs, then faired them in and prepped for paint.
Primed, then painted all with Brightsides.
New gauges and senders (dual station) added up to over $1k, and I decided to make the change to NMEA2k integration.
Research led me to 3 contenders- the Noland RS-11, Actisense EMU-, and Chetco Digital Seagauge Pro. Weighed the pros and cons or each, and decided to go with the Chetco.
And...I’m glad I did. A call to Chetco Digital, and I’m talking to Joe- the owner, designer, and programmer. He’s not a one man show, but from the first conversation I was convinced that I was in good hands.
Placed the order, and then started the project:
- Larger Raymarine MFD for the lower station (used)
- Move the existing 12” Raymarine at the lower helm to the upper helm
- Fill in all existing holes in the fly bridge station and paint
- Construct a new housing for the flybridge electronics
- Connect the Chetco device, and run all electronic wiring
Simple, eh?
The easy part was the lower helm refit- remove the 12”, modify the hole, install the 16”. Updated the 16” to Lighthouse 3 so it would interface with the Axiom units on the flybridge. Done
Next, I installed the Chetco unit. The thing is robust- about the size of a paperback book. It comes pre-programmed based on your specific needs, and has 4 ready to install wire looms (power/ethernet, pulse/tach for mains and gender, 12 analog inputs, and 12 digital switch connections plus alarm connections). Another easy part- remove the sender leads from the existing gauges, connect the requisite analog leads to the Chetco, connect the NMEA backbone, and power it all up.
The system showed all gauges right away in the included vDash software. A call to Joe, and the required tweaks were done to have the info show correctly on the Raymarine.
Next- the flybridge. I used 2” pink structural foam to mock up the housing- I was going to make a plug, but the foal worked so well that I used it as the base. Figured all the angles, made the cuts, and soon had a perfect base to lay the fiberglass on. Followed the glass with 1/4” ply for additional strength, then added additional layers of glass and resin. Cut the openings for the Raymarine head units and autopilot and set aside.
After that, I stripped and filled in all the holes in the helm area from old installs, then faired them in and prepped for paint.
Primed, then painted all with Brightsides.
Attachments
-
 9CD8DB89-D3C6-4FA8-990B-DC92D217F2F7.jpg135.3 KB · Views: 254
 -
 4A756914-AC18-4CC9-ADCE-B0A05DC25AF1.jpg116.3 KB · Views: 267
 -
 0B066A42-67FE-4BF3-8EF0-DE59A4B601DA.jpg104.2 KB · Views: 246
 -
 602FB889-278F-4E0F-AA7B-F7BC7BF6FE21.jpg136.9 KB · Views: 224
 -
 308C6EBE-A1A4-46A9-9D8C-DC4652E540A2.jpg75.8 KB · Views: 223
 -
 0AF6CE93-F767-4341-9A25-3AAFE8E0061F.jpg132.4 KB · Views: 221
 -
 7157DFA1-FD03-4771-804D-A4E903F5BDFD.jpg75.8 KB · Views: 219
 -
 A5F68D63-664E-467A-A61C-8FB632A2C0FE.jpg66.4 KB · Views: 220
 -
 339F34CA-0CD2-47E0-864C-E1B4C690A7F0.jpg95.2 KB · Views: 216
 -
 A652DCED-1E52-4F31-B005-5B5CF5AF0762.jpg119.8 KB · Views: 220

