My Short Haul Refit

The friendliest place on the web for anyone who enjoys boating.
If you have answers, please help by responding to the unanswered posts.
Welcome to the forum Mr. Riley!

Not much has changed in the last couple of months. The yard I'm in has a lot of Chesapeake Bay waterman who change over from oystering to crabing in the spring. Add to that the charter fleet getting ready for summer. I'm heading to Hatteras NC this morning to start my season. Sean should be back working on my boat next week. Hopefully the last of the painting will be done in June.

Ted
 
Thank you for the welcome!

While a "newbie" I'd guess that you have many other fans following with baited breath to see the conclusion of your masterful efforts on this "short haul".

Best wishes for a successful season!

Riley
 
90 degrees inside the building today.

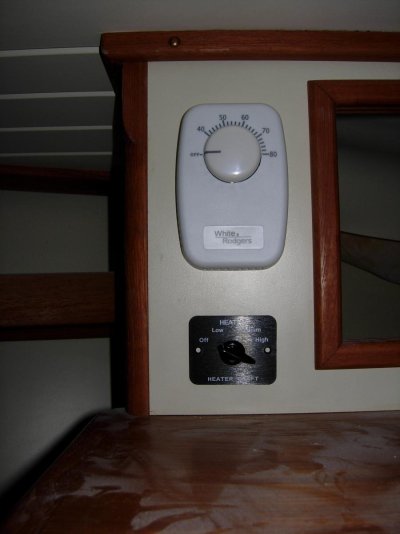
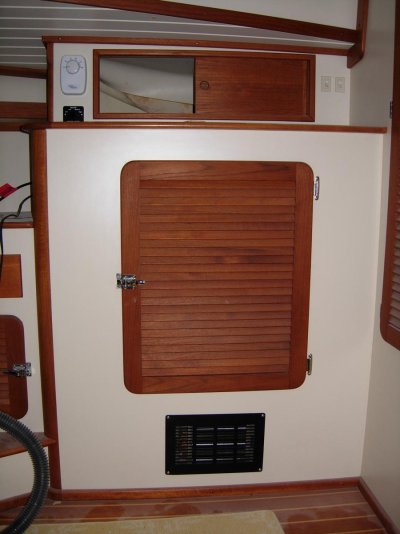
The last round of sanding primer is well underway. Hopefully we will be heading into the Awlgrip top coat phase next week. Meanwhile I'm busy inside finishing up projects. As mentioned previously, I've installed a cabin heat loop system. Simply there is a hot water loop from the engine to heaters located in the master stateroom, pilothouse, and the saloon. The loop coolant solution is pushed around by a 12 volt pump and each heater is equipped with a 3 speed blower and line voltage thermostat.

DSCN1286.jpg


DSCN1284.jpg

So I'm down in the master stateroom with all the windows and doors (except one) closed and masked over. It's about 95 degrees in there with very high humidity. I'm doing the wiring on the blower speed selector and thermostat. As I turn on the heat gun for the last time to finish the heat shrink butt connectors, the irony hits me. I'm intentionally raising the temperature in this sweltering stateroom to install a heating system on one of the hottest days of the year.:banghead: Well it should keep the boat nice and warm this winter when I'm cruising SW FL. :facepalm:


DSCN1288.jpg


Ted
 
As I turn on the heat gun for the last time to finish the heat shrink butt connectors, the irony hits me. I'm intentionally raising the temperature in this sweltering stateroom to install a heating system on one of the hottest days of the year.:banghead: Well it should keep the boat nice and warm this winter when I'm cruising SW FL. :facepalm:
Ted

You'll be happy you have it when one of those long-sleeve t-shirt days roll around.
 
So I'm down in the master stateroom with all the windows and doors (except one) closed and masked over. It's about 95 degrees in there with very high humidity. I'm doing the wiring on the blower speed selector and thermostat. As I turn on the heat gun for the last time to finish the heat shrink butt connectors, the irony hits me. I'm intentionally raising the temperature in this sweltering stateroom to install a heating system on one of the hottest days of the year.:banghead: Well it should keep the boat nice and warm this winter when I'm cruising SW FL. :facepalm:
Ted

I can sympathize. This weekend I spent two 6-hour days in the ER and heads in mid-90s temps cleaning and then torquing down new seacocks with pipe wrenches--13 of them! In cool temps it's bad enough--in positions the human body wasn't designed for, doing reaches that require two elbows on each arm. But this was unhealthy. Although I tried to stay hydrated, I lost about 4 lbs through sweat. Very happy with the result though--as you should be. The work you're doing looks fantastic.
 
I can sympathize. This weekend I spent two 6-hour days in the ER and heads in mid-90s temps cleaning and then torquing down new seacocks with pipe wrenches--13 of them! In cool temps it's bad enough--in positions the human body wasn't designed for, doing reaches that require two elbows on each arm. But this was unhealthy. Although I tried to stay hydrated, I lost about 4 lbs through sweat. Very happy with the result though--as you should be. The work you're doing looks fantastic.

Thanks!

Yes, I'm very happy with how things are coming together. Have been doing wiring for a week or so sitting Indian style next to the breaker panel on the wood floor. My hips are killing me this morning from working in that position for hours, but the end is in sight.

Ted
 
You'll be happy you have it when one of those long-sleeve t-shirt days roll around.

Keep telling myself, "2017, the loop, it could get chilly in Michigan or Canada". It was chilly some days bringing the boat North in April in 2014.

Ted
 
Ted....
I gotta just say it....
THAT IS SOOOO FINE!!!!


1983 Present 42 Sundeck
Twin Lehman 135's
✌️
 
Updates and some more pics:

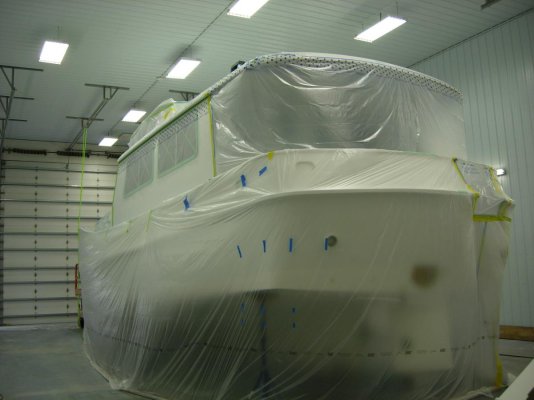
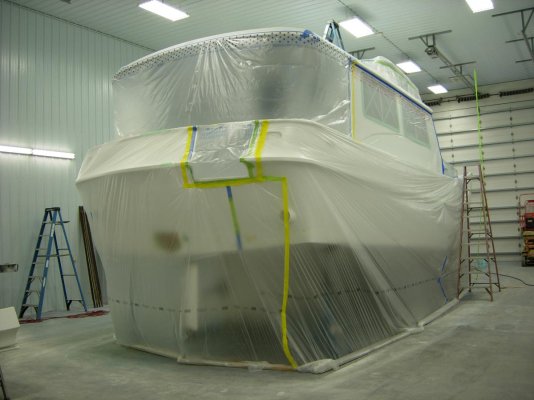
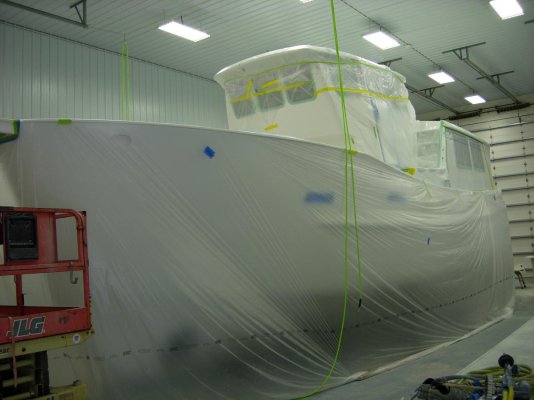
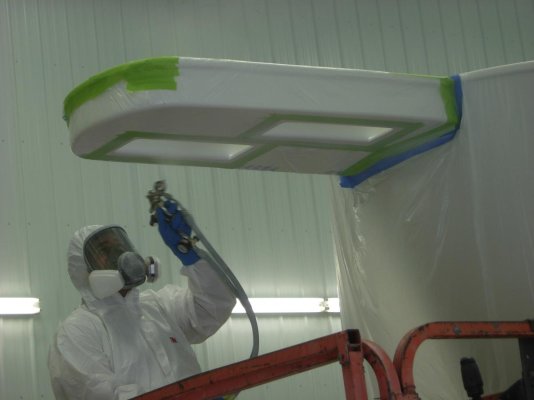
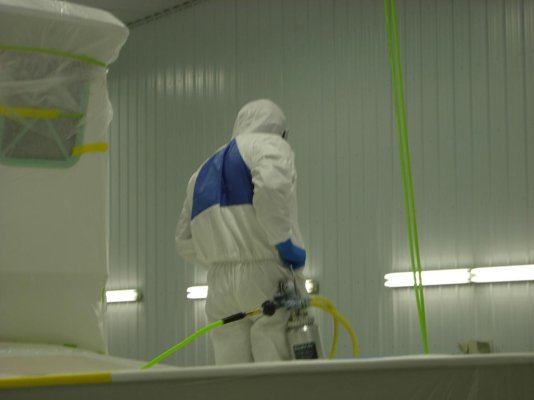
It's been a while, so here is where the project is currently at. The boat has been finally completely sanded and ready to be wiped down, masked off and final coats painted. There are 3 colors that will be shot in probably 8 sections with 3 coats for each section. The entire boat is masked off except for the section being painted. That section will get 3 coats of paint in one day. Then that section is masked off and another section in uncovered and painted, until all sections are done. Monday the boat came out of the building for the day so that the inside of the building could be power washed to remove all the dust. And so the final painting begins.

Meanwhile I have been finishing up little projects that don't look terribly impressive. Thought I would post some pics of the smaller stuff.

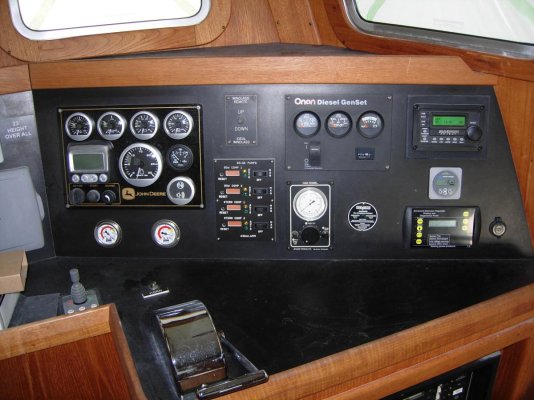
In the pilothouse I added some new displays. Please pardon my dust. Clean up will come after the painting is finished.
DSCN1341.jpg

First is the gauge panel for the new John Deere engine. Below are vacuum gauges for the Racor separators. The left is for the dual Racor 1000 on the engine. The right is for a Racor 1000 which is in the fuel polisher / transfer pump system.
DSCN1340.jpg

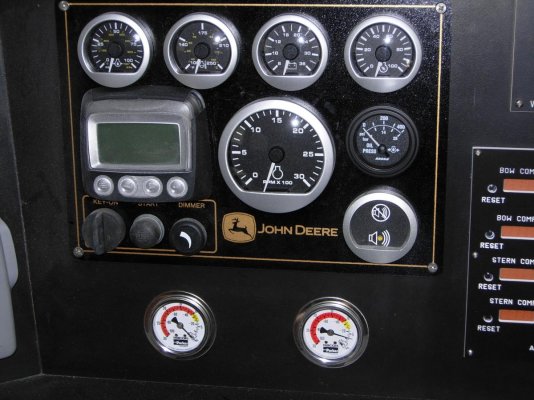
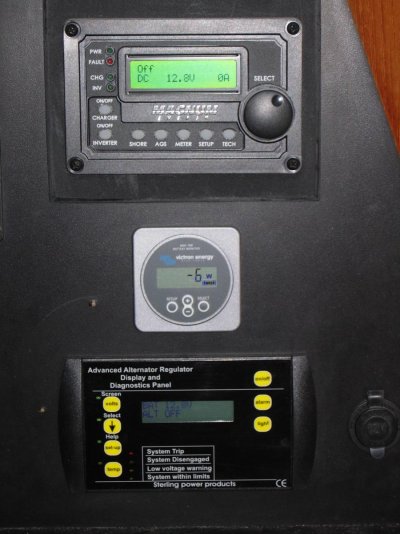
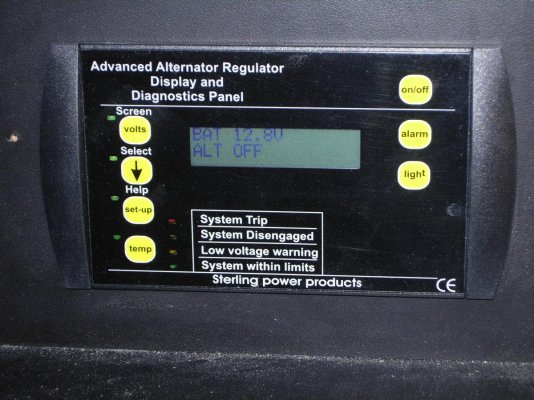
Already had the Magnum Energy inverter / battery charger. Below that is a Victron Battery Monitor. Bottom is the remote display for the Sterling Advanced Alternator Regulator.
DSCN1339.jpg

DSCN1338.jpg

Here is my new custom Aqualarm bilge pump panel. There are 2 compartments in the bilge. Each has a primary and secondary pump. All pumps have a selector switch, system on light (green), pump running light (red), and resetable cycle counter.

DSCN1337.jpg

To the 2 existing Garmin plotters I added two GMI 20 displays on both sides of the autopilot. The GMI 20 can display many things that I might want to focus on such as as depth when going into shallow areas, Wind speed and direction, or anchor drag alarm. Below the GMI 20 on the left is the thermostat and blower control for the pilothouse heat from the engine's cooling system.

DSCN1343.jpg

In addition to the 2 Garrmin Plotter screens, I have added an HP "all in one" computer. What appears to be the monitor is actually a full function desk top computer with USB ports and Disc drive built into the back. The keyboard and multi touch mouse pad are wireless from Logitech. Add to that a USB GPS receiver, Polar Navy software with Active Captain, and a wifi hotspot. I now have a very nice backup and route planning system. Not bad for less than $500 for everything but the hotspot. :) Can also stay current on TF while underway. Below and to the left is the new control panel for the Webasto pilothouse air conditioner and heat pump.

DSCN1345.jpg

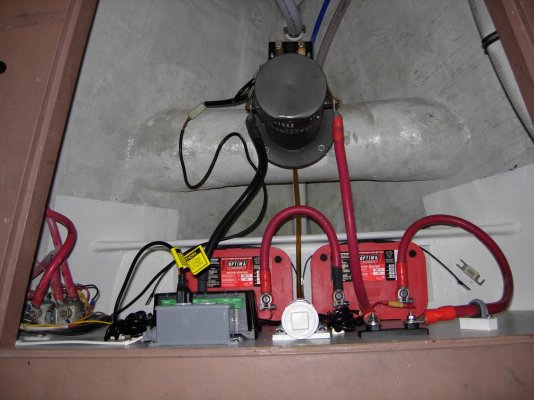
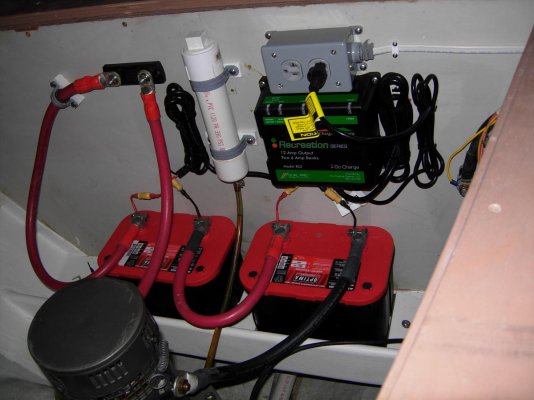
Was having problems with my bow thruster short duty cycling due to low voltage. The system was 12 volt and the batteries were back in the engine room separated by 40'+ of cable and numerous connections, fuses and switches. Sent the unit off to be rebuilt and converted to 24 volt. Had Sean build a battery shelf in the bow thruster compartment under the bed in the master stateroom. Unit is now wired to 2 Optima AGM batteries in series. The batteries are charged by a Duo Pro 6 amp dual output battery charger. The inverter stays on all the time unless either the generator is running or tied to shore power. So the batteries will recharge as soon as the thruster is used. The cables are 4/0 left over from cabling to the old batteries. I know it's ridiculous over kill for such short runs, but the price was right and there aren't going to be any low voltage issues! Managed to break one of the dies in the crimper when trying to attach the cast ends of the battery connectors to the 4/0 cable. :eek: It's amazing how nice a job a hydraulic hose fitting swaging press will do on cast battery terminal fittings. Not many places will let you use the hydraulic press right after you break their battery cable crimping tool. :blush: Really good people here! Have the control wiring to secure, but the project is basically done and functional.
DSCN1347.jpg

The black block in the upper left corner is the fuse holder. The PVC pipe in the middle is the new oil reservoir. Old one was cracked.

DSCN1352.jpg

DSCN1350.jpg

Ted
 
Ted that is beautiful. Great set up on the bow thruster- such a neat set up. Keep up the great work


Forky
1983 Present 42 Sundeck
Twin Lehman 135's
✌️
 
Ted that is beautiful. Great set up on the bow thruster- such a neat set up. Keep up the great work


Forky
1983 Present 42 Sundeck
Twin Lehman 135's
✌️

Thanks Steve. Lots of satisfaction when projects like the bow thruster complete and look good also.

Ted
 
I bet so. And to take an existing system and improve it THAT much is great to see. Course you have taken a complete vessel and improved it THAT much. I'm sure you are eager to have her completed and use it. You seem to do a great job of keeping on task. Not easy to do with I bet with a job with a scope that large. :) Standing by for the next installment.


Forky
1983 Present 42 Sundeck
Twin Lehman 135's
✌️
 
Ted...
Amazing job - your execution is great but I think the planning beats the great execution.

Don
'08 MS 34HT
"Bacchus"

Thanks Don. There's a fine line between planning and over engineering. I know, I've crossed it many times. Just ask Sean. :nonono:

Ted
 
Beautiful work .Good idea on the HP all in one.

Yes, very happy with the "all in one" plan. Really prefer the full computer programs to the chopped app versions for tablets and smart phones of most programs. Still need to make a shoe for the bottom of the computer to set in and then a tension strap to hold it in place.

Ted
 
I'm embarassed to even talk about my piddly little projects anymore. Undertaking such a reconstruction project as yours is one thing, but you're actually seeing it through! Amazing work!
 
I'm embarassed to even talk about my piddly little projects anymore. Undertaking such a reconstruction project as yours is one thing, but you're actually seeing it through! Amazing work!

No kidding, Larry! I was planning to reattach my new Hopcar cleats with duct tape, but now I'm thinking I should use REAL machine screws. OCD really raises the bar a bit.

Damn you, OCD!!

Thanks guys! Neither one of you are slouches when it comes to projects. I can't wait for this to be done. I'm going to be like a kid on Christmas Day when she is back in the water. Won't know what to play with first. :D

Ted
 
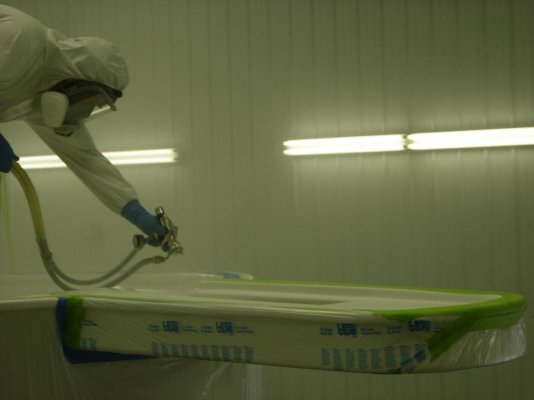
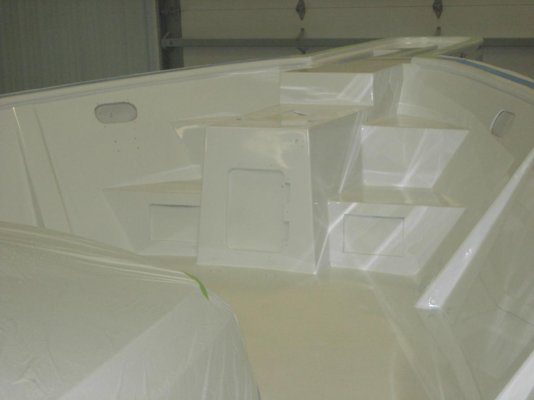
Doors locked; ventilators are running; boat is masked off except for inside the bow and anchor pulpit. Looks like painting today. :)


DSCN1354.jpg


DSCN1355.jpg


DSCN1353.jpg


DSCN1356.jpg


Will have the painting pictures up in a minute.


Ted
 
[FONT=&quot]It's Go Time!

[/FONT]
[FONT=&quot]DSCN1360.jpg

DSCN1361.jpg

DSCN1362.jpg

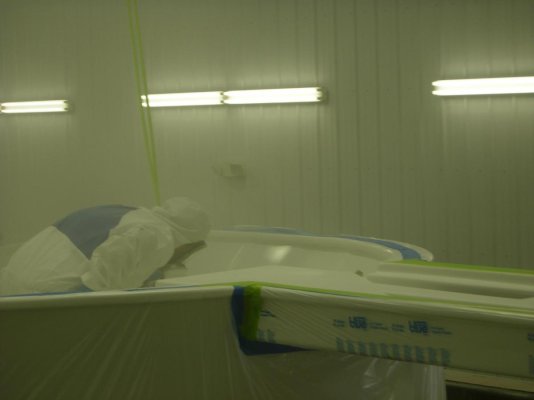
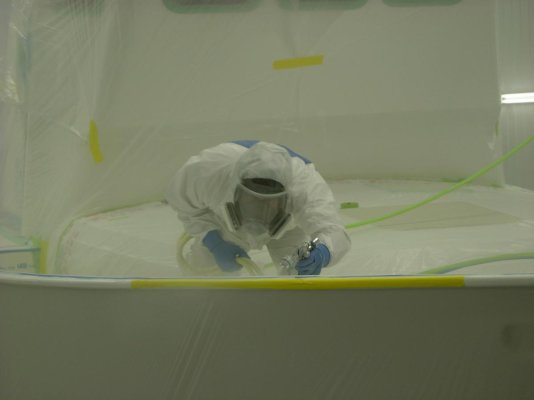
Inside the bow before the cloud forms.

DSCN1364.jpg

Getting cloudy up there.

DSCN1371.jpg

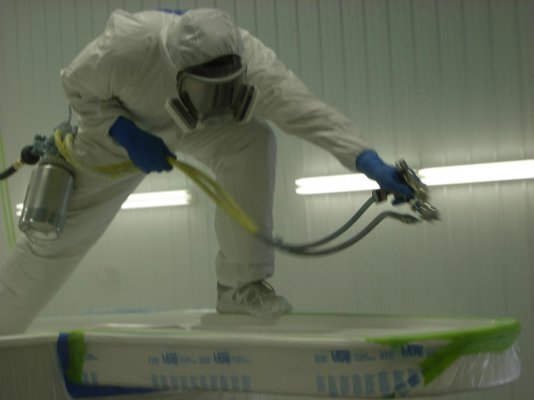
Anchor pulpit time.

DSCN1373.jpg

It's a dance you choreograph before you mix the paint. Left foot on the masked off cap rail and fight foot where the anchor windlass mounts.

DSCN1374.jpg

10 oz. or $7 per minute coming out the gun.

DSCN1375.jpg

Heading down the Starboard side.

DSCN1377.jpg

DSCN1382.jpg

First top coat done; second coat starts in 45 minutes.

Results in the next post.

Ted[/FONT]
 
After the fog has cleared from the second coat.

Results speak for themselves!

DSCN1384.jpg

DSCN1386.jpg

Looking a little ruff.

DSCN0904.jpg

That's what I'm talking about!

DSCN1389.jpg

This was the second section. Pilothouse roof and the veranda were first. Five more sections to go. Sean will be painting about every third day now.

Ted
 
Stunning. Hopefully most mechanicals are done and from here forward you are installing. Not removing to repair. This has got to be one of the most thorough and professionally done marine rebuilds ever taken on!!


Forky
1983 Present 42 Sundeck
Twin Lehman 135's
✌️
 
This has got to be one of the most thorough and professionally done marine rebuilds ever taken on!!

Yeah, and I was aboard it before he started all this. I'd have been proud to have it then!
 
Back
Top Bottom