Here is a great hint for working on Caterpillar heat exchangers and after coolers

The friendliest place on the web for anyone who enjoys boating.
If you have answers, please help by responding to the unanswered posts.

RickyD

Guru
Joined
May 4, 2018
Messages
793
Location
United States
Vessel Name
Aquarius
Vessel Make
Californian 55 CPMY
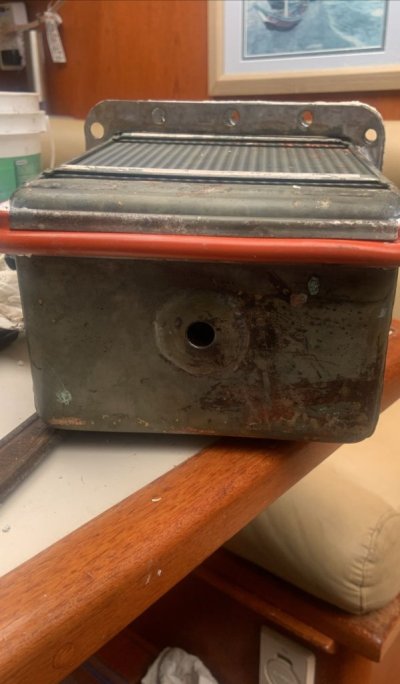
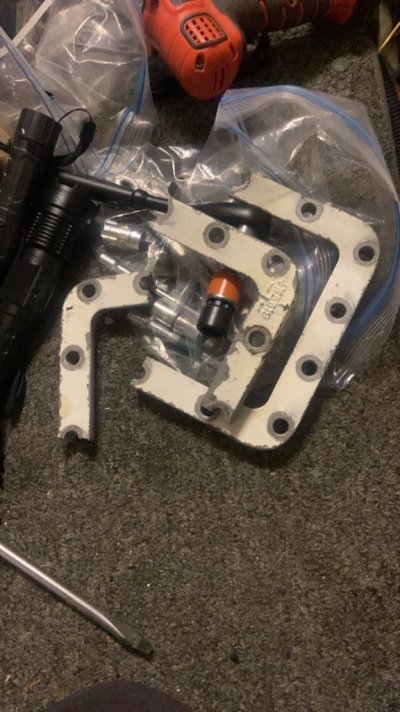
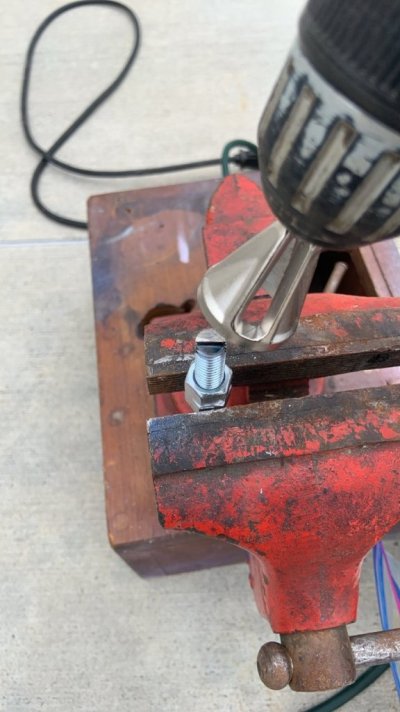
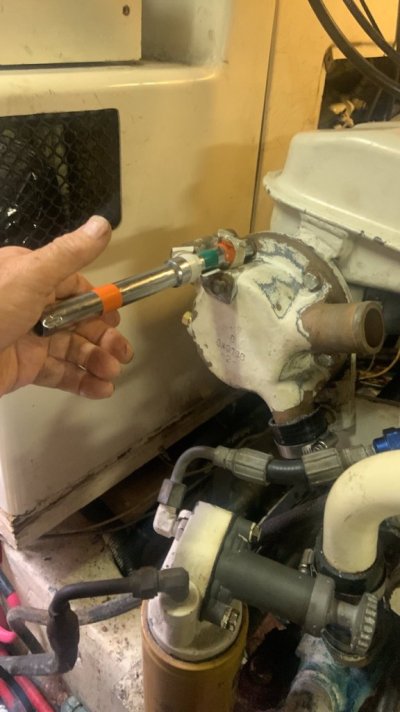
Trying to line up gaskets and heat exchanger end caps while working alone can lead to wasted time and fumbling. On top of that my buddy was re-installing his cleaned aftercooler core in his 375hp Cat 3208 and he tried to push it in by tightening the bolts around the frame that holds it in. If you have it, you will know what I mean. This, as it turns out, is a thin piece of pot metal with holes for the bolts that go through the gaskets and the aftercooler flange and into the aftercooler box. It is secured up and down by a roundish rubber gasket and then, when all the way in, there is a protrusion in the back that fits into a depression so that bouncing won't put undue stress on the roundish rubber gasket. I'll try to post some pictures at the end. In trying to force the AC in, he broke the frame we suppose because it was sagging in the back and the protrusion and depression were not aligned. This stupid part cost over $700. So he bought extra bolts for the aftercooler which are the same as the bolts for the heat exchanger end caps, cut off the bolt heads and ground a slot into them so he could use a screwdriver. Then he installed a couple of them, slipped the gaskets and aftercooler over them which them held it all in place while he more carefully installed the frame with some bolts, securing it all and then removed the modified "screws" and finished. That made things much easier. He then used the same technique on the coolant bundle end caps to great success. I thought I would pass that along in case it helps any of you.
Point of reference: my engines are the 425 hp 3208 version and my aftercooler is totally different but the heat exchangers are mostly the same as are the bolts.
 

Attachments

  • core.jpg
    core.jpg
    84.9 KB · Views: 86
  • frame no good.jpg
    frame no good.jpg
    129.7 KB · Views: 77
  • Aftercooler 375.jpg
    Aftercooler 375.jpg
    95 KB · Views: 77
  • Screw modification.jpg
    Screw modification.jpg
    96.6 KB · Views: 78
  • end cap.jpg
    end cap.jpg
    90.4 KB · Views: 96
Thanks for the post. I will reference when I do my heat exchangers. In the fourth photo-Is that a tapering tool for the screw modification?
 
If that ever happens again to one of those frame I expect you could have a stainless one waterjet cut for 1/2 the price that would never break again.
 
Probably not if it's behind the gasket, but a SS would be a much better part. And I just can't bring myself to pay these crazy prices for something so simple and in some ways inferior.
 
Just don't break it and you won't need a new one Thursday I'm going to do my brothers boat. I have the modified screws which help keep the gaskets in line and keep the Aftercooler at the correct angle for re-insertion. It will be the first time I used the screws. I'll report the results because, as noted, my friend made them and did the job on his own. To answer the other question, I don't know what tool is shown in the photo.
 
The tool is a de-burring tool for finishing the end of the screw after you cut the end off.
 
Ok, we used the helpful mounting "studs" for both the aftercoolers and the coolant bundles. They definitely helped. My brothers Offshore 48 does not have the engine room space that I have. Also he recently cracked a rib so climbing around corners and under floors was going to be problematic for us old timers so he had a mechanic come for help. I worked in tandem with the mechanic and the installation job got done in one day for the two aftercoolers, the two coolant bundles, and two water pump impellers. It would have been faster but the port coolant bundle on this boat can not be removed without removing the entire coolant tank assembly. Now you don't have to take it off but you have to twist it so the bundle can miss the port fuel tank. Then when the mechanic put it all back together again we realized that he had not put on the port side inner gasket, so, it all had to be disconnected again and reinstalled. The Cat mechanic said he was going to make some "studs" for his own use as they were definitely helpful. They made the job easier but it still takes some jiggling and juggling to get the heavy aftercoolers in place while being crammed under the floor and around the port engine. Stb side, easy. The coolant bundles go very easily with the "studs" holding the gaskets in alignment while replacing the bolts.
 

Latest posts

Back
Top Bottom