fractalphreak
Senior Member
- Joined
- Jun 23, 2018
- Messages
- 318
- Location
- United States
- Vessel Name
- Northwest Dream
- Vessel Make
- Davis Vashon 42 Trawler (Defever design)
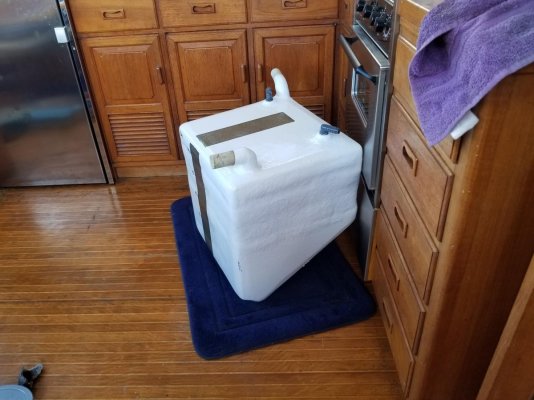
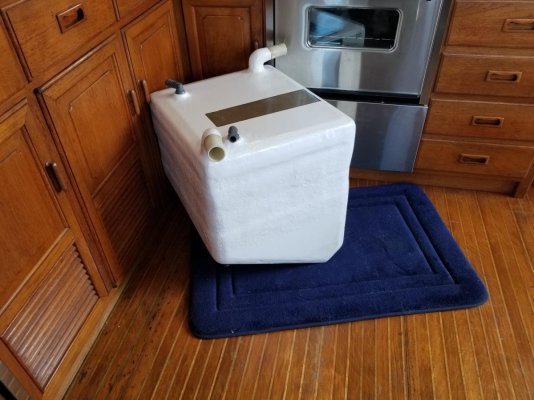
Here's a project we completed after finding we have some work to do on our primary holding tank.
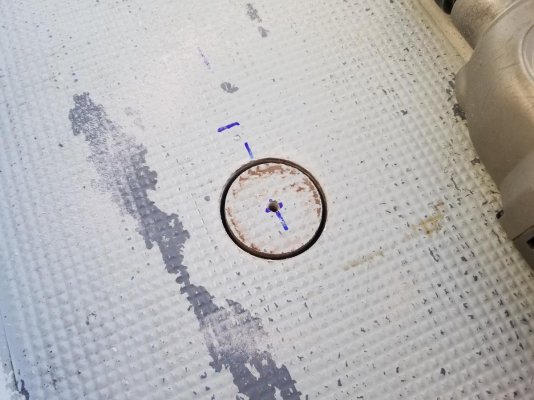
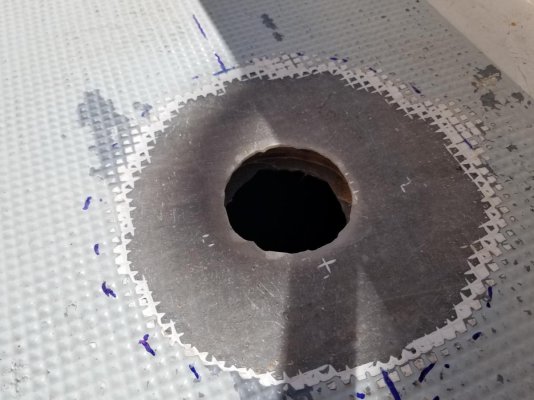
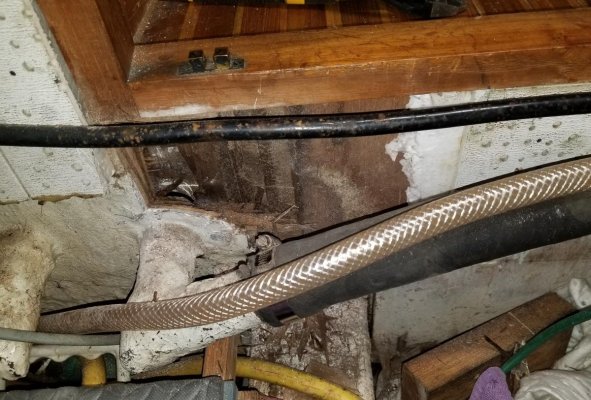
Our boat has an integral fiberglass holding tank under the aft head. It appears the forward end of it is built integral to the aft engine room bulkhead, creating a glass/plywood/glass sandwich that the fittings come through. During our refit work over the fall and winter, we discovered that at least one major fitting has come loose from the INSIDE tank wall, and allowed uck to rot some of the plywood. If you look really close, the large black hose is going into a boatyard made 90 fitting into the tank wall. Where I've dug the plywood out you can see black where the fitting is separated from the inner wall. And yes, the black hose is water hose, installed to carry waste all the way from the forward head. Don't worry, it and the clear vinyl vent hose are gone!
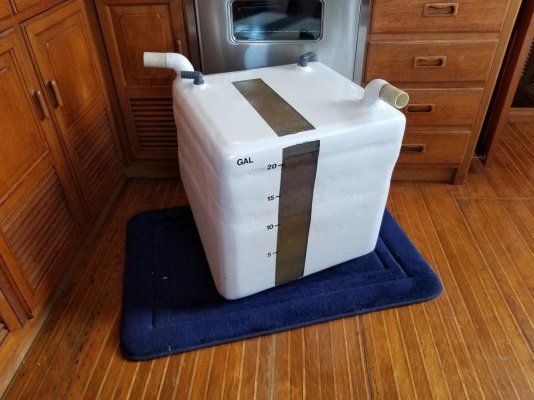
I'm going to have to grind/dig/grind, and repair the area to put the tank back into service. To do that we're going to have to pull the main engine start battery and box - since I'm going to relocate that battery box anyway, its a one thing at a time project that is slated for late May or early June. To get us some temporary use, and for some long term added capacity, I decided to build a dedicated holding tank for the forward head.
I don't have photos of every bit, but do have some. I had created space in the forward port corner of the engine room when we replaced the water heater. The old one had been on the engine room floor, I put the new one up on the fuel tank bulkhead next to the genset. By removing the floor panel I ended up with a space about 22 inches long, 18.5 inches wide, and could go about 12 or 13 inches above the floor level to make sure the toilet would drain right. Between the stringers the hull slopes out to port and up forward. I couldn't find a manufactured poly tank I was happy with, I wanted to maximize my use of the space, so I decided to build my own.
I started with a cardboard box modified to fit my length and width. Then I marked each corner with the total height from where the top needed to be to where it would touch the hull. After cutting that out, I had a cardboard box with no bottom but with 4 sides that fit perfectly.
I turned that into a wood mold.
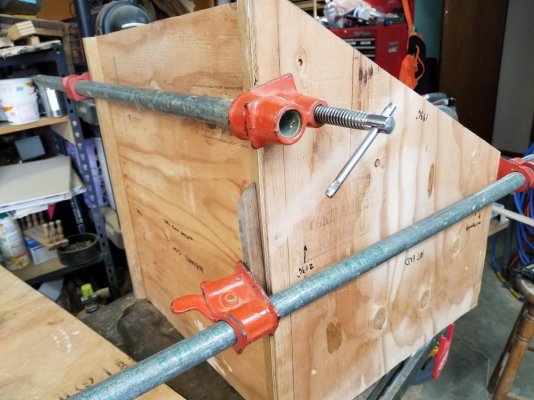
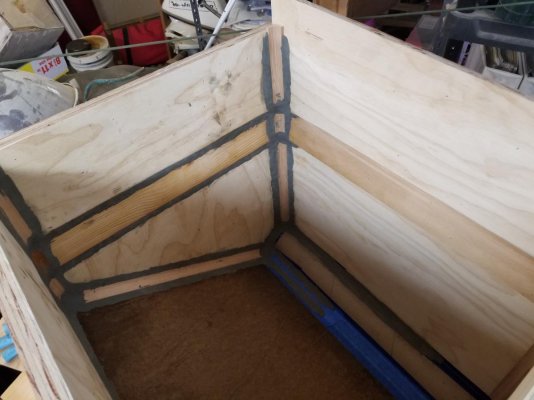
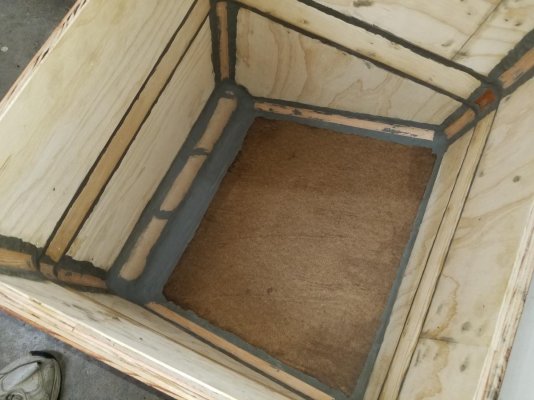
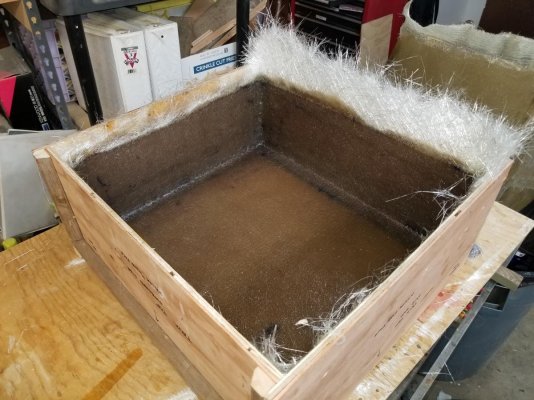
I wanted to keep all the fittings on the top, so I planned on an internal pipe for the pump out suction. To be able to install that I made the tank in two pieces, a main body with a reduced diameter and a lid that would fit over it. I made both halves with a slight indentation so I could glass them together and the final product would be roughly flat on the outside. Here are the two mold halves. The top only has the indentation for the thickness of the glass seam, 6 inches wide. The bottom has that plus a section that is the wall thickness of the lid, so the lid will fit over the top 4 inches of the bottom. I lined the corners with some cove molding to give some gentle radii to make the glassing easier, and followed that up with molding clay to smooth it out. I then put a layer of resin down on the plywood to seal it, then waxed and applied PVA mold release.
(IN RETROSPECT - I should have just used bondo. It would have been way quicker. The clay took a long time, and ended up coming out with the part and was a pain to get off. I should have used bondo to finish the corners, put some resin on that, then waxed and PVA)
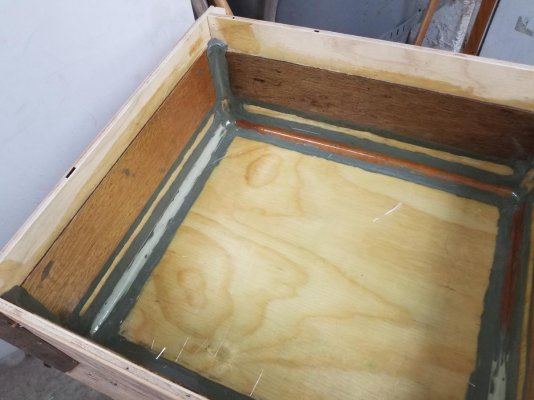
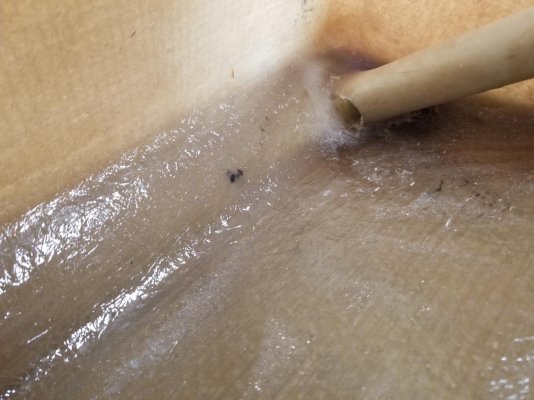
Here is the layup part way complete in the bottom and top. For this project I used vinyl ester resin, its very resistant to water absorption/penetration. For glass I used 1.5 oz chopped strand mat, 1708 biaxial cloth, and some heavy woven roving I had around. The bottom half got CSM/1708/1708/CSM on the sides, and the tank bottom got an additional layer of CSM and woven roving in between the two 1708 layers. The top half of the mold got the same layup schedule, with the woven roving on the surface that is the tank top. I didn't do the woven roving on the sides as the overlapping and joining will add a lot of thickness and strength. The finished product came out way heavy and over built, which is fine for its intended use.
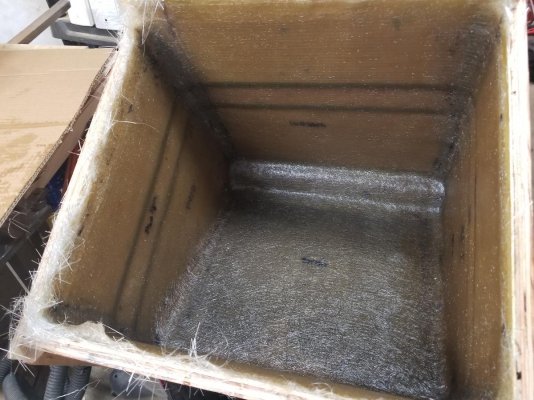
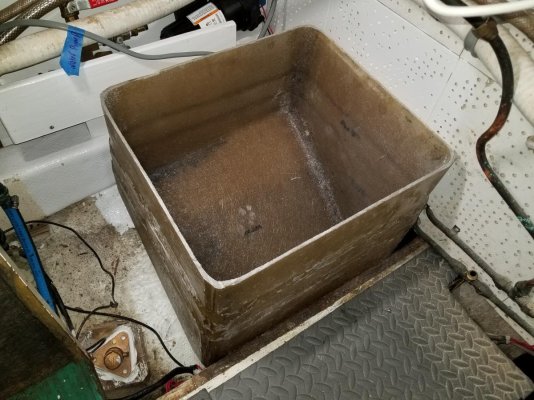
After trimming the bottom half of the part, I took it out to the boat and double checked the height measurements. I wanted to make sure I could maximize the height but still have good drain from the toilet. The part fit the hull angles perfectly. In this photo we still had a lot of prep work to do to get the space ready for installation. As part of the process we figured out why the older cheap fishfinder on the flybridge wasn't working. It wasn't hooked to anything. The sounder we THOUGHT it was hooked to wasn't hooked to anything, either. Both had different cables, and both were cut and abandoned in different areas. GONE NOW!
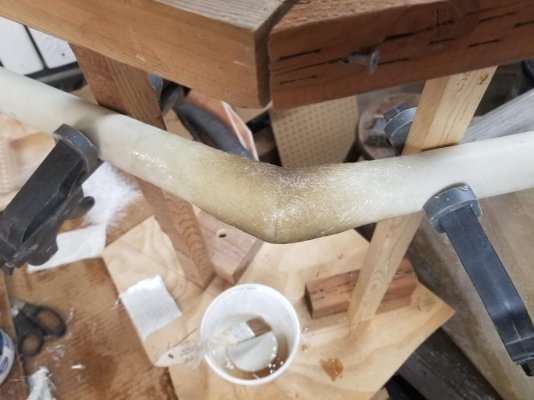
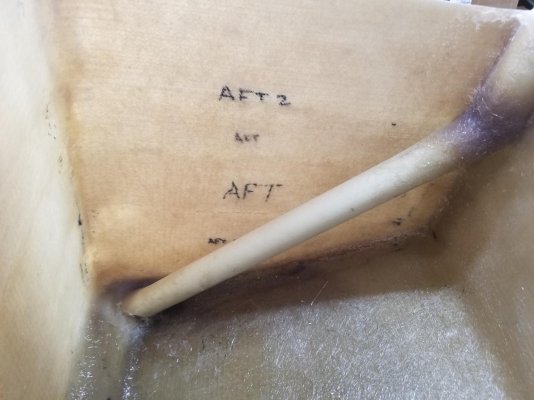
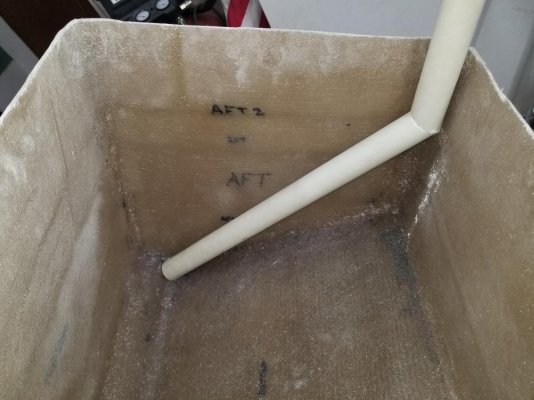
Because we're putting this sitting almost (except for some rubber strips) on the hull, I added a hard 3 inch diameter half round sitting against the stringer so water could move fore/aft. I found that the same company that makes all our fiberglass exhaust parts also sells vinyl ester pipe, I bought a 5 ft piece in white in 1 1/2" OD. They were very helpful, I think it was $38 for the piece. Note to self - ask them to cut it into manageble but usable pieces. 5 ft makes for pricey shipping, I think that was $40!. I next fabricated the internal tank piping. It is complicated because I wanted the fitting on top of the tank to be on the opposite side of the deepest point in the tank. So that's what I fabbed up.
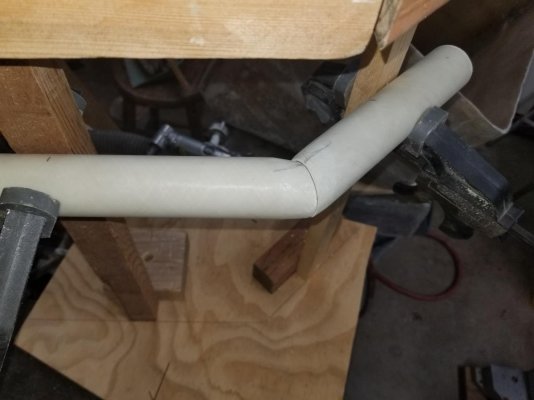
I made a stand to clamp the pipe pieces to so I could glass them together.
More in the next post!
Our boat has an integral fiberglass holding tank under the aft head. It appears the forward end of it is built integral to the aft engine room bulkhead, creating a glass/plywood/glass sandwich that the fittings come through. During our refit work over the fall and winter, we discovered that at least one major fitting has come loose from the INSIDE tank wall, and allowed uck to rot some of the plywood. If you look really close, the large black hose is going into a boatyard made 90 fitting into the tank wall. Where I've dug the plywood out you can see black where the fitting is separated from the inner wall. And yes, the black hose is water hose, installed to carry waste all the way from the forward head. Don't worry, it and the clear vinyl vent hose are gone!

I'm going to have to grind/dig/grind, and repair the area to put the tank back into service. To do that we're going to have to pull the main engine start battery and box - since I'm going to relocate that battery box anyway, its a one thing at a time project that is slated for late May or early June. To get us some temporary use, and for some long term added capacity, I decided to build a dedicated holding tank for the forward head.
I don't have photos of every bit, but do have some. I had created space in the forward port corner of the engine room when we replaced the water heater. The old one had been on the engine room floor, I put the new one up on the fuel tank bulkhead next to the genset. By removing the floor panel I ended up with a space about 22 inches long, 18.5 inches wide, and could go about 12 or 13 inches above the floor level to make sure the toilet would drain right. Between the stringers the hull slopes out to port and up forward. I couldn't find a manufactured poly tank I was happy with, I wanted to maximize my use of the space, so I decided to build my own.
I started with a cardboard box modified to fit my length and width. Then I marked each corner with the total height from where the top needed to be to where it would touch the hull. After cutting that out, I had a cardboard box with no bottom but with 4 sides that fit perfectly.
I turned that into a wood mold.

I wanted to keep all the fittings on the top, so I planned on an internal pipe for the pump out suction. To be able to install that I made the tank in two pieces, a main body with a reduced diameter and a lid that would fit over it. I made both halves with a slight indentation so I could glass them together and the final product would be roughly flat on the outside. Here are the two mold halves. The top only has the indentation for the thickness of the glass seam, 6 inches wide. The bottom has that plus a section that is the wall thickness of the lid, so the lid will fit over the top 4 inches of the bottom. I lined the corners with some cove molding to give some gentle radii to make the glassing easier, and followed that up with molding clay to smooth it out. I then put a layer of resin down on the plywood to seal it, then waxed and applied PVA mold release.
(IN RETROSPECT - I should have just used bondo. It would have been way quicker. The clay took a long time, and ended up coming out with the part and was a pain to get off. I should have used bondo to finish the corners, put some resin on that, then waxed and PVA)


Here is the layup part way complete in the bottom and top. For this project I used vinyl ester resin, its very resistant to water absorption/penetration. For glass I used 1.5 oz chopped strand mat, 1708 biaxial cloth, and some heavy woven roving I had around. The bottom half got CSM/1708/1708/CSM on the sides, and the tank bottom got an additional layer of CSM and woven roving in between the two 1708 layers. The top half of the mold got the same layup schedule, with the woven roving on the surface that is the tank top. I didn't do the woven roving on the sides as the overlapping and joining will add a lot of thickness and strength. The finished product came out way heavy and over built, which is fine for its intended use.


After trimming the bottom half of the part, I took it out to the boat and double checked the height measurements. I wanted to make sure I could maximize the height but still have good drain from the toilet. The part fit the hull angles perfectly. In this photo we still had a lot of prep work to do to get the space ready for installation. As part of the process we figured out why the older cheap fishfinder on the flybridge wasn't working. It wasn't hooked to anything. The sounder we THOUGHT it was hooked to wasn't hooked to anything, either. Both had different cables, and both were cut and abandoned in different areas. GONE NOW!

Because we're putting this sitting almost (except for some rubber strips) on the hull, I added a hard 3 inch diameter half round sitting against the stringer so water could move fore/aft. I found that the same company that makes all our fiberglass exhaust parts also sells vinyl ester pipe, I bought a 5 ft piece in white in 1 1/2" OD. They were very helpful, I think it was $38 for the piece. Note to self - ask them to cut it into manageble but usable pieces. 5 ft makes for pricey shipping, I think that was $40!. I next fabricated the internal tank piping. It is complicated because I wanted the fitting on top of the tank to be on the opposite side of the deepest point in the tank. So that's what I fabbed up.

I made a stand to clamp the pipe pieces to so I could glass them together.

More in the next post!

