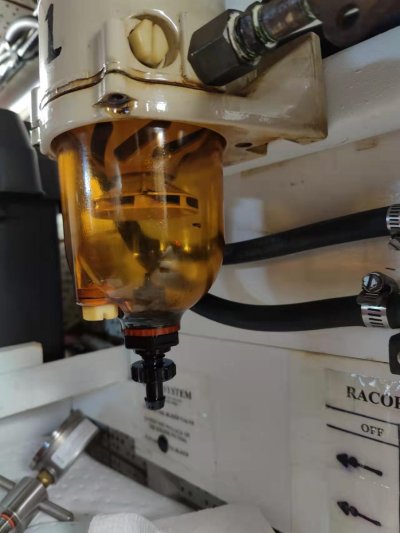
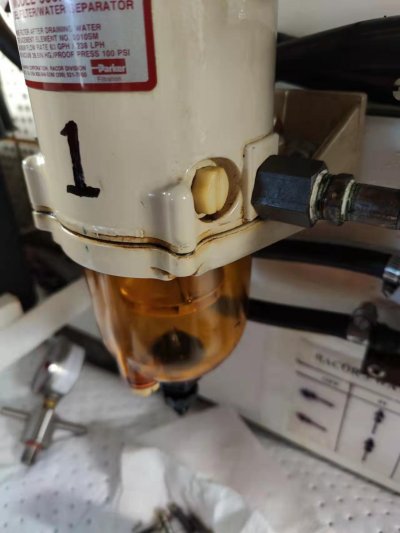
racor drain fitting leaking

The friendliest place on the web for anyone who enjoys boating.
If you have answers, please help by responding to the unanswered posts.
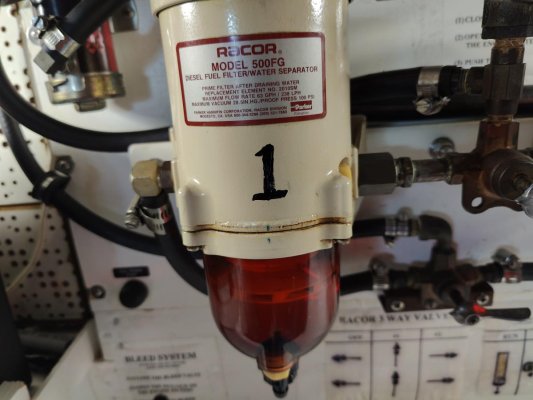
I heard the drain port on the clear bowl RK15279-01 is 7/8" , but the brass valves is 1/4" mnpt, how are the compatible?


I removed the black plastic valves on our 2-500 series Racors. They were a pia to open and close plus, like yours, they dripped. I was going to rebuild them but the kit was ~$25 and to replace them was less than $60 with a brass valve and plug. Filter maintenance was easy after that and they never leaked.
 
Confirm what bowl you have. You aren’t traveling this winter, it’s a good time to drain the filter housing and confirm the size of the drain. You had said previously that the bowl had some hairline cracks. Rebuild the filter housing at the same time. I would not and suggest you don’t use after market parts. The risks out way the cost savings imho on a system with critical parts that if it (they) fail you are dead in the water.
 
Last edited:
The racorstore told me the bowl for 500FG made prior to 2002 is RK 15279-01, mostly likely this is what I need. The bowl for 500FG made after 2002 is RK 15405. The two bowls are very similar in the look, "the only difference is the newer bowl has a 5/8" drain port while the older bowl has a 7/8" drain port".

The brass valve part number is RK 19492 that has 1/4" MNPT, so I wonder how it fits the drain port.


Confirm what bowl you have. You aren’t traveling this winter, it’s a good time to drain the filter housing and confirm the size of the drain. You had said previously that the bowl had some hairline cracks. Rebuild the filter housing at the same time. I would not and suggest you don’t use after market parts. The risks out way the cost savings imho on a system with critical parts that if it (they) fail you are dead in the water.
 
With all you are going through, plus the cost of a new clear bowl, a shield, and the associated fittings, just replacing the whole filter assembly with a 500MA would certainly be easier, and probably not much more expensive. Then just screw in the drain valve, and you are done.
 
The racorstore told me the bowl for 500FG made prior to 2002 is .... The two bowls are very similar in the look, "the only difference is the newer bowl has a 5/8" drain port while the older bowl has a 7/8" drain port".

The brass valve part number is RK 19492 that has 1/4" MNPT, so I wonder how it fits the drain port.


Ask Racor what parts are compatible with what. Or replace your current model with a new one.

Propulsion, and what feeds it, is a critical system, no shortcuts or work-arounds recommended.

-Chris
 
I sent racortech an email will see how they respond next week


Ask Racor what parts are compatible with what. Or replace your current model with a new one.

Propulsion, and what feeds it, is a critical system, no shortcuts or work-arounds recommended.

-Chris
 
The inlet port is connected to a rigid pipe. It's not as straightforward to take off as the outlet side

IMG_20240120_123728.jpg

IMG20240118171342.jpg
With all you are going through, plus the cost of a new clear bowl, a shield, and the associated fittings, just replacing the whole filter assembly with a 500MA would certainly be easier, and probably not much more expensive. Then just screw in the drain valve, and you are done.
 

Attachments

  • IMG_8596.jpg
    IMG_8596.jpg
    23.9 KB · Views: 18
Thanks. Earlier, I saw the heat shield has a 1/4" port. Now I see how the shield is attached to the bottom of the clear bowl. I guess the 7/8" drain port is UNF thread, the same as other holes' thread on the racor. I will confirm with them next week.


The heat shield “add on” comes with an adapter that the ball valve screws into. In the link below, you remove the plug, install the valve and reuse the plug in the new valve.

https://www.parker.com/parkerimages/Racor/11-1911 Rev - (Bowl Adapter Refit Kit).pdf
 
Disconnect bypass

Screenshot_2024-01-21-10-03-47-06_92460851df6f172a4592fca41cc2d2e6.jpgJust curious.
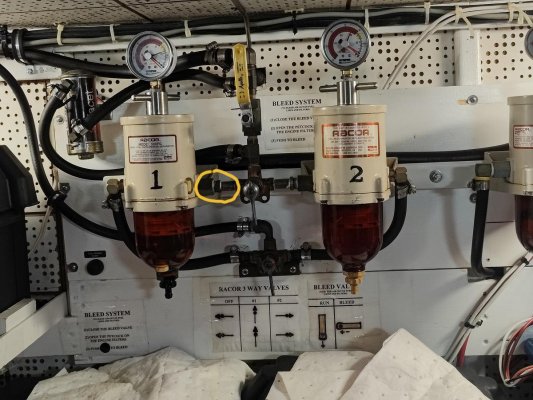
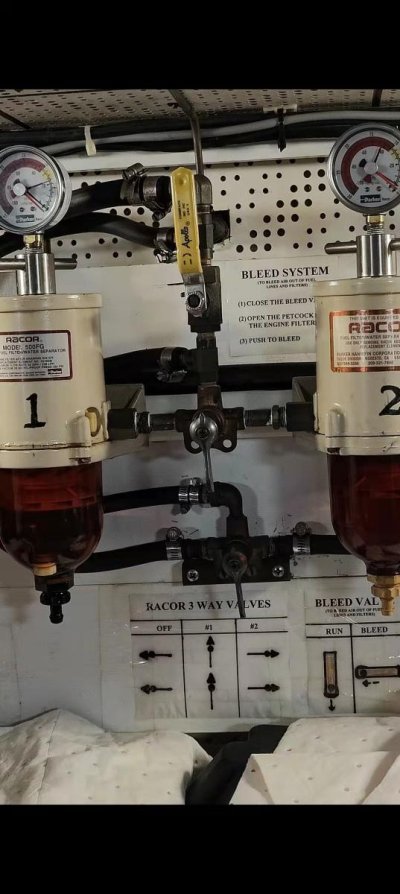
If I really need to take off racor #1, looks like multiple fittings need to disassemble first.
Where to start loosening?
 
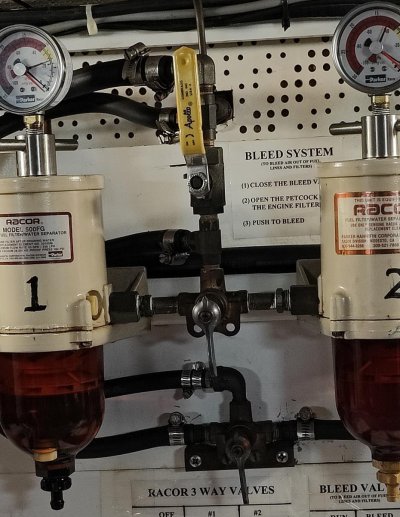
I don't see any couplings so you may need to take both racors off as unit by first removing the fuel hoses connected to the racors.
 
If I'm upgrading both racors, then i could justify this work. But currently only one racor needs to be worked on, so I'm just going to do what's necessary now.

I don't see any couplings so you may need to take both racors off as unit by first removing the fuel hoses connected to the racors.
 
Interesting setup. Most of these filter housings are directional flow.
Either #1 or #2 filter should look clean on outside as the fuel is fed to the inside the filter.

As for removal,
close yellow fuel supply handle,
drain both,
follow #1 left side hose to 3 way loosen hose clamp and disconnect the hose.
follow #2 right side hose to 3 way, loosen hose clamp and disconnect the hose.
cannot see how the bracket releases the filter, loosen it
Now #1 right side connection can be turned until it is off the racor
Repeat #2 left side connection.
 
I didn't see IN or OUT in letter near the either port, so the direction may not be regulated in this model

Thanks for listing the steps. I see both racors have to come off as one unit before one of them could be completely taken off. To me, this amount of work is worth it for upgrading both racors at the same time.

Interesting setup. Most of these filter housings are directional flow.
Either #1 or #2 filter should look clean on outside as the fuel is fed to the inside the filter.

As for removal,
close yellow fuel supply handle,
drain both,
follow #1 left side hose to 3 way loosen hose clamp and disconnect the hose.
follow #2 right side hose to 3 way, loosen hose clamp and disconnect the hose.
cannot see how the bracket releases the filter, loosen it
Now #1 right side connection can be turned until it is off the racor
Repeat #2 left side connection.
 
All the Racors I have had did have an in and out direction.
 
The heat shield “add on” comes with an adapter that the ball valve screws into. In the link below, you remove the plug, install the valve and reuse the plug in the new valve.

https://www.parker.com/parkerimages/Racor/11-1911 Rev - (Bowl Adapter Refit Kit).pdf

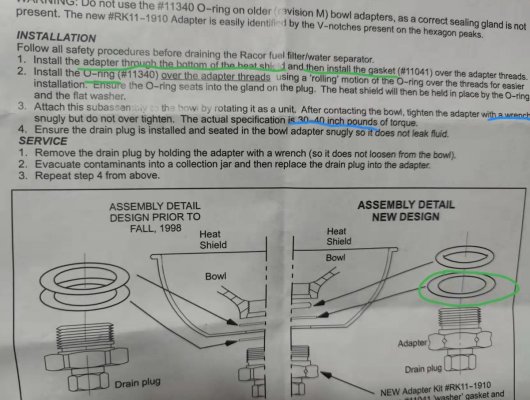
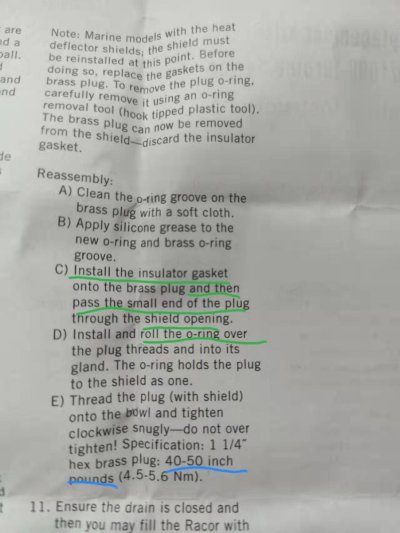
I order both the clear bowl RK 15279-01 and the adapter RK11-1910, they are not consistent in the instructions about the brass adapter in the position of rubber gasket, also inconsistent about the tightening torque of the adapter hex plug


RK11-1910 manual:
Screenshot 2024-01-29 172405.jpg
RK 15279-01 manual:

Image_20240129171911.jpg

the adapter plug was introduced 26 years ago, so there should be a confirmed correct way of its installation. esp. which torque setting is correct?
 
Last edited:
I see your dilemma, The old style had two thin gaskets. One on either side of the heat shield. The new style has one gasket and one o ring. Since I don’t have the parts in front of me to examine, its hard to make a recommendation. But, if the o ring seems to fit snug against the bowl and the metal shield, it doesn’t seem like it would need an additional sealing gasket and the gasket should go on the other side of the shield. Then the o ring seals the top side of the shield to the bowl, and the gasket seals the bottom of the shield to the brass plug.
As far as the torque spec goes, I bet they increased the torque value with the new design, or they had trouble with leaks. Those threads are easily damaged, and if there was a burr in the threads, the lower torque value may not have been enough to overcome that and properly seat. I’d target the high side of 40 inch pounds, maybe around 45.
 
Thanks, will see. guess these really doesn't matter and the difference is essentially non exist.

I see your dilemma, The old style had two thin gaskets. One on either side of the heat shield. The new style has one gasket and one o ring. Since I don’t have the parts in front of me to examine, its hard to make a recommendation. But, if the o ring seems to fit snug against the bowl and the metal shield, it doesn’t seem like it would need an additional sealing gasket and the gasket should go on the other side of the shield. Then the o ring seals the top side of the shield to the bowl, and the gasket seals the bottom of the shield to the brass plug.
As far as the torque spec goes, I bet they increased the torque value with the new design, or they had trouble with leaks. Those threads are easily damaged, and if there was a burr in the threads, the lower torque value may not have been enough to overcome that and properly seat. I’d target the high side of 40 inch pounds, maybe around 45.
 
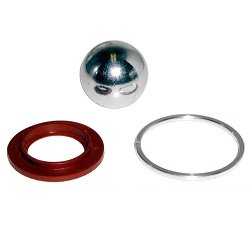
I want to take the opportunity to clean or replace the check ball and seal -
Racor RK 15010B


What is the silver ring in this kit?


RK-15010B.jpg

Has anyone purchased from this discountracor store? Their price is good.
 
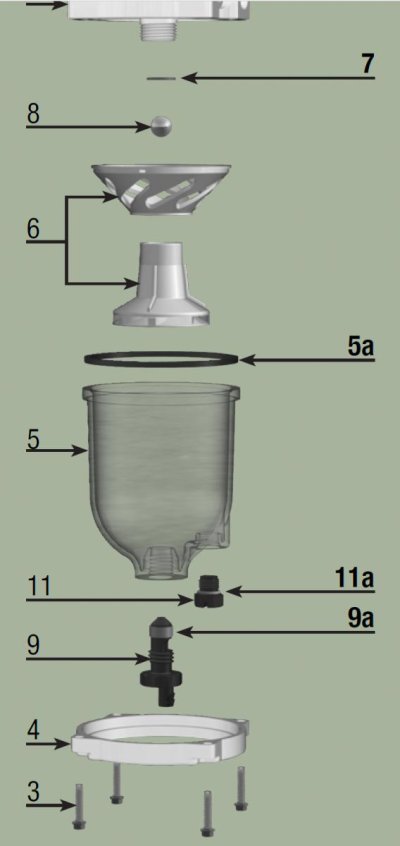
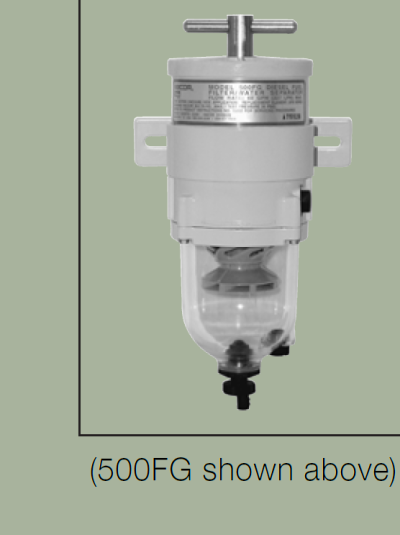
last night, I was going to disassemble the racor filter. according to the manual, after removing the four bowl fasteners - step 3, I went to remove the the bowl ring - step 4 and the clear bowl - step 5. Then I realized my racor is different from the model refered to in the manual

the bowl ring on my racor is integrated to the mounting frame so there is not a removable bowl ring. The clear bowl does not rotate either. How to remove the clear bowl?

Screenshot 2024-02-05 085941.jpg

Screenshot 2024-02-05 085855.png

Image_20240205084343.jpg

Image_20240205084308.jpg
 
When I dissembled mine, it took a few taps to get it separated.

what complexify things is this bypass design

should i remove both racors from the panel, then try to separate racor #1?

Image_20240205104809.jpg
 
I can't really tell by the picture. I'm more of a hands-on guy.
I think you'd need to remove both units at the same time by removing the hose(s) at the top of the valve. With no union fittings that I can see to disassemble, and you will need to unscrew the T handle with the pressure gauges at the top of your units to gain enough clearance to remove the Racors upward. Someone else may see something I don't.
 
post 74
Interesting setup. Most of these filter housings are directional flow.
Either #1 or #2 filter should look clean on outside as the fuel is fed to the inside the filter.

As for removal,
close yellow fuel supply handle,
drain both,
follow #1 left side hose to 3 way loosen hose clamp and disconnect the hose.
follow #2 right side hose to 3 way, loosen hose clamp and disconnect the hose.
cannot see how the bracket releases the filter, loosen it
Now #1 right side connection can be turned until it is off the racor
Repeat #2 left side connection.
 
Back
Top Bottom