2 year refit of C&L 37 Europa

The friendliest place on the web for anyone who enjoys boating.
If you have answers, please help by responding to the unanswered posts.

questionmark

Senior Member
Joined
Jul 10, 2015
Messages
179
Location
USA
I figured I'd make a thread to both track progress and solicit opinions on my just-started refit of our somewhat new-to-us 1979 C&L. Considering that I already have 10 pages of project lists, this could be a long thread. My project management style is with colored sticky notes on graph paper. That way I can expand the subproject lists as they creep (and do they ever.)

The ultimate goal is to live aboard and cruise the Sea of Cortez and points south, leaving fall 2018. Although this is my first trawler, I have a decent amount of sailing experience, including a complete (3+ year) refit of a blue water cruising sailboat.

The boat normally lives in Santa Barbara, so we have great access to the Channel Islands and Southern California. I had planned to take her up to the Bay Area this summer, but my vacation has already started and she's still in the yard, and probably will be for at least 10 more days. So that trip is scaled back to a series of island trips and Catalina.

Cosmetically she's decent, the primary engine is in good shape, and the PO put 500+ hours a year on it for two years. We like the interior layout of the Europa style, it is definitely wife approved. That being said, it's a near four decade old Tawainese build, and the more I dig in, the more I find.

I'll try and take pictures along the way, but sometimes I get focused and in the zone and forget.

All opinions are welcome. If you see me doing something that you would do differently, please let me know. I'll be making a lot of this up as I go (and I'm about to celebrate our 19th wedding anniversary) so I have no problem taking advice and directions.
 
Best of luck on your refit project. Post pics! It doesn't exist, it didn't happen without picture proof.

Ted
 
So I had hoped to post more updates, regaling everyone with tales of conquest and accomplishment, but alas, this is a boat project... This may be the third time I've done this, but one easily forgets how frustrating the opening stages are, when every step forward discovers two backwards.

I have managed to complete a few things. I'll start with the galley sink, since that seems the simplest (relatively.)

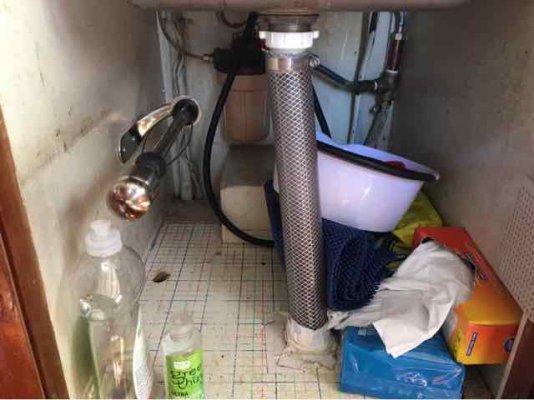
The galley sink drained very poorly. Starting under the sink, I have this (PVC as noted in the survey is not approved for below waterline usage.) ImageUploadedByTrawler Forum1467909689.667190.jpg
Following it down into the engine space, it follows an undulating path aft and outboard to a thru-hull about 6 inches below the waterline. ImageUploadedByTrawler Forum1467909780.653242.jpg here's the easiest example to see, although this is probably the section with the least trapped water.

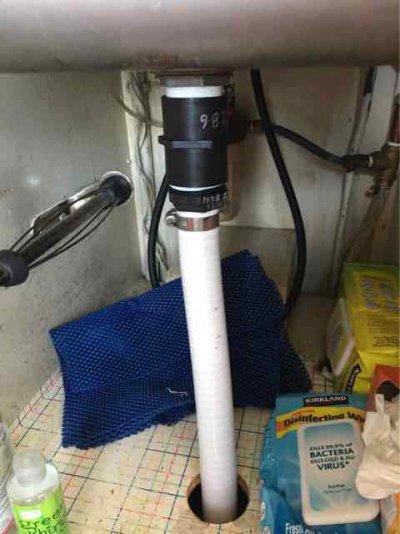
The original raw water intake for the head was right next to the engine raw water intake, below the galley sink. Since I converted the head to fresh water flush (in another project) the thru-hull was unused. I replaced and enlarged it to 1 1/4", and repurposed it for the galley sink. I tossed the Home Depot sink adapter and replaced it with nylon, and the PVC hose with sanitation hose. Now the galley sink has a near vertical drain about six feet long that exits well below the waterline.ImageUploadedByTrawler Forum1467910195.478514.jpg

I guess I forgot to grab a photo of the hose run.

Now I have to figure out what to do with nearly 20' of brand new PVC reinforced hose...
 
Any reason not to have gone through the hull above the water line? less chance of flooding if you have a hose failure.

Ted
 
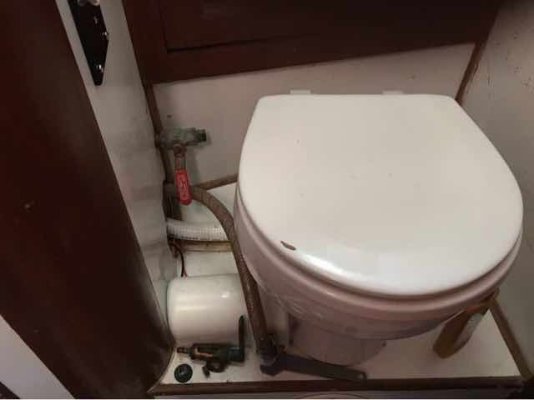
The boat head reeked, and based on the amount of air freshening potions aboard, has for some time. Thus embarks (for it is still being fought) a noble but often ill fated quest.

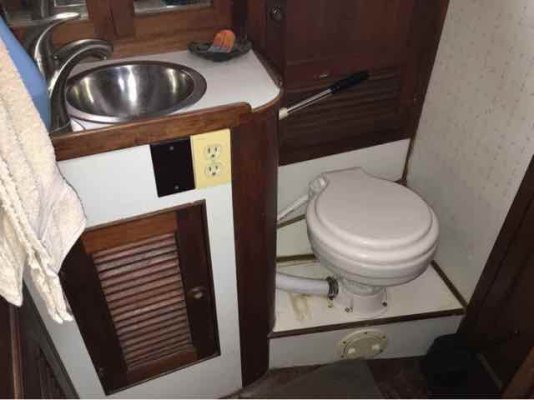
I'm not a fan of the electric flush head, and I had a Lavac sitting in the side yard from the parting out project. So I decided to install it. Thus began a three day voyage of discovery performance art that Christo would probably call "A Vision of Poo: Journeys in Raw Sewage."

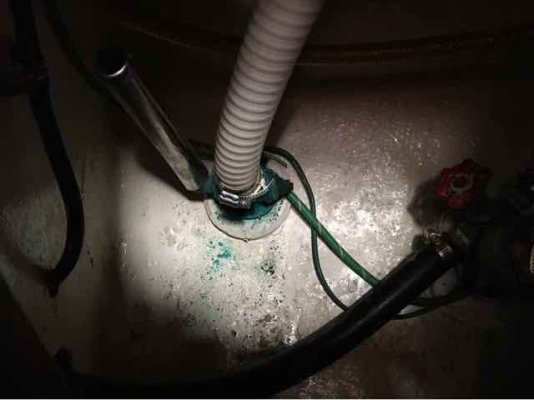
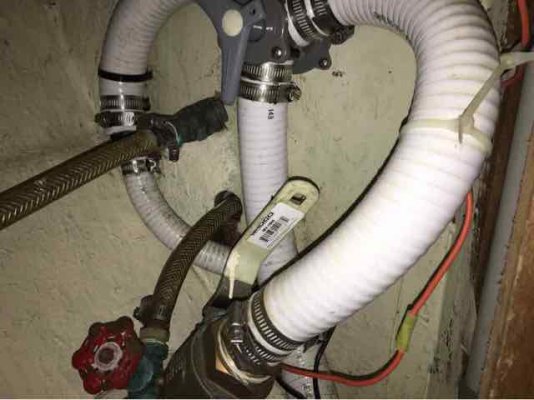
ImageUploadedByTrawler Forum1467910737.820314.jpgImageUploadedByTrawler Forum1467910769.707942.jpgImageUploadedByTrawler Forum1467910805.812574.jpg

Here's some of the before. There's a lot going on here. The gate valve is an extension of an original (as far as I can tell) hose that ran from a seacock in the engine space, under and behind the fuel tank, through a bulkhead behind the tank, and forward through another blind space into this cabinet. It would take a good twenty seconds for the electric head to prime this much hose before even beginning to flush. The check valve and ball valve in the cabinet wall were plumbed into the pressure water line under the sink, my best guess is it used to be a direct connection for fresh water head flushing (nasty.) The "Y valve" is self explanatory, but the best I can figure with the one inch hose is the space is too small for minimum radius of the 1 1/2" hose.

The real issue is that there is no fall for the septic line run back to the tank. In fact, the holding tank inlet is about a foot above the hull where the hose runs. It also runs behind and below the fuel tank, so as near as I can tell, that section is original. The boat was built in 1979, which explains a lot of the smell problems. I don't think exhaust hose can, full of sitting sewage because both ends are foot elevated, can keep the stench in for 37 years. Sadly, this feature won't be addressed till I cut out that tank, maybe in the fall.

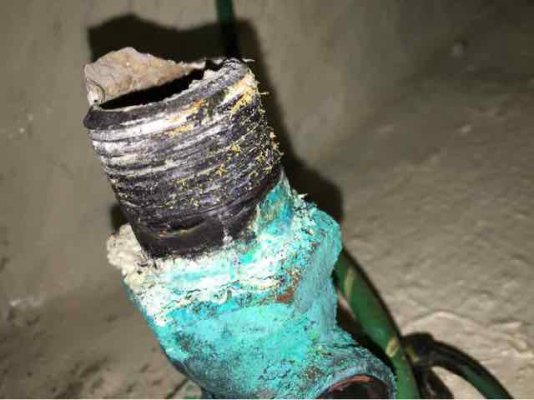
I pulled that sink hose off and found a deteriorating brass pipe nipple used as a hose barb.ImageUploadedByTrawler Forum1467911500.441902.jpg. So that had to go. I stripped and cleaned that bronze tapered seacock. I have a full maintenance kit from Spartan, including their grease and lapping compound, from the last refit.

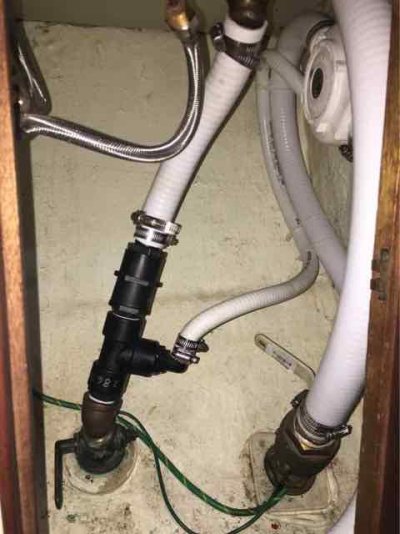
I want the option of fresh water flush, so I ran the head intake to the sink drain. My sailboat was done this way, and it works really well. With the seacock open, it works with sea water. Close the valve and turn on the sink, and it's fresh water flush. I swapped out that brass junk for real bronze and nylon.

I removed the gate valve and that old ball valve, replacing a bit of the pressure water lines to remove unnecessary fittings. I also ditched the "Y valve" and direct overboard discharge. The thru-hull will be reused for my wash down system. It simplifies the plumbing, and makes it easier for getting "dye tabbed" here in Southern California.

ImageUploadedByTrawler Forum1467912032.831693.jpg. Here's an almost finished shot of the cabinet and plumbing. I mounted a thru-bulkhead toilet pump, replaced the head with the Lavac, and replaced all the hoses I could reach. The final product looks like thisImageUploadedByTrawler Forum1467912118.930832.jpg which at first glance doesn't look any different. That's one of the frustrating things about early stages of refitting: all that work doesn't look like much.
 
Any reason not to have gone through the hull above the water line? less chance of flooding if you have a hose failure.

Ted


Geography. The boat is a Europa style so the back wall of the cabinet is above the deck. Directly below is the fuel tank, and aft of that the water tank. The old hose routing was the nearest to get above the waterline, and I'm sure with proper securing I could manage proper fall, but that thru-hull is so hard to access I would rarely secure it properly. The hole was already right there, so rather than patch two holes and drill another, I went down this road.
 
That's one of the frustrating things about early stages of refitting: all that work doesn't look like much.

Tell me about it. I've spent half of my life in the last several years doing necessary projects beneath the sole and behind the walls of my boat, and if my Admiral can't see it, there's nothing done! It's only now that I'm getting around to some more cosmetic things that she's actually able to witness, therby lending her approval or condemnation.
 
Ok, I came back from camping up in the Sierras (and watching my kid sail in the High Sierra Regatta) refreshed and ready to dive back in. It took all of about 15 minutes to get totally frustrated. So here's a pre-lunch rant!

The clock is ticking down on my vacation, and the boat is still on the hard. The wife is, understandably, rather displeased. She was under the impression that we would be using this boat all summer, not working on it. And now, it's going to take even longer to have a proper bearing holder machined to fit the end of the shaft log. But as frustrating as that is, that's not the rant.

No, the rant involves wire nuts. I keep finding them all over the boat because the previous owner was a squirrel and half assed anything he touched. Luckily he paid someone to do all the engine maintenance who knew what they were about. But the wiring stuff he did is absolute crap!

The one but I'd really like to have done before I, allegedly according to her, take the wife to Catalina and the islands for her birthday is to replace the windlass. I've got enough done now that we could go, if I'm willing to raise my giant new Rocna by hand (which sucks cause I just did it in the yard and it was a PITA.) but since the windlass is here in a box, and the new wire is here in a box, and the new autopilot is not, it was windlass day.

Step 1, remove the old. The little Bruce went easy, it's too small anyway. I never could figure out why the PO was satisfied with an anchor that drug anytime the wind got above 30. Turns out the reason was the windlass didn't work. So, as I've come to discover, he attempted to rebuild it himself. And that went about like you'd expect. The old windlass is a Simpson Lawrence, and it's a nice unit, just really slow and only runs for about 30 seconds before it quits.

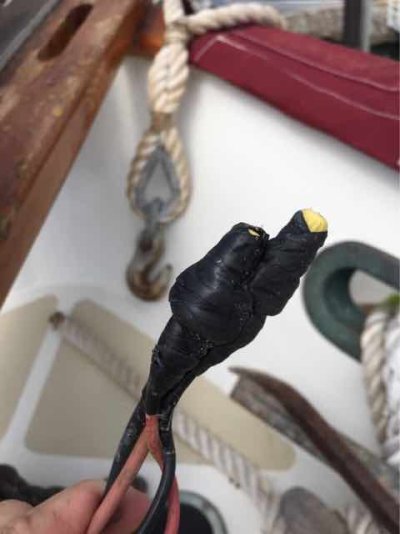
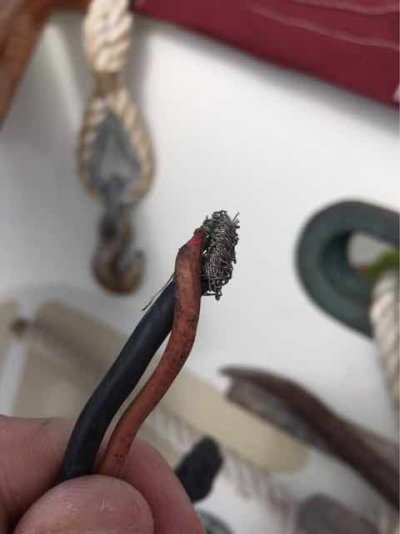
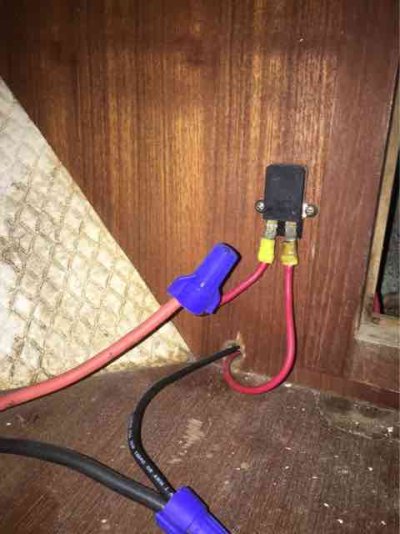
The existing wiring is 8 gauge up to the bow, and then 14 gauge through the deck to the windlass. Not nearly big enough. From there, it runs through not one, but two sets of wire nut junctions, and the final few inches entering the windlass is 16 gauge. No, that's not s typo. The windlass is actually run with 16 gauge. Guess I found the problem.

Original
ImageUploadedByTrawler Forum1468522212.245122.jpg
Underside wiring
ImageUploadedByTrawler Forum1468522245.564191.jpg
Not exactly ideal for connecting wires on the bow of a boat that lives in salt water. But hey, electrical tape is waterproof, right?
ImageUploadedByTrawler Forum1468522269.551472.jpg
Not just wire nuts, but the wires weren't even twisted together first. Now that is dedication to poor craftsmanship!ImageUploadedByTrawler Forum1468522383.183720.jpg

Here's. A quick test for of the new Rocna and Lofrans Tigres. I have another anchor roller, so I was thinking of moving the primary over in line with the new gypsy and putting the old Bruce on the other side.ImageUploadedByTrawler Forum1468522487.764198.jpg

I'll test fit it after I move the primary. I really should refinish the sprit while I have everything off.
 
2 year refit of C&L 37 Europa

So, apparently I double posted.

Since I'm fixing it, I'll mention that I'm using 2/0 for the run to the bow and the control box, and 4 gauge from the box to the windlass, which should only be about three feet (six round trip.)
 
Last edited:
Was there a space limitation that kept you from running 2/0 all the way to the windlass?

Ted
 
Wow, and I thought my PO was a dumb*ss
 
Was there a space limitation that kept you from running 2/0 all the way to the windlass?

Ted


Yeah, the radius required is too big to make the turn into the windlass. I'm planning on running the wires up that stainless post, but I had to fabricate a spacer to raise the windlass over that compression bolt. I picked up some starboard and am about to go out and start.

The 4 gauge has the ampacity to carry the full 130 amps. I shouldn't ever get to that, normal operating should be less than 80 amps. But just in case, might as well do it right.

I'm also running a 12/3 line back to the helm and the flybridge so I can run the windlass from either. I enjoy the solitude of single handing, so it'll be nice to be able to work the throttle, steering, and windlass from either spot. I haven't actually done it yet, but the visibility from the flybridge looks good enough that I can follow my own chain as I bring it in.
 
There are times when I want the boat "just so" before dropping the anchor. Having a windlass control at the helm makes it so much easier.

Ted
 
There are times when I want the boat "just so" before dropping the anchor. Having a windlass control at the helm makes it so much easier.

Ted

I agree, Ted. Diving and fishing can require precise anchoring. Having the controls at the helm with a self-deploying anchor can make a huge difference.
 
Got a late start this morning as other life issues trumped boat work.

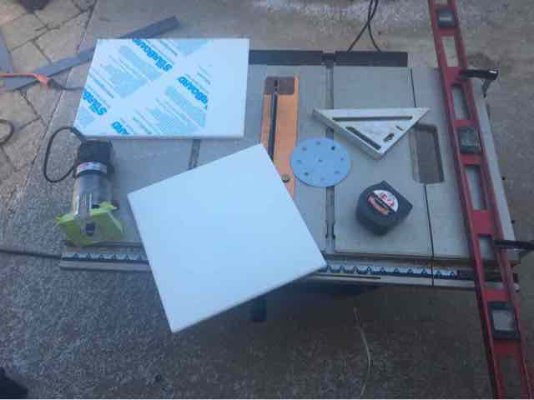
Here's a shot from last night. I had the tools out so I made the spacer for the windlass and the adapter plate for the new radar. It's 1/2" starboard.ImageUploadedByTrawler Forum1468616039.354015.jpg. All the edges are rounded.

It's been a bummer jumping up and down since I took the stairs out during the "dry rot discovery" work. I replaced countertops in the last boat, and had one that I cut wrong just waiting for a new lease on life. And so it became some temporary steps. It'll due until the battery relocation project, when I'll rebuild them as removable. Until then, no more jumping up and down every time I need, or forget, a tool or part.ImageUploadedByTrawler Forum1468616233.079798.jpg

Now back to our previously scheduled wire pulling. Oh, and I caved and went with 2 gauge wire for the last run between the control box and the windlass. I'm pretty sure I can make the turn...
 
Oh, and I caved and went with 2 gauge wire for the last run between the control box and the windlass. I'm pretty sure I can make the turn...

:thumb:
There's no kill like over kill!
Nobody ever said they wished they'd run small gauge wire (once the project was done).

Ted
 
Yesterday went pretty well. My wife came down and spent the day working.

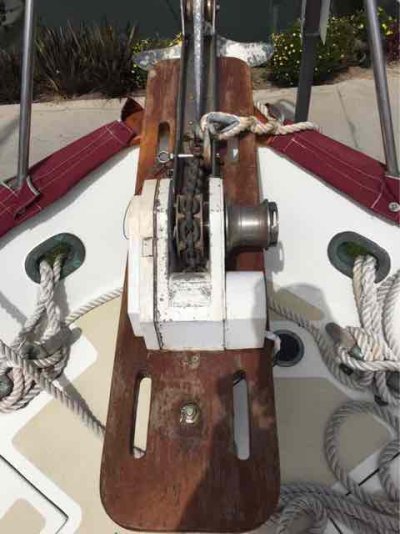
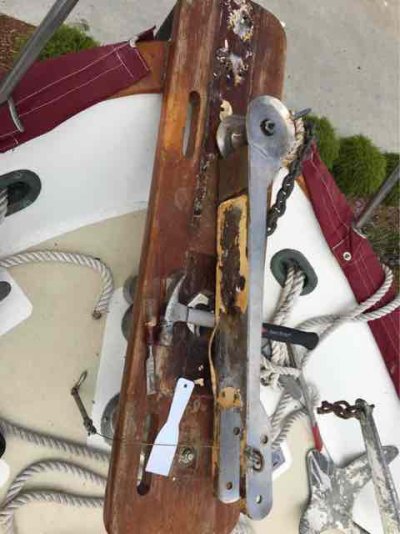
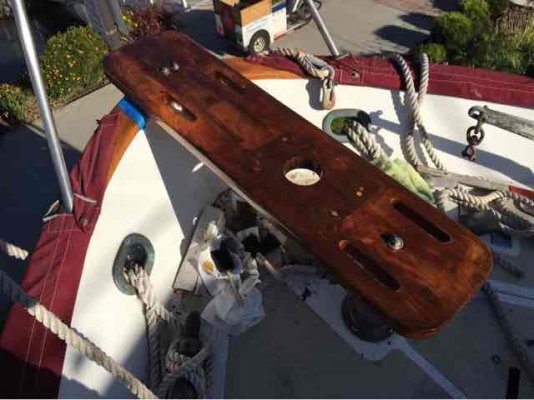
The big project remains the windlass. The old Simpson-Lawrence had the gypsy centered, the new one has it on the side, so the hawse and roller must be moved. Here's after removing the roller.ImageUploadedByTrawler Forum1468768549.592987.jpg. The finish on the sprit looks way better in that picture, it was a mess. So, since I had the hardware off, I refinished it.

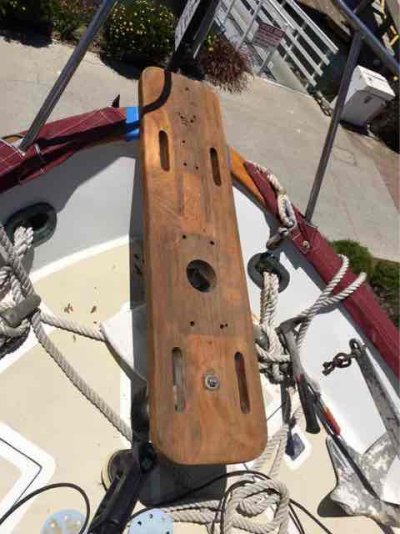
It only took about four hours and 15+ sanding disks, but I took it down to bare wood. The slots were a real pain. ImageUploadedByTrawler Forum1468768901.277969.jpg. It's getting there...

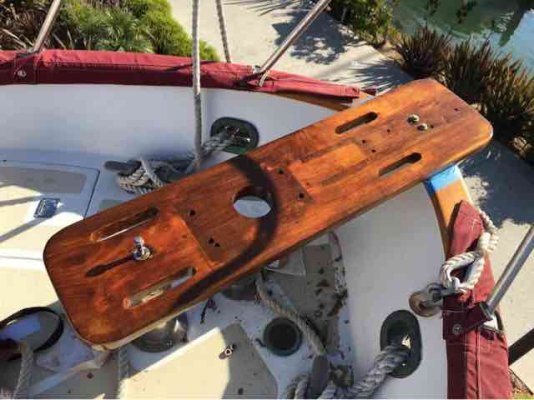
Here's the sprit after the first three coats of varnish. ImageUploadedByTrawler Forum1468768973.451072.jpg. After the first coat we took a walk over to the chandlery and my wife spied some hinges that might work for the salon table. After the second coat I chiseled out the table and mounted the leaf. The hinge was broken by the PO, and rather than fix it, he just used electrical tape to tape that leaf closed. Heh.

My wife also got the old stern lettering removed, and the stern all prepped for the new lettering. We got the new lettering on, with only a few bubbles.

Then a friend walked by and hailed us from the ground, which pretty much ended the work for the afternoon. He has his own refit project underway, so it was nice to get his perspective.
 
So my plan of running the wiring up through the stainless post has been temporarily thwarted. The top and bottom flanges aren't flanges, they're plates.

I'd love to come up with a "plan b" but that post is just such a perfect solution. I really don't want to have to remove it, but I can't see any other way right now. Time to do some thinking, I mean varnishing...
 
Why not drill a hole through both plated and pass a pvc pipe through to run the wires through?

Ted
 
2 year refit of C&L 37 Europa

Why not drill a hole through both plated and pass a pvc pipe through to run the wires through?

Ted


For lack of a carbide tooth hole saw the kingdom was lost...

Neither of the major chain hardware stores in the area had one in stock in the size I need, nor did the one near the house. I need either a 1" or 1.25" hole saw to be big enough to carry all three cables and yet still fit between the post and the compression bolt. All I have in that size range are for wood and maybe fiberglass (cheap set.) All the nice Lenox pieces I have are way too big. Luckily, Amazon Prime can have a nice stainless cutting version, that will fit my existing arbor, here by Wednesday.

Sadly, I have to spend a few days repairing the homestead till then. One doesn't really appreciate the convenience of modern plumbing and sanitation until it quits working. Especially if guests are scheduled to arrive.

So I managed a few more coats of varnish before heading home to do battle with the porcelain overlord and his root clogged minions.
 
While I'm procrastinating pulling that toilet off, here's a few pics of the wire routing project.

Here's the original wiring and termination for the windlass.ImageUploadedByTrawler Forum1468884675.681755.jpg

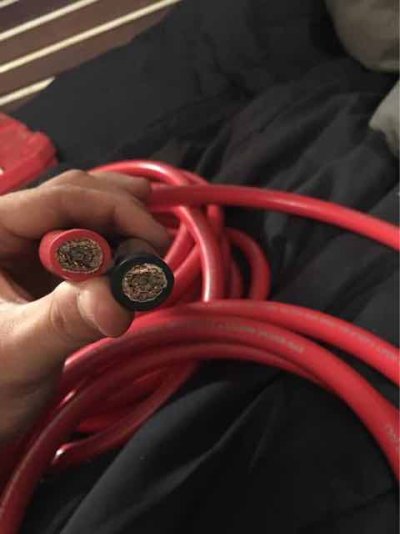
And here's the wire I'm using for the run.ImageUploadedByTrawler Forum1468884734.753737.jpg. No kill like overkill, heh.

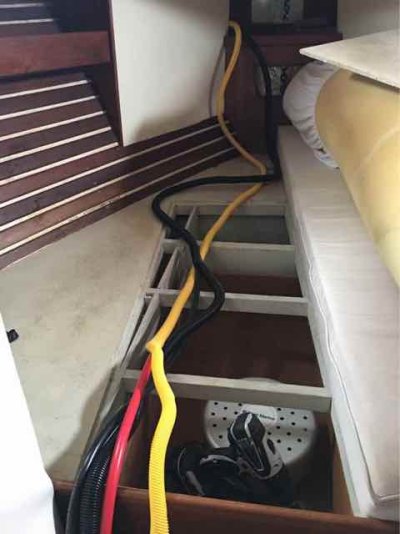
It's all laid out in preparation for pulling.ImageUploadedByTrawler Forum1468884786.482169.jpg

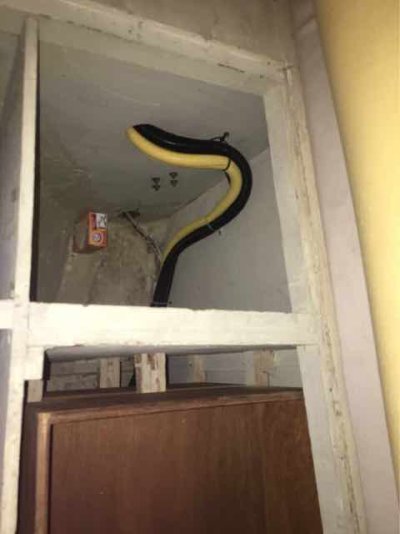
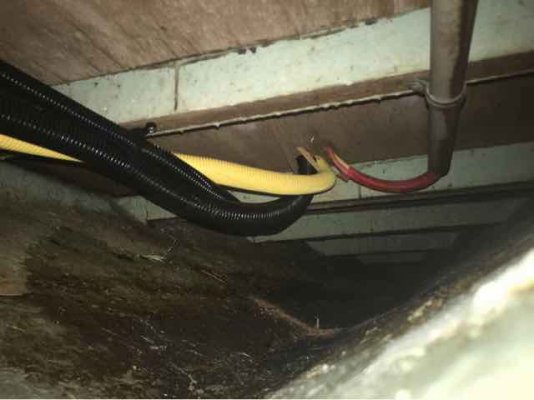
Some access is easy to secure.ImageUploadedByTrawler Forum1468884833.771591.jpgImageUploadedByTrawler Forum1468884941.002059.jpg

And some, not so much. It's almost embarrassing how long it took to get that screw in.ImageUploadedByTrawler Forum1468884919.383871.jpg
 
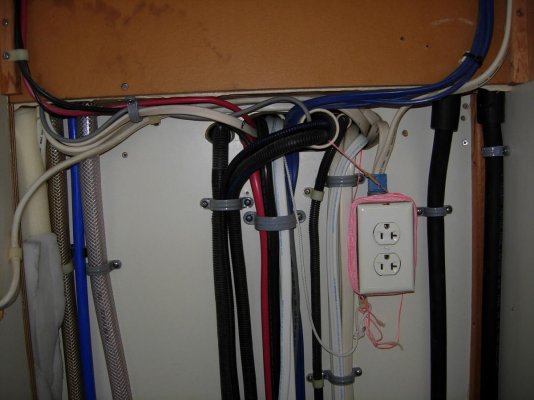
You're going to hate me by the time this thread is done. The plastic tabs and zip ties are poor hangers for heavy electric cables and hoses. PVC electrical pipe hangers are cheap and much stronger (they look better to). Available from 1/2" to 3" at Lowes or HD.

DSCN1079.jpg

DSCN1247.jpg

Ted
 
2 year refit of C&L 37 Europa

You're going to hate me by the time this thread is done. The plastic tabs and zip ties are poor hangers for heavy electric cables and hoses. PVC electrical pipe hangers are cheap and much stronger (they look better to). Available from 1/2" to 3" at Lowes or HD.


Ted


Hate might be a bit strong... ?

I'm always open to ideas, and I like this one a lot. I have some nylon one screw hangers, but none big enough. So off to HD I went...

ImageUploadedByTrawler Forum1469040512.576578.jpg

I'll stop off on the way home and buy more of that size. Which, for the record, was 1 1/4".
 
2 year refit of C&L 37 Europa

I had a huge, depressing, recap of the day all typed up but I deleted it. Let me just summarize that today sucked, and after hours of really crappy work I have actually gone backwards. Everything is a mess.

Tomorrow is another day...
 
If it was easy, everybody would be doing it. Mama said there would be days like this. When I had a bad day on my refit, I often looked for a small victory. While there are lots of big jobs, I'm sure you have a punch list of small projects. Pick something simple and go for an easy victory. Maybe you have a door latch that doesn't close without pushing the door up or down. Maybe you have a window or drawer that is hard to open. Take on a small task and come back to the big one tomorrow.

Ted
 
2 year refit of C&L 37 Europa

Apparently there is a time limit on photo attachments. So this is the revised post. See below for the cut and paste version now with working photo goodness.
 
Last edited:
Alright. After yesterday's debacle I went home, savored an adult beverage or three, and re-engineered the wire runs. Short day today as I had to do some yard work.

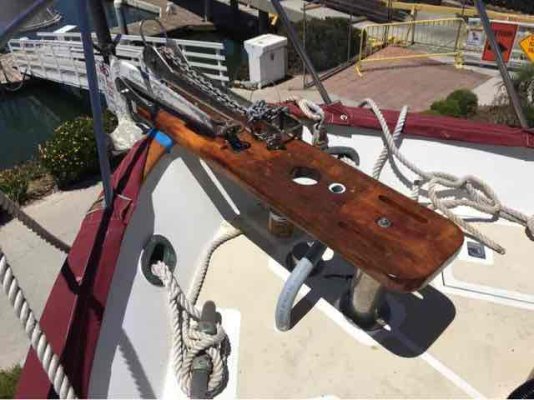
Here's the bowsprit fully varnished. I ended up putting bungs in the old holes and redoing the varnish.ImageUploadedByTrawler Forum1469253296.450595.jpg

Here's both rollers mounted, and the old anchor on the second roller. The chain is temporary for checking the fall.
ImageUploadedByTrawler Forum1469253277.997921.jpg

And the big part. Here's my solution to the wiring conundrum. That's a 1 1/4" UV stabilized electrical conduit that I custom bent using the heat gun. It terminates down below in an L-box mounted to the bulkhead.
ImageUploadedByTrawler Forum1469253233.143867.jpg
I had to offset it that much to clear the access door into the chain locker down below. My original plan was to run it straight down and in between the deck and the headliner, but I just couldn't make it work with the framing and bulkheads.

The issue now is that the angle of the sprit has the chain hitting the aft edge of the hole in the windlass base. I may need to figure out some sort of shim to level it out, or grind out the hole. It's anodized, so I'm reluctant to start grinding.
 
I had a huge, depressing, recap of the day all typed up but I deleted it. Let me just summarize that today sucked, and after hours of really crappy work I have actually gone backwards. Everything is a mess.

Tomorrow is another day...

Keep the faith. I applaud you taking it on and committing to do it right. I've spent all my weekends over the past 4 months making major upgrades to my DC and AC systems: new inverter/charger, alts, external regulation, switches, breakers, fuses, etc. Pulled a seeming mile of 4/0 and 2/0 cable. Spent a significant part of last Sunday literally standing on my head trying to make some inaccessible connections on an ISOBoost transformer. I keep telling myself it'll be worth the time, money and damage to my body. One of the bigger takeaways for me is that any pros who do quality electrical (or other) work on boats really earn their money.


If you wish to paint the PVC conduit, I've had very good success with sanding the surface and then several coats of spray paint.

Ted
 
Keep the faith. I applaud you taking it on and committing to do it right. I've spent all my weekends over the past 4 months making major upgrades to my DC and AC systems: new inverter/charger, alts, external regulation, switches, breakers, fuses, etc. Pulled a seeming mile of 4/0 and 2/0 cable. Spent a significant part of last Sunday literally standing on my head trying to make some inaccessible connections on an ISOBoost transformer. I keep telling myself it'll be worth the time, money and damage to my body. One of the bigger takeaways for me is that any pros who do quality electrical (or other) work on boats really earn their money.


Very nice. When I terminate my big wires tomorrow I'll take a picture of the labeling I do. It's a label from a label maker that's covered with clear heat shrink. Ends get labeled with what they are and/or where they go, and occasionally with notes to myself.
 
Back
Top Bottom