2 year refit of C&L 37 Europa

The friendliest place on the web for anyone who enjoys boating.
If you have answers, please help by responding to the unanswered posts.
2 year refit of C&L 37 Europa

Quick update on today's progress: Not much.

Instead of spending the morning helping the bigger kids with their engineering sessions, I got roped into doing that AND fabricating a wind tunnel for the little kids' project. I hadn't planned on spending all day there, but I did manage to cut the acrylic version of the DC panel while the glue was drying on the wind tunnel frame.
IMG_1515.JPG
I'll start populating it tonight after the kid goes to bed.

I did make it down to the boat for a few hours work while he was at sailing practice, though. I put the wood template in place and discovered that my helm cabinetry is way out of square. I didn't expect it to be great, but it's pretty bad. It's even more pronounced with a properly square panel edge in place.
IMG_1516.JPG

I did get the cutout finished. That was entertaining because I needed to remove the old stuff to cut out the dash, but I needed AC power to run the tool to do the cutting...

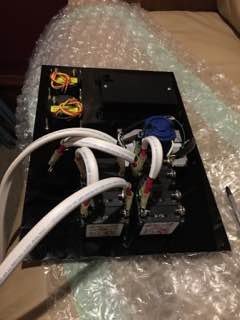
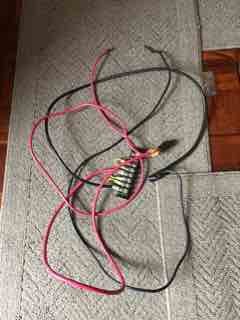
Once the cut out was finished and dry fit, I took it back out and started working on the wiring harness. I got about this far before I had to go pick up the kid from practice.
IMG_1517.JPG
 
Last edited:
Is the selector switch next to the shore power source diagram for selecting which shore power plug is used, or is that switch located elsewhere?

Ted
 
Is the selector switch next to the shore power source diagram for selecting which shore power plug is used, or is that switch located elsewhere?

Ted


Yes, the diagram shows which inlet is which. It's kind of redundant since the selector has "power available" indicators for each source. But it balances the space and looks kinda cool :).
 
Quick rant...

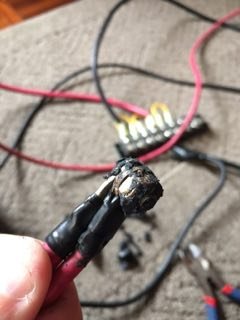
I'm cutting out the old AC wiring and found this...
IMG_1525.JPG which had been placed in line. Here's what's under several layers of electrical tape and rubber liquid tape:
IMG_1528.JPG

Yep, a brass bolt and nut. Now, I find this kind of thing all the time, but what kills me about this example is that they obviously extended the wire run (which for the record is scabbed in 6 gauge wire with strands trimmed down to fit in 10 gauge terminals) for no reason. When I backpulled the originals, it. reached. just. fine.

Ok, back to work...
 
Don't you just love someone's creative wiring? I just started cleaning up the wiring on my boat. Just replacing the cable ends on the start cables got me another volt. Have replaced many old ground bus bars that were very corroded. Another couple of years and all will be well.
 
2 year refit of C&L 37 Europa

Don't you just love someone's creative wiring? I just started cleaning up the wiring on my boat. Just replacing the cable ends on the start cables got me another volt. Have replaced many old ground bus bars that were very corroded. Another couple of years and all will be well.


As I discovered yesterday to my dismay, there's a wiring fault somewhere in my outlet circuit, I think at the distribution strip down in the bilge. After hooking everything up, my AC outlets no longer function. Both the hot and neutral are 110V to GND at the outlets. I have the proper 110V between hot and neutral at my terminal strip in the dash.

At first I thought crossed wires, but that would have tripped the breaker. So it must be a broken neutral path. I'm guessing and hoping that re-terminating the ends in the bilge will fix it. I probably should do that anyway, but I was really hoping to stop hemorrhaging time on this part.
 
Last edited:
Any time spent sorting out the boat's electrical system is time very well spent. Not one bit wasted. You will also sleep on board much better once you've done it! Knowing that nothing is going to short and start a fire....
 
2 year refit of C&L 37 Europa

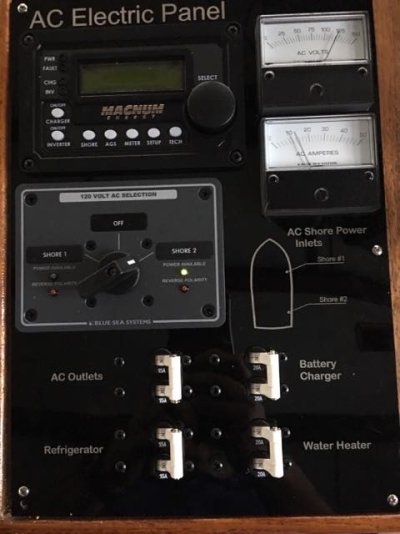
Victory!!! The new AC panel is in. That only took four days longer than it should have...

Here it is:
IMG_1555.JPG

After spending the last three days running down a series of wiring issues, it's finally in. As a function of feature creep in this one, the new shore power inlet is in and hooked up, portions of the wiring harness between the panel and the bilge terminals was replaced, the parts are here to re-terminate the bilge terminal strips (and replace the strips) and all the outlets in the boat are now GFCI protected. Oh, and all but one of the wires in the AC system is labeled.

Whew.

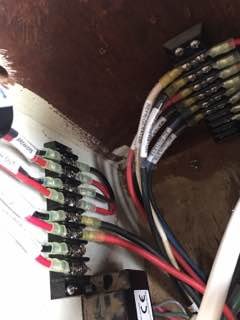
Here's a view from a few days ago of how it looks under the hood. I've cleaned it up a bit since then. When I dig back under there for the DC panel replacement (which starts tomorrow afternoon) I'll snap a final pic.
IMG_1536.JPG
But you get the idea.

Along the way I found that my ground was tied to neutral in more than one place, and that I had a ground leak anywhere from 100 to 500 mV to ground. And I had a bunch of corroded outlets to replace. But it's in and working, and I'm feeling pretty good about it. For tonight at least.
 
2 year refit of C&L 37 Europa

An update:

I haven't posted anything because there really hasn't been any visible progress, at least not any visible to others. I've been working on the DC system and chasing down rabbit hole after rabbit hole. I just keep cutting stuff out.

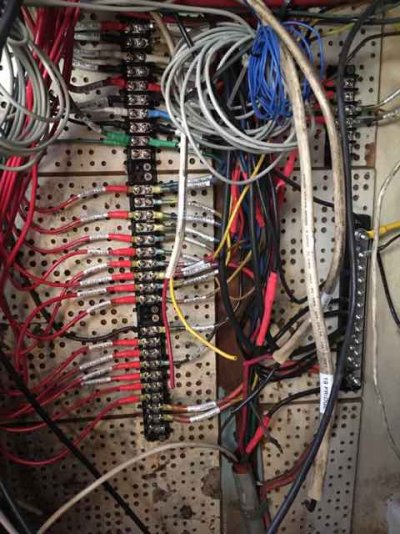
Here's a pic of the new bilge wiring setup. I haven't dressed or secured anything yet, as I'm waiting till I'm through the troubleshooting phase. You know, the "now why doesn't this work anymore... oh I see, because I'm an idiot!" phase. There's still a few loose wires that I'm trying to decide what to do with, and that stuff all hanging down needs to move. But it's where I am right now.

IMG_1605.JPG

So, the existing wires were (mostly) reterminated and sealed. The terminal strips were replaced, the grounds moved to a proper bus bar, and the wiring harnesses built and extended up into the cabinet behind the panel. I've used heat shrink crimps in the bilge, and then added a bit of additional heat shrink for strain relief. The engine room is also the bilge, so I'm considering it a "wet location."

This afternoon I'll (hopefully) finish the panel harness and install it. I dropped the panel and cracked it, so I now have an excuse to make a few changes and cut a new one. I'll put it on the to-do list
 
Last edited:
Greetings,
Mr. q. "Looking good Lucy..." Hahaha...I thought I was the only one who employed the "..."now why doesn't this work anymore... oh I see, because I'm an idiot!" phase." I've scratched my head so many times at wiring, both installing but mostly removing, I've got a bald spot.
 
We have lights again! Just in time for the time change...

I got the first third of the new panel hooked up, and it works well. In the process I ended up re-terminating a bunch of wires in the dash. Project creep at its finest.

I also just ordered some thicker acrylic for the final panel fab, the 1/8" is just too thin for the weight of all the breakers. I tossed in some 3/4" and 1" starboard to do some bracket fabrication for the solar panels. The panels which were originally purchased for the sailboat and sat in the shed so long that now they're destined for the trawler...

Josh

-- probably should start putting my name on these things
 
Quick update:

Nothing is done, but tons of stuff is "almost done." I ended up working for two months and logged an obscene amount of overtime. Which is good in that I've paid off all the bills and bought some new toys, and is bad in that I haven't had any real boat time.

Did I mention I also remodeled the bathroom at the homestead? Another project that took away from boat time, but resulted in my wife refraining from murdering me in my sleep, so I have to count it as a win.

I have been working like mad to get her (the boat, not the wife) island ready enough to take out the family, and I think I'm there. I did finish wiring up the temporary run for the windlass, so that works. Which will be awesome, no more hand raising the anchor!

Unbeknownst to me, my wife decided to flip our kayak over on the finger to clean the bottom. She slipped and launched herself fully clothed into the harbor water. I somehow managed to miss all the commotion as I was down in the engine space terminating wires. Luckily she didn't have her phone or wallet on her. Some folks on the finger helped pull her out, and I stepped outside just in time to see her standing there completely drenched and embarrassed.

The software won't let me post videos, which is a bummer as we were out a couple weeks ago and ran into a super pod of dolphin. They were everywhere, and surfing the bow by the score.
 
In the end, it's all worth it. Every time.

I'm also kind of surprised I still have service.

Josh


IMG_1908.JPG
 
It's nice when the family gets as much enjoyment out of using the boat as you do.

Ted
 
2 year refit of C&L 37 Europa

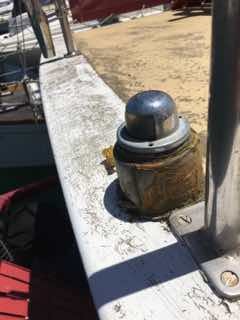
I've been working on getting the trawler set up for night running, since we're planning on running overnight down to Catalina. I'm pretty sure the previous owner didn't run after dark, since the nav lights were suspect and there wasn't a red overhead light in the boat anywhere.

I swapped out the switch in the fixture over the helm with a nice beefy SPDT and installed a dual red/white LED. The fixture didn't work when we bought it, which turned out to be a failed wire between the old switch and bulb socket (now removed.) Now we can see without completely destroying the night vision.

I also noticed that the green navigation light had joined the stern light in the great light party in the sky. This left the port red light and the steaming light as the only working ones. The easiest place to mount the SSB antenna was directly in front of the red nav light, so it needed to be moved forward at the very least. I decided that I would just bite the bullet and buy new sealed LED fixtures, rather than try and deal with the ancient, leaking, corroded ones.

Here's the old ones:
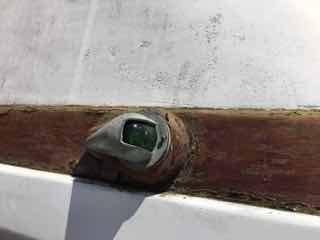
IMG_2001.JPG
IMG_2004.JPG

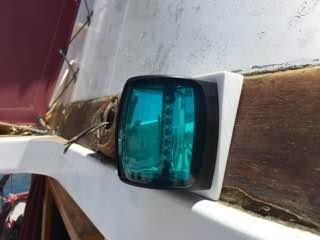
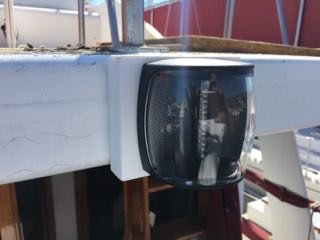
I measured the angle on the brow for the side lights at 30 degrees. So I needed to fabricate some wedges to mount the new LEDs on. I also did a plate for the stern light, and one to use as an adapter for the steaming light:
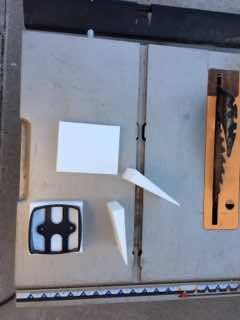
IMG_2002.JPG
Once again, King Starboard to the rescue. The mounting plates are screwed directly into the wood, so I used butyl rubber to seal the screw penetrations:
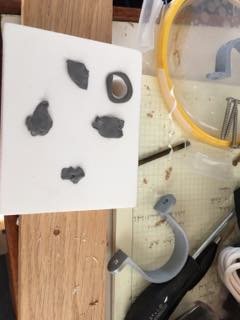
IMG_2006.JPG

Here's the finished look:
IMG_2003.JPG
IMG_2008.JPG

When we bought the boat, none of the outside lights (cockpit nor walkways) worked. The existing stern navigation light only worked if you turned on the breaker for both nav and salon lights (still trying to figure that one out, since it did it with the LED fixture as well) When I pulled the cockpit light fixture to access the space, I found the now standard rats nest of bad crimps and electrical tape. Luckily there was enough slack to cut back to clean, and I re-crimped and sealed everything with adhesive lined shrink tubing. Removing that corrosion magically fixed the stern light (it works independently of the salon light switch) and the cockpit light, and the walkway lights as well. Hey, I'll take it.

Just a few more items off the check sheet and we'll be ready for the wife's (and kid's) first overnight passage on our boat.

Josh
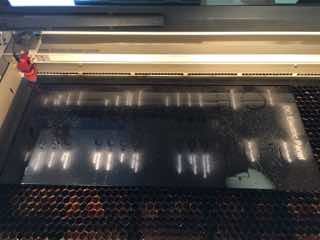
 
Today was a good day. It was one of those "finish the half done projects and check them off days" which I needed after trying to run multiple parallel projects simultaneously. Why do I do that? I know better...

Nav lights are done, minus the steaming light replacement, but I got the old one working, so we're good to go. Had to extend one wire because it wasn't long enough.

Cabin lights are fixed, so we can quit using headlamps down below. It'll be nice to get the reading lights back, since we're heading out for a week or so. I had originally thought the PO scabbed off the electric head circuit, but it turns out there used to be an old school 12v outlet down below, and he had scabbed the lighting off that. It didn't take long once I brought down the inductive toner and traced it back. Moved one wire on the new terminal in the bilge and magically the downstairs lights work again. Later, when I'm bored, I'll have to hook up the toner and see where the circuit originally labeled "cabin lights" actually goes...

Just for good measure, I fixed the problem with the autopilot that was my own doing. I've got lots of examples of not being nearly as clever as I think I am, and hand steering for the last few trips has been the penalty for doing so again. All better now, though. I think.

The last of the "need to finish before an overnight passage" boxes have been checked. So it looks like my wife will get her wish and we will do our first overnight passage together. I really hope it goes well. A lot of my future planning involves her liking (or at least tolerating) passage making.

Josh
 
Are you working up from short and longer daytime passages? A long nighttime passage seems like a big first step.
 
Are you working up from short and longer daytime passages? A long nighttime passage seems like a big first step.


Not exactly. I come from a singlehanded sailing background, so I'm comfortable with longer passages. The move to a trawler was so that we could cruise as a family, rather than just me.

My wife has been on many multi-day dive boat trips, and a handful of "live-aboard" dive trips up to 10 days at a time. But this will be her first time standing watch at night. She's done week long island trips on the sailboat, but the longest sailing leg has been about 8 hours.

Going overnight was her request. We could have done it as a pair of long days, but she wanted to do the overnight. It's the way I've done the same trip in the sailboat in the past, so I think (hope) she's eager to experience something similar. I've been blessed to have some amazing experiences at sea at night, and I'm looking forward to sharing new ones.

Conditions look ideal. Let's just hope this is the first time in recorded history where the forecast matches actual conditions...

Josh
 
For a variety of not very interesting reasons (and a few much too interesting ones) I’ve taken a break from my own thread. But I have been working on the trawler, just not as much as I’d like and off-line.

But I thought I’d ease back into the Internet life with a project I completed this morning. A real transom shower. I like to do a lot of diving and free diving, and the PO’s version of a “transom shower” was a running joke.

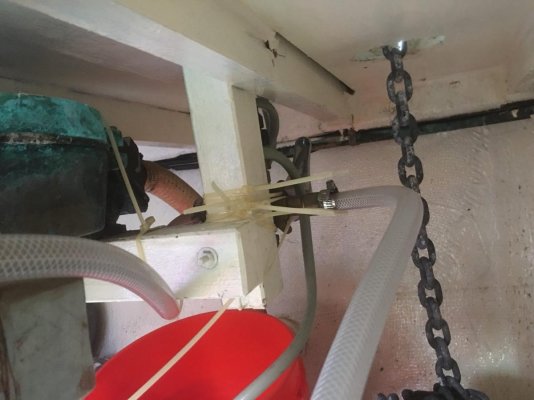
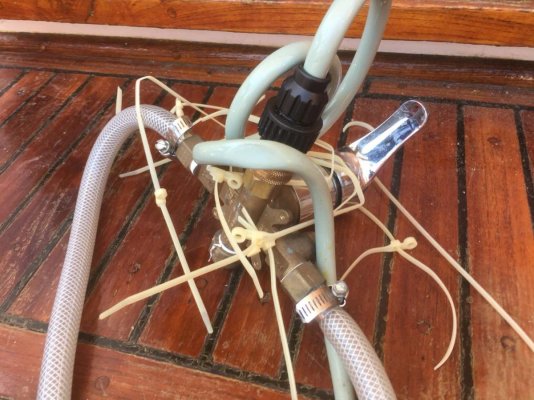
Here is his solution before and after I cut it out:
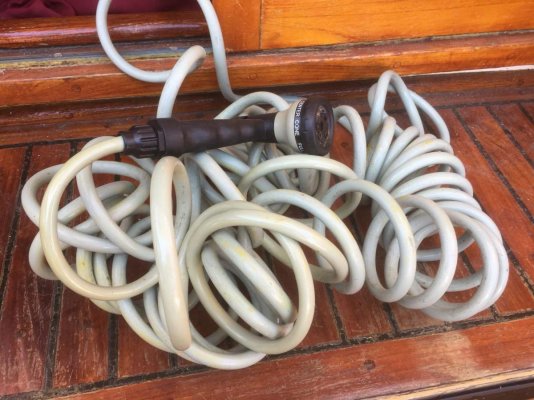
IMG_0150.jpg IMG_0151.jpg So yes, that’s a bathroom fixture wire tied in place. In the back corner, and facing opposite the hatch, in the aft cockpit lazarette. Using this hose:IMG_0153.jpg to reach the swim step. Needless to say, this was less than ideal.
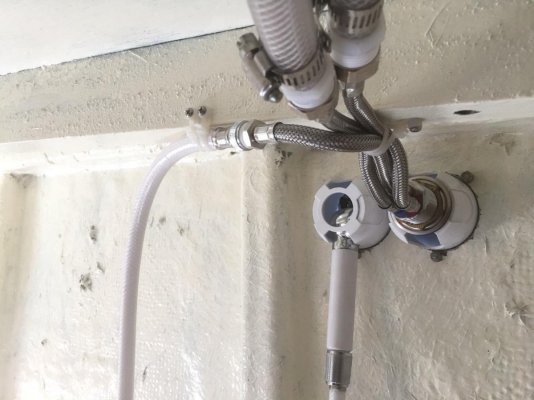
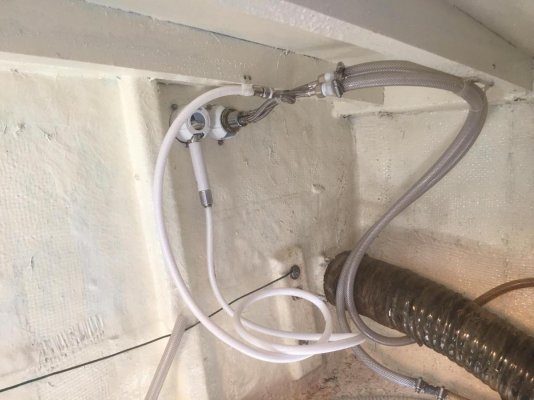
So installed a new one I bought from Defender like 18 months ago. IMG_0154.jpgIMG_0155.jpg. I’m still not super stoked with the hose routing, and I’ll end up replacing all of it after summer when I redo the freshwater system, but it works for now.
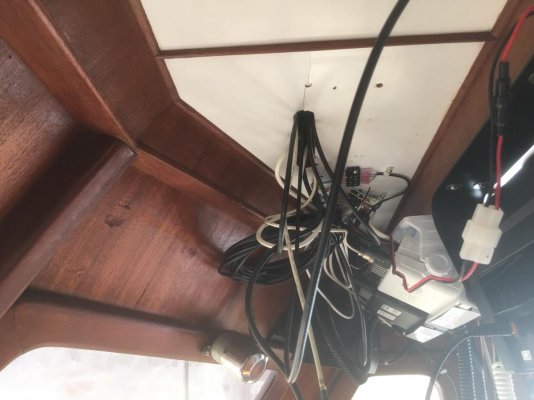
I’m in a rush to try and scratch lines off the list this week because I have to go work the next 7 days, and then the day I get off I hope to head out to the islands for a few days.

I got the dingy davits installed last month, for my cool new RIB with an actual running outboard (heh, rowing is right out now) stowage.

I do love this boat, and working on her.
 
Ok, so just a quick one because when it rains it pours...

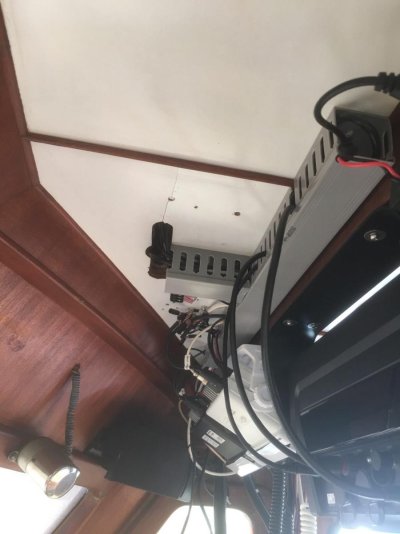
I’m putting in a second plotter, this one up with the radios and not on the dash. It was really getting ratty back there (and with no-one to blame but me) so I fished some cable management stuff out of the back of the closet and cleaned it up a bit. Before and after...
IMG_0157.jpgIMG_0158.jpg

Still needs some work on the column down, but a good quick hit to finish the day.

Josh
 
I should have taken more pictures, but today was a super productive day. The new belts weren’t in yet, so the engine projects are on hold till Thursday, but there’s several little loose ends that needed finishing.

The new plotter is all wired up, on the correct circuit, and is linked in with N2K and Garmin’s version of Ethernet (which works just fine with normal cables.)

I replaced one of the last two incandescent lights in the boat, that being my reading light in the V-berth. I had a chart table flexible LED light sitting around, so now I have a red and white LED reading light over my side of the bed. And, I rerouted the wiring in the cabinet properly and swapped out a threesome of butt splice crimps for a properly done terminal strip.

I added a few 12v outlets so that I can stop charging phones off the back of the TV. The TV came with the boat. We don’t have TV at home, but on my project list is a Raspberry Pi based HTPC for the boat so we can use the TV for more than just a big USB outlet.

I finally swapped out the old dead electric horn for a shiny new two horn air powered model. It’s much louder(as in it actually works) and sounds pretty nice. Now I can put away the canned air horn I’ve been using. Buttons at both helms, so I can sound the horn from either.

I ran the wire for the windlass control up to the flybridge. Ran out of time so I didn’t install the switch, but that should happen on Thursday. I also moved the power to my GMI-10 display from the “Salon Lights” to “Instruments” circuit like I should have done initially. One of the reasons why I like plain English labels instead of circuit numbers. I added a few more labels to hopefully avoid the same mistake in the future.

Josh
 
This is a great stage to have reached—seeing tangible results like operating plotters and horns, vs the dull but necessary foundational work that we often have to start with on a refit. Congrats!
 
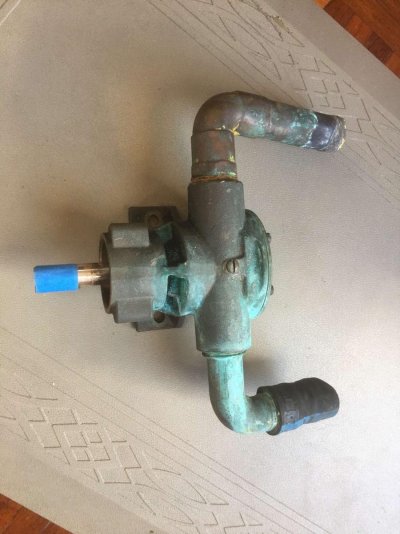
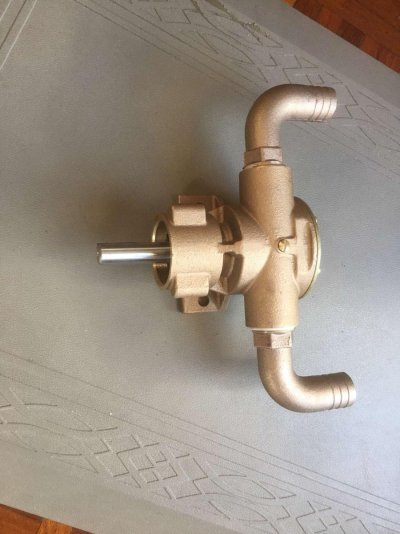
Yesterday was pretty productive. I got the pulley off the old raw water pump, but it wasn’t fitting the keyed shaft easily. Rather than pound on it at the boat, I’ve brought it to work where I have much better tools.

Here’s the “old and busted” vs. the “new hotness” in pump-land:
IMG_0201.jpgIMG_0202.jpg.

I got the stove working again. Last year, on a crossing back from Santa Barbara Island, it was rough enough that the propane bottle mounting was broken and the bottle flailed around (before I figured out what the banging was) and wrecked the propane system. So now that’s fixed, and the bottle is double strapped and secured with some all-thread. We’ve been cooking on a camp stove sitting on the built in, so that’s one more thing off the boat.

I added a few more 12v outlets, these up in the V-berth. I have a CPAP machine and this will make it much more convenient to use. I’ve been using it on its own battery and then recharging, now I can just run it off the house bank.

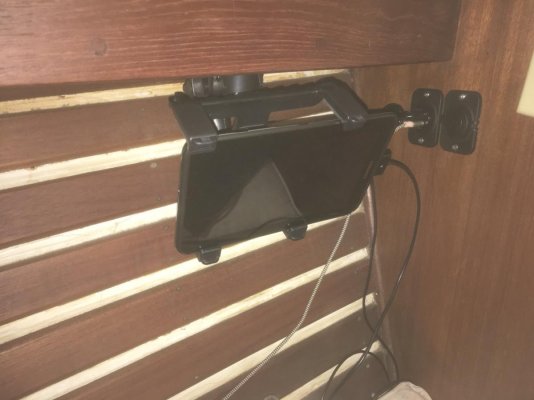
This last project is a bit odd. I mounted an old 7” Android tablet that I had laying around. It’s in the V-berth on my side. I’m going to use it as an instrumentation repeater down below. Now that my wife and kid are taking watches on night passage, I have a fixed way of checking while off watch. We did our first one last year and I used my phone, now it’ll just be installed. It probably seems crazy, but it allows me to check up on things without intruding on them and seeming like I’m checking up on them. As someone who has done a lot of single-handing, I haven’t made the adjustment to sleeping solidly “off watch” and it will make it convenient just to take a quick peek at the radar/AIS when I pop awake every hour. I’m hoping that as we get more hours in together that will go away, but for now I’ve facilitated my neuroses.IMG_0204.jpg.

I ended up taking the dinghy out to the anchorage to help a fellow boater with some electrical issues. It was nice to look at a different set of projects for a bit. I had the cables he needed in a box of old wiring, so that’s more stuff off the boat.

It looks like the weather might line up with my days off and the wife and I can make it out to San Miguel Island next week. She’s never been, and it’s been five years since my last foray out there. Hopefully we’ll trial a few of the new things before our two week Catalina trip next month.

Josh
 
2 year refit of C&L 37 Europa

I’ve been plugging away and making good progress since we got back from a great four days at the islands. That being said, I thought I had removed most of the PO’s booby traps.

I missed one!

So I wanted to remove the TV antenna amplifier box since I removed the TV antenna last week to install a wind instrument (I’m a total weather geek.) I had seen the power cord disappearing into a cabinet when I was running new wire for DC outlets in a drawer cabinet. So I figured I’d just cut it and back pull rather than remove all the drawers again...

Imagine my surprise when I cut it and blew the 110V AC outlet circuit with my cutters. I didn’t even know it was an AC device.

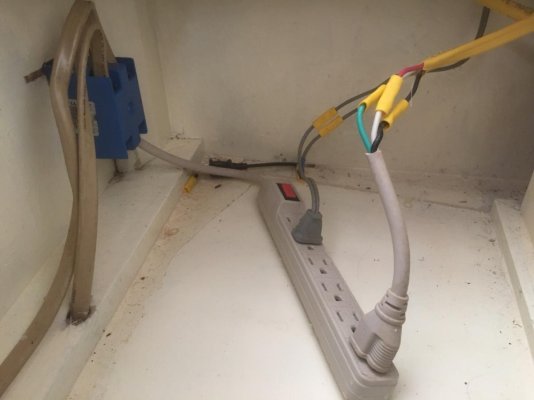
So after checking my underwear for marks, I started tracing it back down, and here’s what I found!

IMG_0247.jpg

Yep! They spliced in a plug strip into the outlet box, and then crimped a plug onto the downstream wire they removed, and plugged it in. I’ve been using the outlet downstream of that when in the slip. Then they crimped the AC plug onto the amplifier cord and plugged it in...

I’ve changed most of the AC outlets out, but apparently I didn’t do that string, an error I shall be rectifying shorty (pun intended.)

Arghhhh!!!!! So frustrating. I thought I was past this stage!

Josh
 
Lol! Well now, if that’s not ABYC certified, I don’t know what is!
 
You gotta love DIY wiring. I had somethings like that in my boat when I bought it. They had added a 30 amp inlet without any bepreaker and just hot wired it to the distribution bus bar. Many other things. My boat would trip the GFIs on the dock just by plugging it in without anything turned on. I ended up replacing the main panel and doing a lot of rewiring. I can now plug into a GFI dock without any problems. Good luck with your projects.
 
Just to continue my ranting... I just got done replacing their “added” outlets, since as I was working my way back I found a stretch of solid conductor 14-3 Romex (and you had to know they used the red instead of the white) and replaced it. I had some wire left over from the last bit of the AC system I fixed, so now there’s no more solid conductor wire (that I know of) on board.

I really hadn’t planned on spending a couple hours playing AC. But it’s done now, and I’ve finished most of the DC stuff I had planned for today. I just need to finish terminating the new DC Outlet runs down in the engine space. I’m using shrink terminals and shrink wrap. Every wire gets a label from the label maker and a clear heat shrink over it. It makes everything take longer now, but saves so much time later when I don’t have to try and remember what goes where.

Josh
 
Love this sort of stuff. My boat was mostly wired with Romex and wire nuts wrapped in balls of electrical tape. In year one I found a hot wire, with the insulated part wrapped around a seacock.
 
Back
Top Bottom