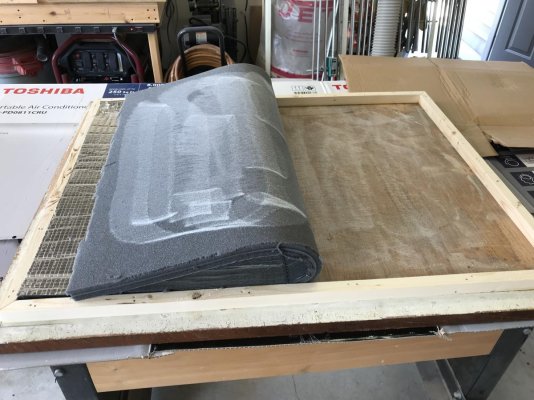
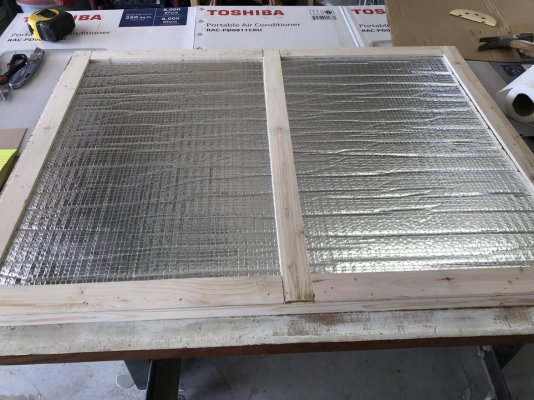
Generator Sound Shield Foam

The friendliest place on the web for anyone who enjoys boating.
If you have answers, please help by responding to the unanswered posts.
I would look for a loaded vinyl foam for better sound suppression. Look at Soundown.
 
I used this Soundown IVF1010MNSFT36, SDNIVF1010MNSFT36
 
I was not using it for the generator. I got it from Amazon for $275.
 
Its unavailable on Amazon right now. But looks like others have it for ~ 250.
 
Soundown with the 2lb per sq ft lead , mounted properly is a one time expense , but a lifetime of delight.
 
Soundown with the 2lb per sq ft lead , mounted properly is a one time expense , but a lifetime of delight.

Soundown no longer has lead in their insulation, hasn't for years as it was banned by the EPA. The current material is good but not as good as the lead.

Ted
 
Most generator manufacturers use an acoustic foam (noise absorber) in their smaller generators. That is what’s in the link in Menzies first post. The same manufacturer will use a vinyl/foam composite insulation in their larger generators.
Noise absorbers are not noise barriers, they reduce the noise level in the enclosure by covering the hard surfaces which would increase noise by reverberation.
Noise barriers have mass, like lead in the old days and mass loaded vinyl today. Same weights, 1lb or 2lb per sq ft are commonly used, so there is no weight savings from lead to vinyl.
The base line for noise from a marine generator in an enclosure is set by the noise escaping from the combustion air intake penetration in the enclosure, which is almost always baffled. Using an insulation product which will perform better than that baseline will not make the generator any quieter.
The vinyl/foam composite insulation mentioned by several above is the typical replacement. It incorporates an absorption layer with a barrier and a decoupler layer which enhances the performance of the barrier. The size is almost always 1” thick for American generators with a 1lb per sqft barrier. This is what most people use when replacing old insulation as an upgrade from acoustic foam.

:socool:
 

Attachments

  • vinyl foam insul.png
    vinyl foam insul.png
    5.7 KB · Views: 638
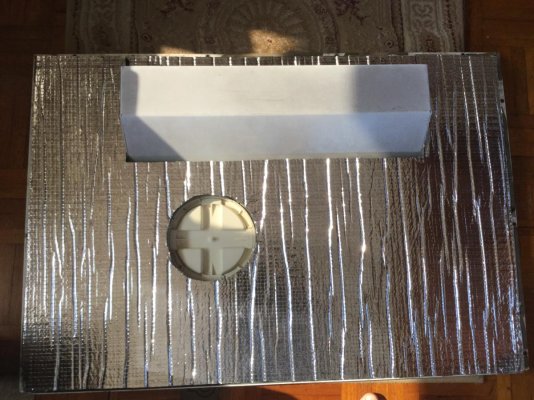
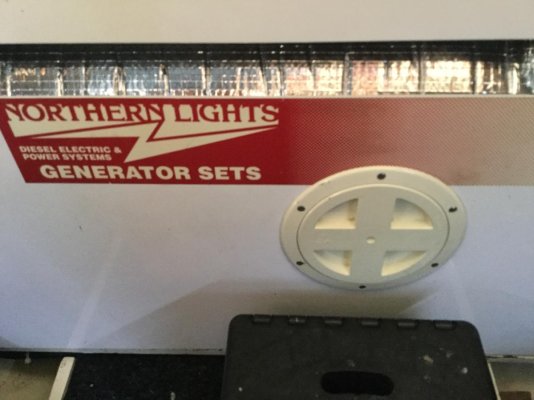
Menzies: We redid our 8 kW generator enclosure a few years ago with the 1” that Steve talked about. The panel at the generator end was the only panel we didn’t do. The electrical harness, fuel lines and exhaust hose all enter/exit thru that panel. Fortunately that panel was in good shape. After I removed all the other panels, removing the old adhesive was a lot of work. I ended using solvents and plastic razor blades to clean them up. I think you’ll be real happy when you’re done.
 
Menzies: We redid our 8 kW generator enclosure a few years ago with the 1” that Steve talked about. The panel at the generator end was the only panel we didn’t do. The electrical harness, fuel lines and exhaust hose all enter/exit thru that panel. Fortunately that panel was in good shape. After I removed all the other panels, removing the old adhesive was a lot of work. I ended using solvents and plastic razor blades to clean them up. I think you’ll be real happy when you’re done.

Thanks Larry, I just went down to measure the shield to see what I need. I will go down after lunch and take off one side and look at that end - it is on the hull side. I think I have enough room to reach around and get it off but will see if it will be a difficult job to move around those lines and get it back on.

Could you have melted the adhesive off with heat - or not a good idea?
 
...Could you have melted the adhesive off with heat - or not a good idea?

I don’t know. I didn’t try heat but it might work. A few areas did came off easier than in others.

I was able to use the pieces that came off the inside of the front air vent as a template for the new. All the others I just measured and cut.
 

Attachments

  • 9C4B9637-E403-4ABB-BB55-9D9F09ED2B36.jpg
    9C4B9637-E403-4ABB-BB55-9D9F09ED2B36.jpg
    170.1 KB · Views: 57
  • 98322E71-455D-4904-8863-8A34D32EF5D3.jpg
    98322E71-455D-4904-8863-8A34D32EF5D3.jpg
    98.3 KB · Views: 55
Be careful with heat and adhesive. If it gets too hot it might catch fire. I did that on a previous boat. I did have a fire towel handy so it wasn’t a big deal. I then went to solvents and a putty knife.
 
I used 3M Super 77 for the foam adhesive. I sealed all of the edges with aluminum tape before I sprayed on the adhesive. I sprayed the adhesive past the edge and used cardboard on the dock to prevent overspray. I used PL premium for the insulation pins. Be sure to aluminum tape of the seams. My install looks like new 10 years later, with no sags or delamination.

I too had to remove the old lead and foam insulation. The lead and facing came off readily, but the foam was stuck to the bulkheads and hull. I used an orbital finishing sander with a fairly coarse grit to remove it. I also used sound deadening paint under the insulation as a mass dampener.
 
In addition to using an adhesive spray on the new foam, where it may not be strong enough I use long screws with fender washers to help secure it if you can screw into the structure. If not use machine screws and a nut if the structure is sheet metal.
 
Hello Larry,

I trust you and Lena are safe and well.

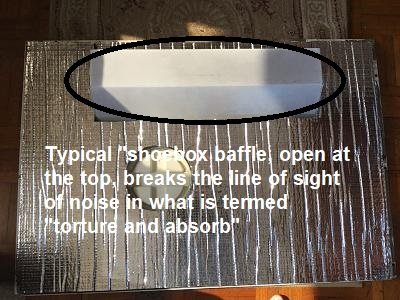
Your photo is a perfect example of the typical oem "shoebox" baffle we see in most generator enclosures. Basically breaks the line of sight of noise, thereby reducing it as it exits the enclosure.

I have seen some people that want a super quiet genset extend the baffles and make them longer and more complex without reducing the open area so they don't choke the engine.

:socool:
 

Attachments

  • 9C4B9637-E403-4ABB-BB55-9D9F09ED2B36.jpg
    9C4B9637-E403-4ABB-BB55-9D9F09ED2B36.jpg
    61.6 KB · Views: 595
In addition to using an adhesive spray on the new foam, where it may not be strong enough I use long screws with fender washers to help secure it if you can screw into the structure. If not use machine screws and a nut if the structure is sheet metal.

Good point. I did that too on my overhung load (hatches).

Be sure to poke a hole through the foam and vinyl before driving in the screw or it will wrap up like a bugger and make a big hole in the sounddown if you are using a electric driver.
 
Just a thought. I removed the sound shield from our Northern Light for maintenance purposes. Have run it that way since. Was surprised at how quite that little 3 cylinder diesel runs. Very little increase in noise without the shield. If I were to want more quite I would add sound shield to the entire underside of the deck and quite down the entire engine room. It’s nice to have easy / visual access to the generator.
 
Be sure to poke a hole through the foam and vinyl before driving in the screw or it will wrap up like a bugger and make a big hole in the sounddown if you are using a electric driver.

Great tip Spy. Use an awl or icepick to make a hole in the insulation. Another tip is if you need to drill a pilot hole, wrap the drill bit with a wrap of masking tape. Push it through the hole you made with the awl. Do the same with the screw. The tape will lessen the chance for the insulation to bugger up and create a void right where you don't want one.

:socool:
 
Folks this is for my gen set shield. I won't be adding screws.
 
Great tip Spy. Use an awl or icepick to make a hole in the insulation. Another tip is if you need to drill a pilot hole, wrap the drill bit with a wrap of masking tape. Push it through the hole you made with the awl. Do the same with the screw. The tape will lessen the chance for the insulation to bugger up and create a void right where you don't want one.

:socool:

Even better tip! I did not know the masking tape trick.
 
Does the sound shield material need to be flame proof??

The most common terms used re marine fire ratings for insulation are:

self extinguishing
fire resistant
incombustible

The grey open cell acoustic foams in this conversation are typically self extinguishing. When exposed to an open flame they will burn, if the flame is removed, the foam will self extinguish.

This meets the USCG and ABYC standards for all vessels except USCG "inspected" vessels. For USCG "inspected" vessels insulation must meet an incombustible standard. This is also true of many large boats, yachts and ships that operate under various classifications for insurance reasons like Lloyds, RINA, ABS, etc.

Incombustible insulations include most fiberglass insulation, mineral wool, ceramic fiber insulation, and there are several "exotic" types as well.

:socool:
 
Even better tip! I did not know the masking tape trick.

To avoid poking the hole, run the driver and screw in reverse until you are through the foam. Switch to forward to drive the screw. Works very well. The tip came from Soundown years ago when I rebuilt the green trawler.

Rob
 
I put vinyl weighted Soundown on the inside of the generator sound shield on the Celestial. It had self-stick adhesive on it. I did not use screws w/washers as the pieces were within the guidelines not to use them. Within a year, the foam separated, leaving the adhesive and a soft almost gooey layer of foam on the panels, but all the rest came off as a full sheet. I tried to use Scotch Spray adhesive to reattach the foam, but that failed immediately as the foam itself simply had no strength. It reminded me of reverted potting on old aircraft connectors (for those who may have worked on old USAF and Navy aircraft in the 70's) which became a soft, semi-runny, gooey mess.
 
I re-did the insulation 15 years ago on my Onan 7.5 MDJE with the vinyl-foam insulation. I used those metal spike fasteners that have a dome shaped cap that hold the insulation. I attached the base of the spikes with a Liquid Nail product to the fiberglass cover. It has held fine for all those years.

Tator
 
I put vinyl weighted Soundown on the inside of the generator sound shield on the Celestial. It had self-stick adhesive on it. I did not use screws w/washers as the pieces were within the guidelines not to use them. Within a year, the foam separated, leaving the adhesive and a soft almost gooey layer of foam on the panels, but all the rest came off as a full sheet. I tried to use Scotch Spray adhesive to reattach the foam, but that failed immediately as the foam itself simply had no strength. It reminded me of reverted potting on old aircraft connectors (for those who may have worked on old USAF and Navy aircraft in the 70's) which became a soft, semi-runny, gooey mess.

I always use a mechanical connection whether they are supposed to need one or not. If it is going into wood then I use a sheetmetal screw and a fender washer and if it is going onto metal then I drill a hole in the metal and through bolt it with a fender washer. I just redid the insulation on my deck hatches in the salon. I used wood lath to hold up the insulation along with 3M contact cement. Then we painted the lath.
 

Attachments

  • 793C19A9-545C-4122-A65A-5852352EBCFB.jpg
    793C19A9-545C-4122-A65A-5852352EBCFB.jpg
    156.4 KB · Views: 53
  • F2BB9F93-D390-4494-B333-76E6F460CC58.jpg
    F2BB9F93-D390-4494-B333-76E6F460CC58.jpg
    196.7 KB · Views: 47

Latest posts

Back
Top Bottom