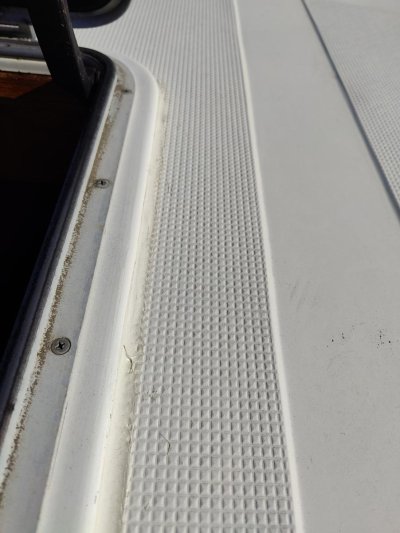
hatch rubber seal worn

The friendliest place on the web for anyone who enjoys boating.
If you have answers, please help by responding to the unanswered posts.

paulga

Guru
Joined
May 28, 2018
Messages
1,060
Location
United States
Vessel Name
DD
Vessel Make
Marine Trader Sundeck 40'
The rubber layer on the base is worn out a bit in the corner. How to replace that? It is the hatch in the v-berth of a marine trader sundeck model. Please see my attached photo.

IMG_20240110_110659.jpg
 
Measure the thickness and width of the current tape. Then look on Amazon for some closed cell foam tape the same size with a PSA on it. Then remove the old tape, clean off the sticky residue with something like acetone. Stick the new tape on. Make sure it is closed cell so it doesn’t absorb water.
 
peel and stick adhesive? the adhesive should be on both sides of the tape, right?

I may leave this one for summer while applying 3M sealant on the outside for now.

No, the foam tape will come with PSA stuck on it. You peel the paper off the PSA and then just stick it onto the hatch. It is really simple except for cleaning off the old tape which may or may not be a PITA.
 
To figure out and take the assembly off will be the major part for me.

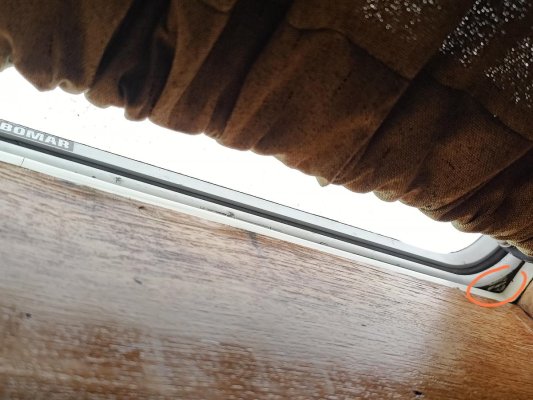
The area in the circle is where the rubber material worn out. Do you mean to remove the hatch window, unscrew the hatch base, flip it over, clean off and apply new tape?


IMG_20240110_133102.jpg
No, the foam tape will come with PSA stuck on it. You peel the paper off the PSA and then just stick it onto the hatch. It is really simple except for cleaning off the old tape which may or may not be a PITA.
 
No need to disassemble it if you can access it good enough to get the old tape off and the new tape on.
 
isn't that just a vinyl trim piece? not part of the hatch? it looks like it more closely follows the shape of the wood rather than the radius of the hatch.
 
isn't that just a vinyl trim piece? not part of the hatch? it looks like it more closely follows the shape of the wood rather than the radius of the hatch.

yes, it is a vinyl piece that aligns with the wood edges.
it is somehow bedded to the deck
The base of the hatch is screwed on top of the vinyl piece, with a piece of rubber thingie in between for water tight seal (I think this rubber layer has worn out and lost the water seal)
the hatch window rubber seal is pressed down on the base when the hatch is closed
 
I don’t think the vinyl trim is part of the hatch or integral to the seal of the hatch base to the deck. If it’s leaking between the hatch base and the deck, the hatch needs re bedded. That’s a job for better weather. It takes some effort to break the hatch free from the deck without damaging either the hatch or deck material.
Usually, the hatch is bare aluminum and you provide the bedding material.
 
If it does need rebedding, the best material I've found is Butyl tape. There are more modern sealants that are supposedly better, but I've had the best luck with old school butyl.
 
If you're going to lift a hatch to apply a sealant, Why not use butyl tape before reinstalling the hatch? It probably has better longevity than foam tape.
 
I'm planning to do it in the summer

Where do you apply butyl or bed-it tape?

The hatch base is fastened to the vinyl below with screws, not bolts. I remember screws do not provide enough torque to compress the butyl?


If you're going to lift a hatch to apply a sealant, Why not use butyl tape before reinstalling the hatch? It probably has better longevity than foam tape.
 
Typically, the hatch will have screws going straight down through the base into the deck. The bedding would be in that interface. Any screws going sideways into anything are probably for a trim piece. Open the hatch and go up top and see if you can see the screws that hold it down.
 
I'm planning to do it in the summer

Where do you apply butyl or bed-it tape?

The hatch base is fastened to the vinyl below with screws, not bolts. I remember screws do not provide enough torque to compress the butyl?

I guess you won't know until you take the hatch out. In my case I had to remove the hatch when I rebuilt my front deck and added 3/4-in ply in the rebuild. In my case I had plenty of wood "meat" to screw in the screws to hold down the hatch. Butyl comes in a roll (black, white or grey) and you simply unroll it around the perimeter of the opening where the hatch would go, then you drop in the hatch, shoot the screws, and you're done.

In your case I'm not sure what is underlaying your front deck. I doubt it's just vinyl. Repairing other parts of my boat, I had plenty of stripped out wood holes where screws just wiggled themselves out. In those cases, I used either Dowl or toothpick and cyanoacrylate them into place, cutting them flush, and then shooting new screws. It's just like new wood and the screws hold very well
 
Thanks for the ideas. What else are included in rebuilding your front deck? Did you have to build something to protect the deck from the elements during your project? What I remember is a tabular tent but that is only doable when the boat is on land.

I guess you won't know until you take the hatch out. In my case I had to remove the hatch when I rebuilt my front deck and added 3/4-in ply in the rebuild. In my case I had plenty of wood "meat" to screw in the screws to hold down the hatch. Butyl comes in a roll (black, white or grey) and you simply unroll it around the perimeter of the opening where the hatch would go, then you drop in the hatch, shoot the screws, and you're done.

In your case I'm not sure what is underlaying your front deck. I doubt it's just vinyl. Repairing other parts of my boat, I had plenty of stripped out wood holes where screws just wiggled themselves out. In those cases, I used either Dowl or toothpick and cyanoacrylate them into place, cutting them flush, and then shooting new screws. It's just like new wood and the screws hold very well
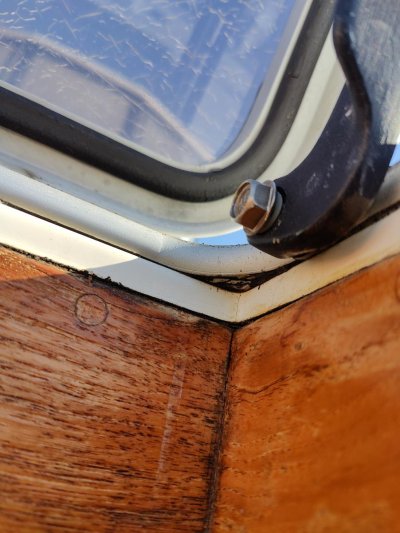
 
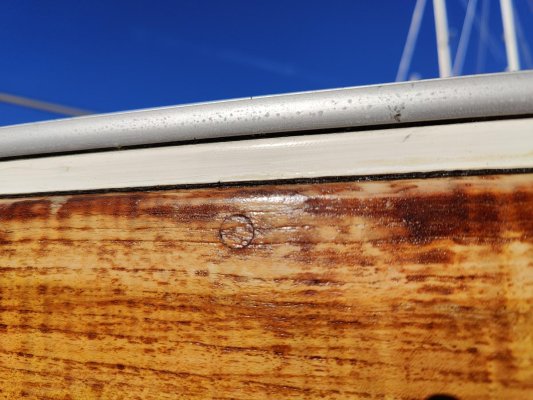
It seems to be some butyl between the hatch bottom and the vinyl piece, and between the vinyl and the wood

IMG20240112132910.jpg

The seal between hatch and vinyl is already weakened. Is butyl or 3m 4000 on the outside perimeter sufficient to reenforce the seal?

IMG20240112133156.jpg

Hatch is screwed to the deck

IMG20240112133039.jpg


Typically, the hatch will have screws going straight down through the base into the deck. The bedding would be in that interface. Any screws going sideways into anything are probably for a trim piece. Open the hatch and go up top and see if you can see the screws that hold it down.
 
Thanks for the ideas. What else are included in rebuilding your front deck? Did you have to build something to protect the deck from the elements during your project? What I remember is a tabular tent but that is only doable when the boat is on land.


Hi paul. You're very observant in my Marine Trader project thread. I did have the pop-up shelter on the hard when I was rebuilding my foredeck. However the bulk of my protection from the elements came from tarps that I stretched across the foredeck as it was under construction. I usually put these up every night before wrapping up for the day. The pop-up shelter was just to give me shade from the scorching sun while working in the boat yard.
 
Back
Top Bottom