Kitchen faucet delta starting to go

The friendliest place on the web for anyone who enjoys boating.
If you have answers, please help by responding to the unanswered posts.
It feels like you been beaten up by the gorilla after contorting and bending and stretching and slipping and have parts fall into cracks and banging your head into overhangs and...
 
Yes looks like a filter. Canvas material looks to be there to cover probably deteriorated wood cabinet laminate.

--Kevin
 
Greetings,
Mr. N. (Your post #26). Next time you have to work over a sill, apply padding (pillows/ensolite/life jackets) over the hard edge. Helps enormously.
 
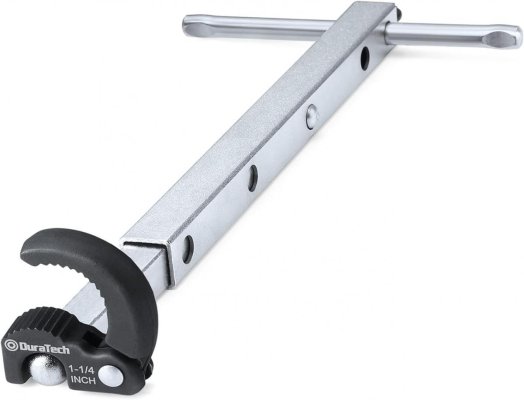
Buy a good basin wrench, not a cheap one,stuff a large pillow under the sink and go to it. If it's really rusted just cut it off and drop it through from the top. It's not a high quality fixture to begin with. You can crush the escutcheon plate with a channel lock pliers if you need to and get it out of the way if you absolutely have to work from above.
 

Attachments

  • basin wrench.jpg
    basin wrench.jpg
    54.6 KB · Views: 20
Aren’t plumbing fixtures like this all brass? I’m not getting all the comments about rust. What’s rusting?
 
No, not all brass. Different alloys on the threaded connection parts and the nuts that secure it.
 
Aren’t plumbing fixtures like this all brass? I’m not getting all the comments about rust. What’s rusting?

I wondered the same thing. I've purchased at least two dozen faucets over the last 10 years (many house remodels). Some have plastic components (even expensive ones - shower trim plate for example), but even the moderately priced ones are some flavor of solid brass. I've given up on the European faucets (Grohe for example). Delta, Kohler, and Moen are my go-to. As a specific tip, I won't buy a faucet that requires a special tool to remove the aerator. Most easy to service are the aerator cartridge holders that are external to the spout with flats on it so you can put a wrench on it to remove. The cute little recessed ones that require a cylindrical wrench are very pretty but not always servicable.

Boats often have extra deep sinks. Access to the faucet can be exponentially more difficult.

Peter
 
Yeah, I think mine is over a foot deep. Reading this I'm thinking when it's my turn I'll disconnect the hoses and start banging with the rubber hammer and pop the sink with the faucet still attached.
 
How to disassemble a rotating style faucet handle

The faucets in the heads are the rotating style. They are not compatible with the quarter turn handles. I'm curious how they come off. I watched several videos but this is not covered.

IMG20231210140349.jpg

IMG20231210140644.jpg
 
Those faucets are secured to the counter with 2 large (usually plastic) nuts over the hot and cold inlet pipes.
 
So the first step requires removing these nuts from beneath the sink using a basin wrench, correct?


Those faucets are secured to the counter with 2 large (usually plastic) nuts over the hot and cold inlet pipes.
 
Advisory: The intend of my comment is not to be bad.
If you don't know how to remove a faucet you better get a plumber or you will run into trouble sooner or later that could be worse.
If you really want to learn and do it yourself start watching few videos about faucets and plumbing on youtube, all faucet are more or less the same.

L
 
I have watched a few videos that covered faucets tiered by difficulty level, but this style is not talked about. So I'm curious if this handle has some hidden screws and can be changed as easily as other styles.

Initially I was thinking if this handle can be changed to quarter turn style. Now I see they are not compatible.


Advisory: The intend of my comment is not to be bad.
If you don't know how to remove a faucet you better get a plumber or you will run into trouble sooner or later that could be worse.
If you really want to learn and do it yourself start watching few videos about faucets and plumbing on youtube, all faucet are more or less the same.

L
 
Last edited:
So the first step requires removing these nuts from beneath the sink using a basin wrench, correct?

First you shut off the water, then disconnect the feed lines and then you can remove those nuts that hold it to the counter. They are usually not super tight (because they are plastic) and your hand may work fine. But you have to contort your arm around the sink which is the hard part.
 
I have watched a few videos that covered faucets tiered by difficulty level, but this style is not talked about. So I'm curious if this handle has some hidden screws and can be changed as easily as other styles.

Initially I was thinking if this handle can be changed to quarter turn style. Now I see they are not compatible.

From the above, it appears to me that paulga is looking for advice as to how to take the faucet's handles off of the faucet, not remove the faucet itself from the countertop.

If so, in the case of the clear plastic knobs it could be that there is a cap at the top of each knob, about 1 1/4" in diameter that using a sharp knife you can carefully lever up and off which would expose a screw that once removed allows the rest of the knob to pull of the valve's shaft. It may take some gentle persuasion using a lever if the knobs have been on for a while.

With the white porcelain 4 spoke handles, look for a set screw somewhere between the spokes to unwind using an allen key or hexagonal bit socket. Once out, again lift up with gentle persuasion.

Once the knobs are off you have access to the valve itself, which in most instances it is easy to remove to old cartridge, clean the valve body and install a new cartridge.
You do all of this work from a standing position in front of the sink, no sore ribs, backache, pillows or profane language is required, unless you forgot to turn the water off first.

Also, there is no need to remove the faucet from the countertop.

Good luck, nobody likes a dripping faucet.
 
Go to the manufacturer website and it will show you schematics and exploded view of the faucet. that should show you everything you need to know.
 
Thanks for the explanation
So both are indeed very similar styles already covered in the videos I watched

They are not dripping now. I was considering changing the handles to a quarter turn style. Now that they are not compatible, I would leave them as is.

From the above, it appears to me that paulga is looking for advice as to how to take the faucet's handles off of the faucet, not remove the faucet itself from the countertop.

If so, in the case of the clear plastic knobs it could be that there is a cap at the top of each knob, about 1 1/4" in diameter that using a sharp knife you can carefully lever up and off which would expose a screw that once removed allows the rest of the knob to pull of the valve's shaft. It may take some gentle persuasion using a lever if the knobs have been on for a while.

With the white porcelain 4 spoke handles, look for a set screw somewhere between the spokes to unwind using an allen key or hexagonal bit socket. Once out, again lift up with gentle persuasion.

Once the knobs are off you have access to the valve itself, which in most instances it is easy to remove to old cartridge, clean the valve body and install a new cartridge.
You do all of this work from a standing position in front of the sink, no sore ribs, backache, pillows or profane language is required, unless you forgot to turn the water off first.

Also, there is no need to remove the faucet from the countertop.

Good luck, nobody likes a dripping faucet.
 
If you want quarter turns, you have to replace the whole thing.
 
an update:

I received the repair parts shipped directly from Delta (two pars: RP61 - cam and cam washer, RP25- Orings), then ordered the complete repair kit for the special wrench and the ball assembly.
Thanks for all your inputs, I was able to connect all the dots. I found two youtube videos that filled in all the details, e.g. plumber grease. Each video is only ~9 minutes, I watched several times before starting, but still spent a couple of hours last night, including figuring out how to keep the cam nub aligned with the notch on the valve body when installing the cap assembly. I turned on the f.w. pump this morning, to my disappointment, water was leaking pretty strongly from the handle. it could be the cam was not aligned perfectly with the notch, or the cap was not tightened fully.

The cam assembly in the complete repair kit is the same as the existing one, however, it's difficult to ensure alignment with the notch.

IMG20231215173823.jpg
so I replaced it with the cam assembly from Delta (RP61), which is one piece and easier to be pressed against the notch.
IMG20231215171533.jpg
The complete repair kit has two thick o-rings (same as RP25) and two thinner o-rings. I improvised to put one thin o-ring on the valve body (it will be at the bottom of the cap assembly). this time I tightened the cap assembly using a groove joint plier, as the adjustable wrench did not grip well. Finally, no leak when I turned the water on, like shown in the video.
 
Last edited:
Back
Top Bottom