Impeller replacement

The friendliest place on the web for anyone who enjoys boating.
If you have answers, please help by responding to the unanswered posts.

PhilPB

Guru
Joined
Oct 5, 2021
Messages
763
Location
Palm Beach County
Vessel Name
Sun Dog
Vessel Make
Mainship 34
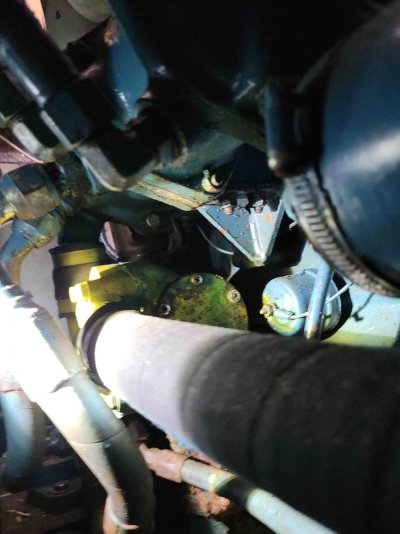
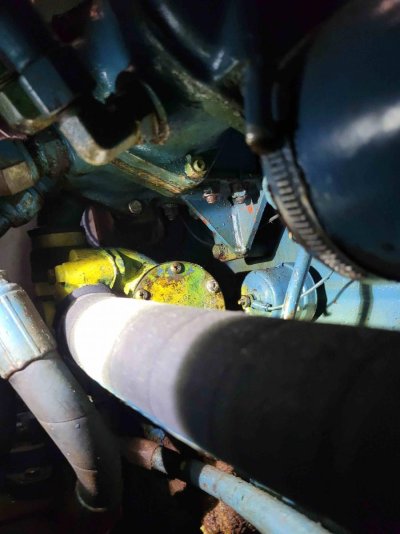
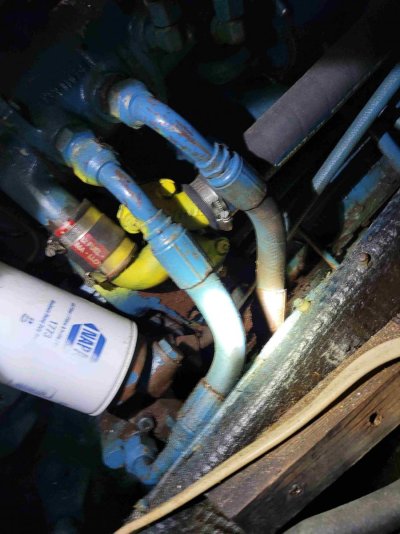
Well, it's been 2 years and a few hundred hours since the last impeller change on my Perkins so I suspect that it may be time to do it again. I'm embarrassed to say that this is the first time I plan to do it myself not pay a mechanic. I've got the new impeller and believe I found the plate (has Jabsco imprint on it) where it lives. I hope that it will be as straightforward as it doesn't seem to be a difficult project to do.
I do remember the mechanic that did all maintenance on the engine when we bought it explained that his trick for installing the impeller is to first note the direction of the vanes of the old one before removal and use a tie wrap to help compress the new impeller vanes in the correct direction before installing, then cut and remove the tie wrap after it's far enough in.
 
I changed mine myself for the first time this year and found this video helpful. I was going to buy an impeller puller -- kind of looks like a miniature version of a gear puller in auto work -- but I have very tight clearance between the front of my engine and the bulkhead and thought the impeller puller might not fit, so I used his two-screwdriver method instead and it worked easily.


You'll find lots of YouTube videos on how to do it, but I just happened to play this one first. This video isn't for a Perkins (or Jabsco) but they're pretty generic. He says the direction of the vanes doesn't matter when you put it in, it'll flop to the proper orientation when you start the engine, but I didn't want to test that. I pushed in the new ones with the vanes in the same direction as the old ones that came out.
 
One important caution...
The pump housing in the video doesn't appear to have an Oring groove (likely has a gasket) so prying against the housing with pick or screw drivers OK. If your housing has an Oring groove it is very easy yo damage the thing land area.
Having a good puller that fits is a better way.
My Johnson pump has a threaded impeller hub and the threaded type puller works very well.
 
Caveat..... I did not watch the attached video from kthoennes so this "trick" may have been covered in it.
After the thru hull is closed and the pump cover is removed, spray (reasonably liberally) the inside of the pump and the old impeller with WD 40, and then bump the engine with the starter (but do not start the engine). This will move the lubricated impeller and allow for an easier removal. Before installing the new impeller, grease up the impeller, pump shaft, and the inside of the pump plate with a "rubber safe" lube. Some water based "sex lubes" work well, but there are other sources available.
If the old impeller has any "missing parts", you should find them (downstream usually inside a "cooler") and remove them to ensure proper cooling.
Good luck, it is not as bad (hard) as it at first seems.
 
Yep, I agree with Bacchus for sure -- I'd much rather use the puller and do it properly, and I figured buying the puller was worth it because it's annual or bi-annual maintenance, so it's not like I'm only going to use the tool once. I had no choice though because of tight clearance, so I did leave the old gasket on until I got the old ones out, to try to cushion the edges of the cup.
 
So needle nosed pliers wouldn't work? I didn't think about the impeller being a tight fit.
 
The steps to change an impeller are straightforward in concept - absolutely DIY. The complications in my experience relate to access, adequate leverage to push the new impeller all the way into the housing, etc... The pump on the outboard side of a twin engine set-up can be the problem child if you can't easily position yourself at the pump. If you have good access, it's a no-brainer in my opinion.
 
It's kind of buried but I think I can get to it.
 

Attachments

  • Compress_20230920_133700_0866.jpg
    Compress_20230920_133700_0866.jpg
    110.7 KB · Views: 58
  • Compress_20230920_133659_9931.jpg
    Compress_20230920_133659_9931.jpg
    98.1 KB · Views: 59
  • Compress_20230920_133658_8973.jpg
    Compress_20230920_133658_8973.jpg
    136.3 KB · Views: 53
On our last boat one of the water pumps was almost impossible to get to. I bought a Jabsco puller. The T handle would not fit so I bought some metric althread and cut it so I was just long enough to do the job. Then put double nuts on one end so I could use a wrench. Then the impeller came out easily. I also put Speedseals on both pumps, made it way easier to change the impellers but unfortunately they went out of business. To put the new impeller in I got a tool from impellertool.com. It is a machined aluminum housing that you lube up the new impeller and the tool has a funnel shaped end to help twist the impeller into the tool. Then insert the tool into the pump, hold the impeller in and pull the tool out. Really makes it easy to do. As to the alignment of the fins on the impeller it doesn’t matter which way they are facing, the first time you crank the engine they will align in the proper way.
 
As long as we're talking impellers, I know about soap or some other lube on the fins, but it's also my instinct to use some kind of sealant on the gasket. Nothing I've read or seen says anything about any sealant or goop of any kind on the gasket. Anybody use anything? Maybe that's just an automotive instinct of mine - and I sure wouldn't want to use anything that would glue the gasket to the cup, making the next change more difficult.

And P.S., yep, like Phil's post my impellers are buried almost as tightly so I had limited tool options.
 
I didn't see it mentioned. I would order or acquire some spare screws and of course new cover gasket before starting. Probably 50/50 that you might break one or two screw heads off.
 
I think I'm going to spray the screws with pb blaster a couple days before disassembly, just in case.
 
As long as we're talking impellers, I know about soap or some other lube on the fins, but it's also my instinct to use some kind of sealant on the gasket. Nothing I've read or seen says anything about any sealant or goop of any kind on the gasket. Anybody use anything? Maybe that's just an automotive instinct of mine - and I sure wouldn't want to use anything that would glue the gasket to the cup, making the next change more difficult.

And P.S., yep, like Phil's post my impellers are buried almost as tightly so I had limited tool options.
Instinct yes. Well, I have read the opposite, no sealant, the gasket is suppoesed to do that job.
 
If anyone needs to retrieve broken vane pieces from a downstream cooler... I've had success usingba shop vac alternating sucking from the pump housing and blowing into a removed hose on the discharge end. Sometimes it takes multi times but keep at it until you have accounted for all pcs or only missing small pcs and retrieval has stopped.
 
Another idea for making this process easier is to change the screws to Allen head screws. I find it much easier to undo Allen screws in tight places than the slot-head screws that most impeller pumps have. Ditto for re-installing them.

Do not use gasket goop. It might help a one-time seal, but will be a pain to remove to ensure a seal when you next try to install the cover plate.
 
I use silicone grease to hole either the O ring or gasket in place while I am assembling it.
 
I’m not a big fan of levering against the housing to remove the impeller, as any nicks or gouges may affect cover plate seal. I can’t get a puller to fit, but find using 2 small needle nose vise grips on opposite remaining impeller vanes is inexpensive & works reliably on my Westerbeke 4 cyl gen as well as both JD 6068 mains.
On reinstall, the zip tie works if needed, it doesn’t matter which way you fold the vanes, they will immediately fix themselves with the first revolution. A squirt of Dawn provides the initial lubrication until water flows.
Most new pump cover plates seem to come with hex head slotted machine screws these days, or as other suggested replace with SS cap screws.
 
I scratched the direction of the vanes on the outside cover.

Use two slotted screwdrivers to pry the old impeller out.

Grease the housing with antifreeze or dish soap.

pete
 
Yes. As always I have learned far more than I would have via "Figuring it Out". The knowledge I have gained and instructions I have received from the members here has been amazing!

Although, Dave's suggestions that I go with are always convincing enough to spend more $ for better!

I'd like to say Thanks to all!!!
 
I use my needle nose vice grip or just a needle nose plier to pull out the old impeller. WD40 if stubborn.
 
I use a hose clamp to compress the vanes. I made a puller out of a plumber's faucet seat remover...chump change and it works.
 
So needle nosed pliers wouldn't work? I didn't think about the impeller being a tight fit.


That’s what I use, but I have easy access to my raw water pump. I just partially work it out one vane at a time, going around the impeller, until it has been removed. I use a cable tie on the replacement to cinch in the vanes and use silicone lubricant fit it back in. I don’t worry about orienting the vanes in the correct direction…if properly lubed and installed, a crank of the engine orients them in the correct direction. I’ve never had one of these fail or had torn vanes, so I don’t think you have to worry about orientation. I also have a speed seal, and sourced the thin replacement “O” ring seals from an industrial seals place called “Fluid Seal”. The whole procedure takes about 10-15 minutes.
 
Last edited:
I use a hose clamp to compress the vanes. I made a puller out of a plumber's faucet seat remover...chump change and it works.

I looked at my plumber's faucet seat remover and can't figure out how that would clamp down on and remove the impeller, unless it was very small. Do you have a picture of it that you can share?
 
When installing the new impeller, I’ve found putting it into a container of hot tap water for ten minutes will soften it enough you can simply start to rotate it and push it onto the shaft by hand, no zip ties, hose clamps etc required. A bit of soap for lubrication is optional.

James
 
On my Perkins, I can’t get even a stubby screwdriver on some of the impeller cover screws because there’s no clearance. I have to use a right angle screwdriver, I have a little ratchet unit that’s like a tiny socket wrench.
 
On my Perkins, I can’t get even a stubby screwdriver on some of the impeller cover screws because there’s no clearance. I have to use a right angle screwdriver, I have a little ratchet unit that’s like a tiny socket wrench.

I put Speedseals on our last boat. They come with thumbscrews to secure the cover. Very easy to use.
 
Back
Top Bottom