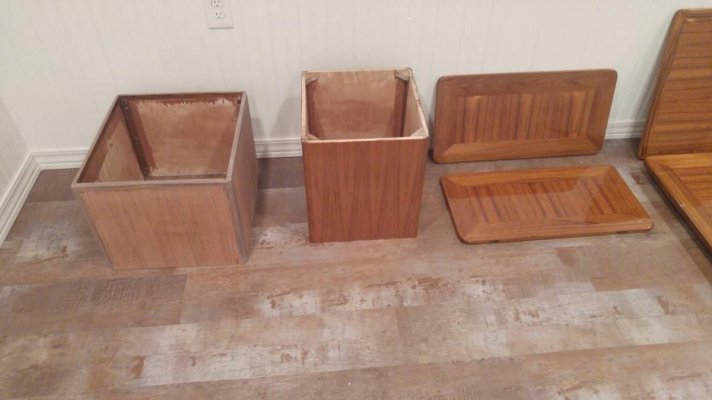
New Salon Table build

The friendliest place on the web for anyone who enjoys boating.
If you have answers, please help by responding to the unanswered posts.
Syjos:

This tabletop folds over onto itself. No room for a thick surface finish as you are suggesting. Simple to finish with a good quality varnish, interior if away from teh sun, exterior, with UV inhibitors if exposed.


I thought the OP was asking about WEST epoxy under the varnish.

The epoxy, after sanding, is not that thick but hinges and other hardware would require shimming.
 
Koliver, you just saved my bacon! I had not considers the build up thickness. I could have done the build up if I would have waited to miter the hinges in after finishing the table. In hind sight that is probably what should have happened. Details, details, details.

Dave: You are welcome. I have done the mortising of hinges into $$$/bf teak, so I know you wouldn't want to have to move yours.
 
Great work, Dave! I jig nearly all the time for routing.

Current project will require mortices for 34 butt hinges in Khaya (sold as African Mahogany). Two sizes of cabinet doors; three hinges on the tall and two on the short. I'll rout both door and cabinet at the same time.

A previous project, 4- 9'1" tall interior storm doors on splayed jambs, required an angled jig for the 12 butts.

I don't see any need for an epoxy seal coat / primer for an interior or exterior Teak table. 'Way too much like work! A tip: you can file the worst unevenness in the cured epocy, then use a scraper for most of the rest. Then wet sand to adequate perfection.

Marty, you really did do well with that purchase!
 
I thought the OP was asking about WEST epoxy under the varnish.

The epoxy, after sanding, is not that thick but hinges and other hardware would require shimming.
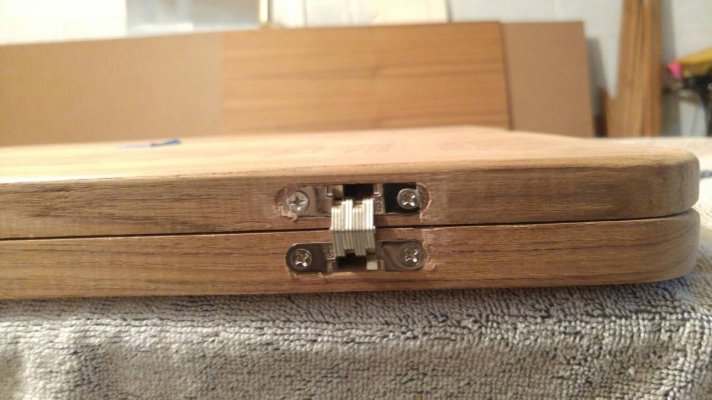
Syjos, I was headed that way. It sounded like a good way to get a high build look. As for shimming, the hinge mortise is 1/8" from the edge. No margin to shim.
Always learning [emoji6]
 
Syjos, I was headed that way. It sounded like a good way to get a high build look. As for shimming, the hinge mortise is 1/8" from the edge. No margin to shim.
Always learning [emoji6]

Yes the epoxy gives it depth that varnish alone will not.
 
Yes the epoxy gives it depth that varnish alone will not.
I think I will use the epoxy method on the one side of the leaves that will show when folded over. That won't unpack hinges. The table will be folded over 95% of the time.
 
You do realize that if you coat the top with epoxy and varnish, the hinge mortise will get coated with an equal thickness of epoxy and varnish so the hinge will be level with top or close so shimming would not be required.

Just cleanup of the mortise edges with a chisel to square the sides and maybe the bottom to make sure hinge is level with top. Or a router if you used a gig.

Even just varnish will change the relationship of the hinge to the top surface.
 
I appreciate the help, thanks. I think the only thing I can adjust on the hinge is depth. That will account for any increase on the end edge.
The surface that is visible when the table is fully open can not be built up because I can't (don't want to) move the hinge toward that 1/8" thin edge of the mortise.
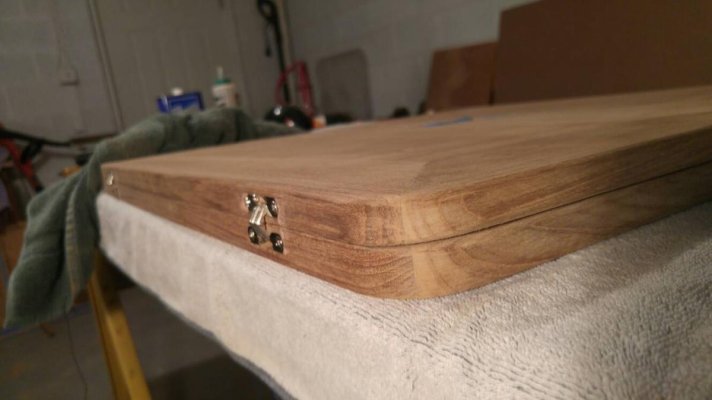
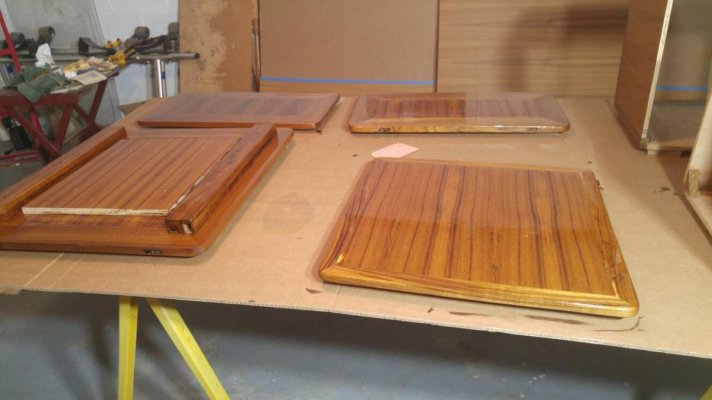
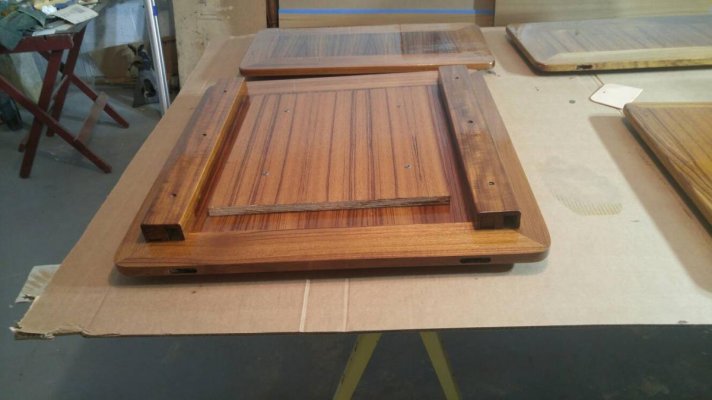
I can build up the folded over top without impacting hinges. 0616201524.jpg0617201551a.jpg0617201552.jpg
 
You guys have infinitely better woodworking skills than I will ever possess. I'm impressed!

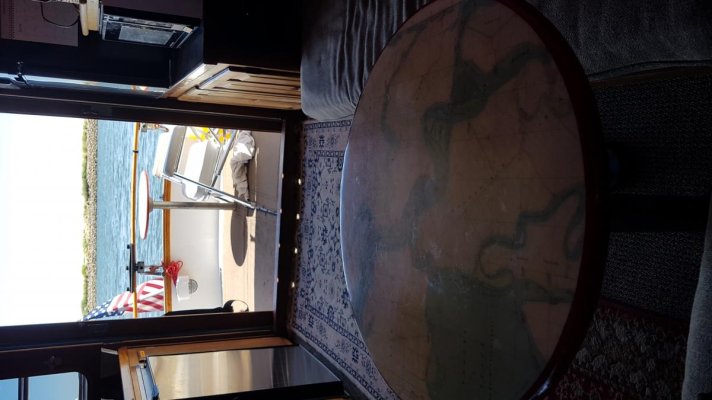
I stick to local charts under epoxy on 22" rounds. I got tired of the big table too.
 

Attachments

  • 20200617_135819.jpg
    20200617_135819.jpg
    90.7 KB · Views: 82
Table Build Questions

Pedestal enclosure glue up pic.View attachment 103840

I hate my wrestle in place table setup and have been gnashing my teeth at the cost and limits of what I've found pre-fab on the internet.

You are definitely NOT a hack... I am going to brave up and attempt this also. The pedestal enclosure looks really great.

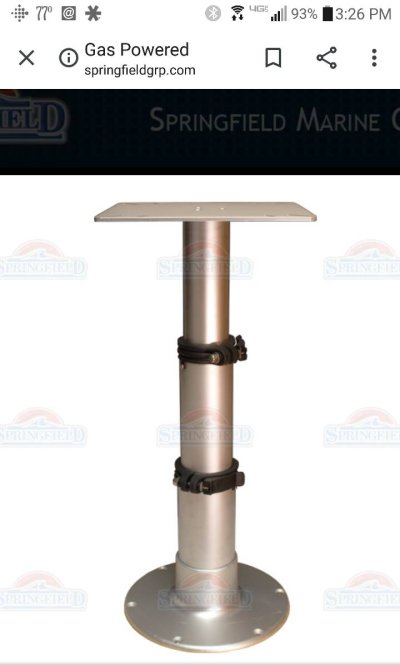
Question: How do you access the locking clamps for the pesetal with the pedestal cover boxes in place? Am I missing something obvious?

David
 
Question: How do you access the locking clamps for the pesetal with the pedestal cover boxes in place? Am I missing something obvious?

David[/QUOTE]

David, my plan is to tap a rod onto the cam-lock lever and bring it through the enclosure box. I have to figure out the details later when the back ordered pedestal comes in.Capture%2B_2020-06-19-15-27-03.jpeg
 
I appreciate the help, thanks. I think the only thing I can adjust on the hinge is depth. That will account for any increase on the end edge.
The surface that is visible when the table is fully open can not be built up because I can't (don't want to) move the hinge toward that 1/8" thin edge of the mortise.
I can build up the folded over top without impacting hinges.View attachment 103987View attachment 103988View attachment 103989

Wow! Great workmanship.

I've done similiar work and familiar with the woodworking skills required to build something like that. You tackled a pretty ambitious project for your first woodworking project. You must have read all the past issues of Fine Woodworking before starting. LOL

You now have a retirement hobby business!
 
I can imagine

Very well done! Our long-gone-at-the-hands-of-a-previous-owner setee table must have looked like your original. The ragged holes in out Teak and Holly sole were still there, until I fixed them.

We're happy to have loose furniture in the salon for flexibility. And, we never have need for the additional berth.

Our table was mounted on one of the four, heavy lift-out ER access panels. I cannot imagine lifting that panel with the table mounted on it!

***
I can help with that---The whole thing tips and falls into the engine room
 
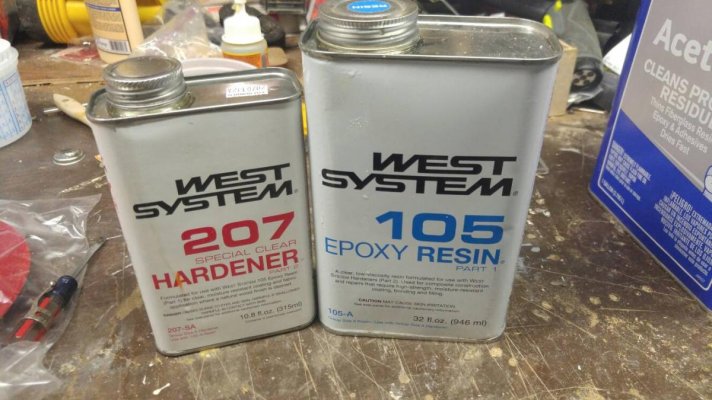
Started West System today. Using 207 clear hardener. What a rip off on price. I bought a can and took it back because the can was half empty. When I got the new can home it was half empty. So I pours it out and measured it. 10.8 oz just like it says on the can. 10.8 oz for $52...BS. You can get a 42 oz can for $99.
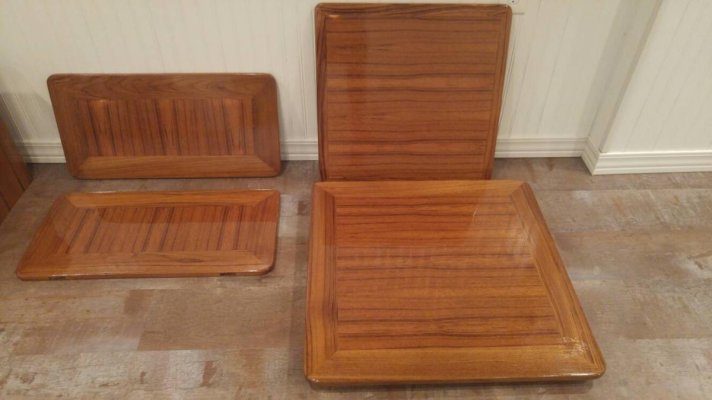
Epoxy is off gassing on the first coat. I will get two coats on and then put on poly after it cures a week.0624202114.jpg0624202111b.jpg0624202111a.jpg0624202110a.jpg
 
Started West System today. Using 207 clear hardener. What a rip off on price. I bought a can and took it back because the can was half empty. When I got the new can home it was half empty. So I pours it out and measured it. 10.8 oz just like it says on the can. 10.8 oz for $52...BS. You can get a 42 oz can for $99.
Dave, if you really want to save money, buy the 52 gallon drum. There are no more boat projects in my life that will justify the savings of buying it by the drum. :nonono:

Ted
 
I layed up the 2nd coat of epoxy WHAT A MESS! I spent 4 hours sanding it back down. My mistake was not rolling and tipping it. 2nd coat was to thick and it doesn’t level well. Alway learning (and making it harder than it has to be[emoji2957])
I tend over think everthing. It comes from working in nuclear power. I should have just layed up a bunch of coats of poly
 
Last edited:
For epoxy being used as part of your finish, you might try system three silver tip.

One, you will think west system is cheap.

Two, if you topcoat with anything else, the silvertip chemistry is almost always playing nice. It doesn’t blush and won’t cause varnish to crater. I use it too often, because I don’t have to think much about compatibility.

If it’s going to be in the sun, very few epoxy have useful UV protection and can often yellow. I’ll often throw on a varnish top coat. Another one is waterlox. I’ve just started using it. It’s a varnish but you can practically wipe it on. I’ve had it on my cork countertops since last year and it’s been wearing really well with decent use.

I’ve been using west again laminating some window coring. The dispensers are really convenient and versatile product.
 
There's another thread about tung oil finishes and I have no idea what is different about Waterlox but I have used it and really love it for furniture finishing.
It has proven very durable and easy to recoat.
I have thinned and wiped on, as mentioned, for interior teak and it worked very well sort of like a teak pile finish except very durable and longer lasting.
 
Good timing for this thread [emoji4] so I made new name plates that goes on the side of the flybridge out of mahagany. I started with West 105/207 epoxy and finished with Epifane varnish. The problem is I got a lot of bubbles when doing the epoxy. I basically had to sand down the first coat of epoxy to remove the bubbles. I then applied another thinner coat of epoxy and there's still bubbles. It's like the wood itself is gassing. I used a plumber's blow torch to remove them as best as I could but they kept coming back even after 30 mins. I used a brush to apply the epoxy and tipped it once the whole panel was done. It was bare wood sanded with 80 grit and cleaned with acetone. Temperature was about 70F and humidity 70%. What did I do wrong? Any tips?

Same thing happened with the varnish in the same environmental conditions. A lot of air bubbles. I was really careful not to create bubbles when stirring the can and did not work the varnish too much. Tried with thinned and untinned with pretty much the same results. Sanded the top coat of epoxy with 220 grit and used dewaxer. Subsequent sanding was with 400. From what I read, it's pretty standard procedure but I'm sure I'm doing something wrong or I missed something [emoji52]

Thanks [emoji4]


I had bubbles on the first coat. I should have sanded after the first coat. I will not use epoxy as a base coat ever again. Too much work and too many problems. I weighed my epoxy down to the gram when mixing. I know from previous efforts that if you go to heavy on the hardener it will bubble. I should have just gone with straight polyurethane. I am going to layup epoxy today with a foam roller and tip with a brush. I screwed up putting too much on with a brush last time. I had to San to bare wood in spots, so I have to get that base coat on before I can move on to the poly. If not it will have color variations that won’t look good.
Good Luck
 
To avoid bubbles from wood gassing is to heat the wood with an electric heater before applying the epoxy. If small parts, I put it into a box with the heater. Take the wood away from heat and apply the epoxy. As the wood cools, it contracts and draws the epoxy into the wood instead of bubbles forming in the expanding cells resulting in gassing.

For the final coats, I put the mixed epoxy into an airtight container with a hose attachment. I connect an air hose to the container and pressurize it a few pounds. That will force the air bubbles out of the epoxy. Heating up the epoxy prior to coating will also help reduce air bubbles.

Applying epoxy with a squeegee or notched spreader will reduce bubbles. Tipping the epoxy with a brush will pop bubbles. Heating the wood while applying epoxy will also pop bubbles on 2nd and additional coats. The first coat when clear coating is done as described above..
 
Last edited:
I too am dealing with a dinette table for my refit boat. I was going to have an image of Vancouver Island cut out by some machine type I can't remember but the price was bizarre. So instead I'm toying with a native carving for the center of the table embedded in clear epoxy surrounded by finished wood.
 
I converted our permanent mount salon table to two movable smaller tables that could be linked together to get back to the size of the big one.

I used self-leveling crystal clear bar-top epoxy for the finish - don't try to get the bar finish with regular West, etc. epoxy. You should seal the wood first with a very light coat to prevent outgassing.

Full project writeup here: Salon Table Modifications
 
***
I can help with that---The whole thing tips and falls into the engine room

I've done that, thanks. We have four large hatch panels. They lie on stepped perimeter structure plus one longitudinal beam that lifts out, and two short cross beams that lift out. I've cudgeled for ways to hinge 'em with gas strut lifting assist.
 
I've done that, thanks. We have four large hatch panels. They lie on stepped perimeter structure plus one longitudinal beam that lifts out, and two short cross beams that lift out. I've cudgeled for ways to hinge 'em with gas strut lifting assist.
The hinges for the hatches with assist pistons is another project after I remove my stationary table. My hatches are very heavy and I have to lift them out everyday while cruising to do ER checks. Someday my back is going to tell me I shouldn't be doing the lift[emoji33].
 

Latest posts

Back
Top Bottom