Solar power project

The friendliest place on the web for anyone who enjoys boating.
If you have answers, please help by responding to the unanswered posts.
Joined
Feb 16, 2022
Messages
1,200
Location
Stockton
Vessel Name
Dream Catcher
Vessel Make
1979 Island Gypsy 44 Flush Aft Deck
I did the deed and ordered up the stuff.

Three 200W thin film panels, a 60A MPPT controller and some hardware, tools and extension cables. Halloween sale, 20% off - :)

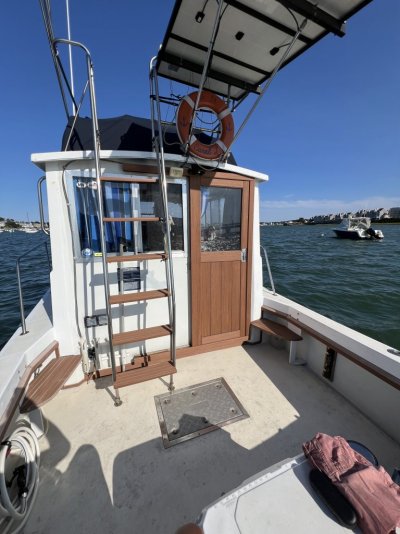
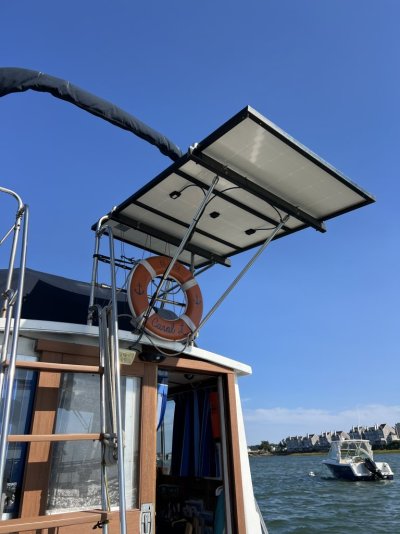
Going on the fly Bimini, won't even see them. Going to use neo magnets on the panels (8 each) and series wire the set. Will add 20 pounds to the canvas and require no holes.

Once I figured out how to get them up there, the path was clear. Going to pull them over the top with strings with washers attached - :)

I love it when a plan comes together - :)
 
Thanks for posting - I'll be interested to see how your project works out. I've got a 13' x 14' bimini over my head doing nothing, and a 14' x 6' aft deck roof, also just sitting there doing nothing. Sure would be nice if all that square footage were productive.
 
Thanks! I'm pretty jazzed. The fly bimini you see to the left is way up there eh?

I have good hopes for the "strings tied to washers" plan. Toss the strings over, stick the washers on the magnets, pull and place more magnets as she goes until she is is up and then stick the steel disks on the bottom for the first 6, pull the strings off and stick the last 2.
 
Since the Vmp is 24v and the Voc is 30 volts, three panels give a maximum voltage of 90 volts wired in series. That is enough to kill you. Standard DC wiring practices are not appropriate at that voltage. So be very careful installing and using those panels.

David
 
@Delta Riverat
Why did you decide to go series instead of parralell. I ask as series is used to keep total voltage below the Mppt max volts, parralell allows three to operate independant, whereas in sweries all three are compromised if only one is shaded.
 
I don't think they will get much shading way up there.
 
Since the Vmp is 24v and the Voc is 30 volts, three panels give a maximum voltage of 90 volts wired in series. That is enough to kill you. Standard DC wiring practices are not appropriate at that voltage. So be very careful installing and using those panels.

David
Yes, I plan to - :)

Series just makes the wiring easier and neater. Aside from the wires along one side of the Bimini and down one support strut, you won't even know the boat has solar. Can't see the panels from anywhere on the boat or the dock. Since the berth has a steel roof, no sun will hit them when docked either. Yeah I know there will still be output, but not a lot me thinks
 
Here’s my setup on Cape Dory flybridge..325w panel,30a victron charge controller,2 (232ah) 6 volt us batteries in series producing basically a 2800 watt system that you can use half of being lead acid.Mastervolt 1200w inverter/charger and balmar 200 battery monitor complete system…very happy with setup since 2020…just got 2nd set of batteries this past spring. I leave the original 1989 norcold fridge on around the clock,22” flatscreen in cabin we use in evenings…batteries are usually topped off by late morning…use acr charging relays to top off 2 start batteries in system…solar setup was about $1100 back in 2020 including the 2, 6 volt batteries..good luck with your setup,Mike
IMG_3637.jpeg
 

Attachments

  • IMG_3554.jpeg
    IMG_3554.jpeg
    149.7 KB · Views: 12
  • IMG_3553.jpeg
    IMG_3553.jpeg
    116.9 KB · Views: 12
  • IMG_2969.png
    IMG_2969.png
    524.3 KB · Views: 11
Last edited:
Ordered up the hardware today.

Got these 1 inch counter sunk neo magnets, #10 SS machine screws, SS nylock nuts, rubber backed SS washers, 2 inch steel disks and some mylar sheet. The mylar is to go between the steel disks and the canvas so if I need to take them down I can slide a putty knife between the disk and the mylar and avoid cutting the canvas.
 
600 watts of solar inna box;

54105251582_94ef73621f_z.jpg


The controller arrived also and looks good. Even included 6g ring crimps for the cables. Speaking of crimps...

54106119816_22d21428a5_z.jpg


This is a cut off crimp on a 2/0 cable done by me and that hydraulic die-less crimper I was excited about during the stereo-inverter project. I thought I'd saw through a cable that I replaced to see if the advertising was as good as the result. Call me pleased.

Looks like a solid bar of copper eh?
 
Last edited:
Back
Top Bottom