It seems I am updating everythink but the kitchen sink. Well here goes

The friendliest place on the web for anyone who enjoys boating.
If you have answers, please help by responding to the unanswered posts.
What product did you buy? And did you cut it yourself or have it cut?


Thanks
Paul

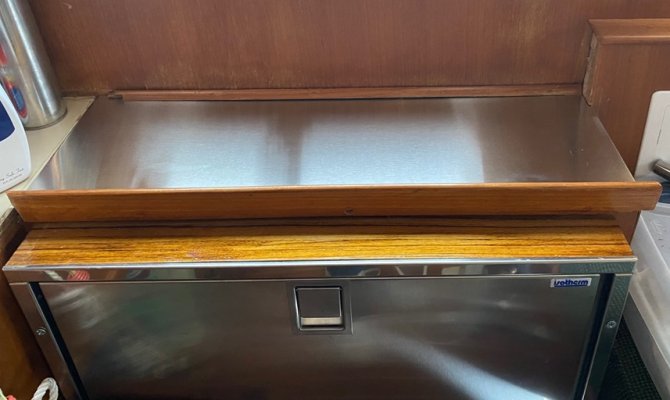
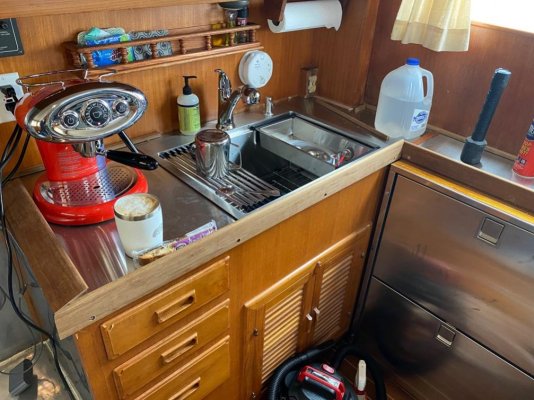
Most people say it is Corian but that is a brand name. Like Formica for high pressure laminate. Corian is a solid surface material and there are many companies that make solid surface. I don’t recall the exact brand I used but check solidsurface.com and see what they have. One problem is that a lot of places will not sell it to a DIYer. The website above will sell it to you and they have lots of articles on how to. It is really much easire that you would think to work with. If you don’t have huge pieces that need to be glued together it is easy. With the proud fiddle on your counter you can trim it to size and drop it down into the fiddle so the front edge is hidden by the fiddle. I used some gray caulk to fill the small gap in between the solid surface and the fiddle. Also on the ends. I left a small gap at the ends so the solid surface could expand and contract a tiny bit. Filled it with the caulk.

I started with a pattern as seen in the photos. I made it out of 1/4” luan plywood strips and hot glued the strips together. Some of the strips were scribed to fit the curved sides. Then I transferred the strip pattern to a solid piece of luan. I cut and smoothed the luan so it was smooth. Then I cut the solid surface to a rough size with about 1/4” oversized. Then clamped the luan to the solid surface material and used a router with a patterning bit and cut the material to final size. Regular woodworking tools cut the material just fine.

It really is pretty simple and the finished product will amaze you on how nice it is and what an upgrade from high pressure laminate!
 

Attachments

  • IMG_1594.jpg
    IMG_1594.jpg
    35.1 KB · Views: 116
Last edited by a moderator:
Dave, I was about to ask for that photo to be added to your other ones on the project! I turned it right way up for you, cheers
 
Picture above did not come through properly. All I got was a blurry pic of a polar bear in a snowstorm!:D
 
Good one. It was a mess but the finished countertop was beautiful.
 
Just ordered two pieces of stainless steel sheet, cut to size (Except the sink cutout. Be able to glue them down over the formica. Think it will look great, very tugish ;)
#4 finish.
 

Attachments

  • countertop001.jpg
    countertop001.jpg
    41.5 KB · Views: 19
Trouble with these duel sinks is they are too small to get a sauce pan into. Wait til you see the new one (If I ever get this one out)

Your saucepan's just too large. You are only cooking for two on a boat most times. :D
Sorry, but that huge job you've just done would have fallen into my category of...'if it ain't broke, don't fix it', but my boat was way more ordinary than yours in the first place. Never mind - you did it - it's done - will be great - well done..! :thumb::socool:
 
Last edited:
Greetings,
Mr. PB. 'if it ain't broke, don't fix it' or the corollary: If it ain't broke, fix it until it is.


200.gif
 
The first of two SS pieces arrived (The smaller of the two). Taking the trim teak off without damaging it is proving difficult. Luckily, it appears to be common stock, so I have ordered some more. Getting pricey these days. Anyway first piece above the new reffer is down.
 

Attachments

  • galleysink011.jpg
    galleysink011.jpg
    114.7 KB · Views: 20
Second piece of stainless arrive. This on has to be cut out for the sink and one corner. At first I was considering a cutoff wheel on a grinder, very messy. Then a jigsaw, slow and the blades for stainless steel cutting are expensive. Finally a 5HP nibbler. So I will report how that goes.
 

Attachments

  • galleysink012.jpg
    galleysink012.jpg
    67.7 KB · Views: 12
I have to remove the old stove to get the teak trim off to lay the SS sheet down. Well OK so here's a new stove.....
 

Attachments

  • Stove01.jpg
    Stove01.jpg
    46.1 KB · Views: 202
Second piece of stainless arrive. This on has to be cut out for the sink and one corner. At first I was considering a cutoff wheel on a grinder, very messy. Then a jigsaw, slow and the blades for stainless steel cutting are expensive. Finally a 5HP nibbler. So I will report how that goes.


Turns out I needed the grinder to start the sink cutout, then the nibbler.Once you get the right angle, the nibbler does an excellent job of cutting. It takes out a 1/4: slot in a curl of metal. The stainless is approximately 14 gauge, which is the maximum gauge the tool is rated for.


Now to take it to the boat and glue it down.
 
Countertop installed (Except a couple of trim pieces). Sink installed and plumbing done and tested. Next, wood trim.
 

Attachments

  • galleysink014.jpg
    galleysink014.jpg
    87.7 KB · Views: 21
Every Piece Of Trim Is Custom Fit

Trying to get my wood working skills back. First piece of trim took me an hour to get it trimmed to fit.
 

Attachments

  • Trimwork002.jpg
    Trimwork002.jpg
    87.4 KB · Views: 14
Recommendation:
When you replace the sink don't get a divied one. You can always add a dishpan if you need a separated sink but a large sink gives you the advantage of being able to work on large items, whole fish ect.
 
Recommendation:
When you replace the sink don't get a divided one. You can always add a dishpan if you need a separated sink but a large sink gives you the advantage of being able to work on large items, whole fish ect.
You are so right. On a boat (at least my size) a divided sink means two small hard to use sinks. Love mt new one. It comes with a bottom rack, a draining rack, and something else I have not yet tried. I will get photos.
 
Galley Sink

Continuing the teak trim work, time for a latte break. So here's the sink, on the right is the vegetable strainer, on the left the extendable dish rack, now that's already handy.
 

Attachments

  • galleysink015.jpg
    galleysink015.jpg
    121.2 KB · Views: 22
Trim work done, time for varnish

Finally got all the trim work done, Not a square angle in the boat of course) and the first coat of varnish being applied.
 

Attachments

  • galleysink016sm.jpg
    galleysink016sm.jpg
    80.9 KB · Views: 22
The photo in #52 is very small, but it's looking great!
 
The photo in #52 is very small, but it's looking great!


Thanks. so I took a couple today after the second coat of varnish. The new teak is so much darker than the original teak on the boat which is 40 years old now.
 

Attachments

  • galleysink018sm.jpg
    galleysink018sm.jpg
    109 KB · Views: 14
  • galleysink017sm.jpg
    galleysink017sm.jpg
    152.2 KB · Views: 13
Now I have varnished the teak trim, it maybe time to varnish the rest. Oh but where will it stop?


First it's time to polish the stainless that will be behind the stove and above it. Grits 800, then 1500, and finally 3000.
 

Attachments

  • galleysink019.jpg
    galleysink019.jpg
    180.1 KB · Views: 16
Ha ha, it never stops! You know that. It looks so amazing when you get a fresh coat of varnish on.
 
All done

Final install was the stove, all in and leak checked and tested. Now for a massive cleanup.
 

Attachments

  • galleysink020.jpg
    galleysink020.jpg
    124.7 KB · Views: 21
Well I would dump the kitchen sink and go with a one vessel sink. We are getting ready to put in a Elkay EFRU24169RTWC workstation sink. Check it out. Note Home depot will price match a company called Focal Point which has it for 100.00 less.
 
I have a Sundowner 32. I removed my double sink and installed a single with a new faucet. it came out hard like yours and I installed the new one using butyl tape. I love it.
 
Back
Top Bottom