A Bad Monkey Tail

The friendliest place on the web for anyone who enjoys boating.
If you have answers, please help by responding to the unanswered posts.
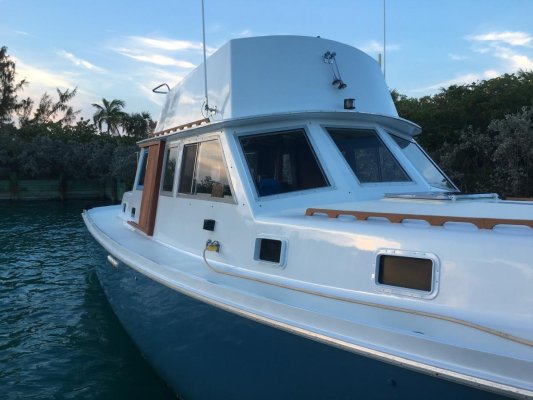
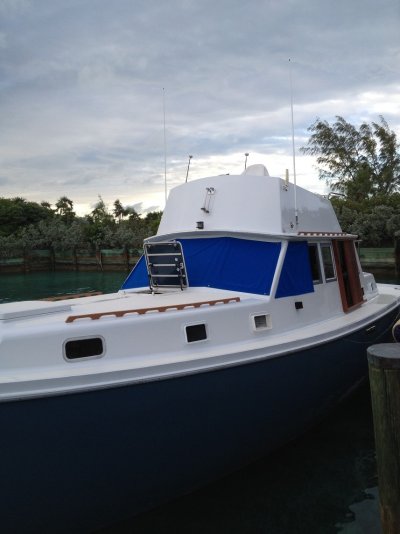
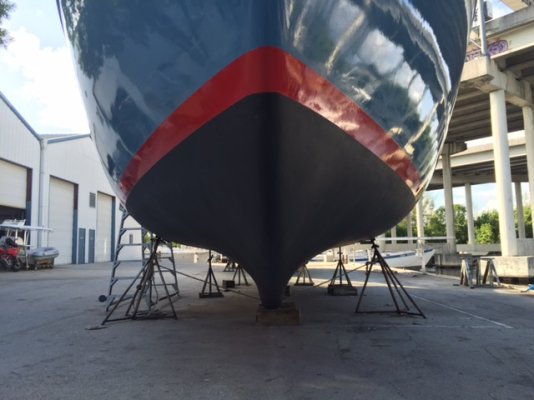
Hull colour Awlgrip - Stars and Stripes Blue
The hole has been dug but they have not started anything else on the Marina at Normans yet.
The McDuffs restaurant is open and the staff are very nice, food very good, Be warned it is expensive.
Merry Christmas to all you good peoples and loved ones.
Capstan
 
It has been a while since I last posted, this was due to work commitments and unexpected trips back home to Australia. During December and through to March hardly anything was accomplished on the Monkey, however,with the time change there is more time in the late afternoons to accomplish more and we still find ourselves on track for an 18 month completion - maybe!

Photos will follow with my next update.


Week 41 – 56
Re-install VHFs
Prime aft cabin panels
Order stern light
Paint window frames. (New screws)
Run wires for aft cabin lighting
Sand, skim and prime aft cabin floor
Trace aft cabin wiring
Terminate 110v engine room port and stbd lighting
Trace and fix 12v E/R blower
Prep Stern light wires
Run Main Engines
Check power to running lights
Connect 12v house batteries
Fit aft cabin panels and trim (1/2 completed)
Install engine room fire extinguisher.
 
Greetings,
Mr. C. If you haven't already addressed the ER fire extinguisher AND it is not a built in unit may i suggest you install it outside the ER? Makes it easier and safer to get to in the event it is needed, especially in the ER.
 
Greetings,
Mr. C. If you haven't already addressed the ER fire extinguisher AND it is not a built in unit may i suggest you install it outside the ER? Makes it easier and safer to get to in the event it is needed, especially in the ER.

Thanks RT
It is an automatic system which is also hooked up to ignition etc. Smaller portable are available outside the Engine room.
Capstan
 
Welcome back. Look forward to seeing your work.
 
Welcome back. Look forward to seeing your work.
Thanks, Good to be back! I'll get some pics and more out next week.

Like the Blog you have. Some great places you are seeing. Cold weather - mmmm - Jen not to keen on that! But one day. Alaska is a dream away.
Capstan
 
As promised some photos since getting the boat back alongside.


Weeks 56 – 60
Remove Stbd base framework Main cabin and copy in PT timber
2 x new entrance panels made and installed for main steps
Reinstall 3 x steps. 2 in Main salon and one to Galley.
Install 2 x hand holds on inside Main entrance
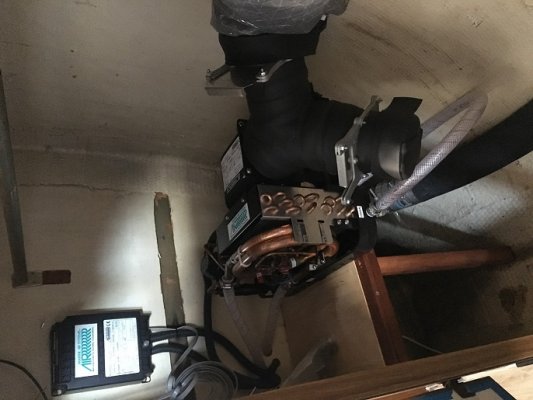
Install A/C unit, panel, pump, supply /discharge hoses andconnect electrical
Install LED Navigation Stern light – Test all Nav lights
Install 2 x LED transom lights
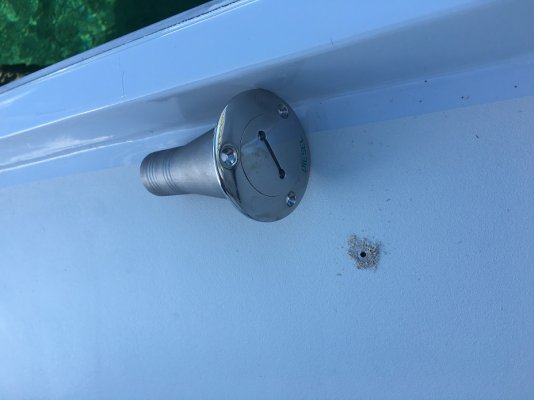
Install diesel fuel fill in Stbd deck and connect
Polish fuel
Fault find on Fuel Gauge/Sender
Remove hosing from Fresh water tank and unblock
Clean out fresh water tank
Wash and empty bilges
Tighten stern tubes
Connect Battery monitor for 12V systems
Connect and run windlass
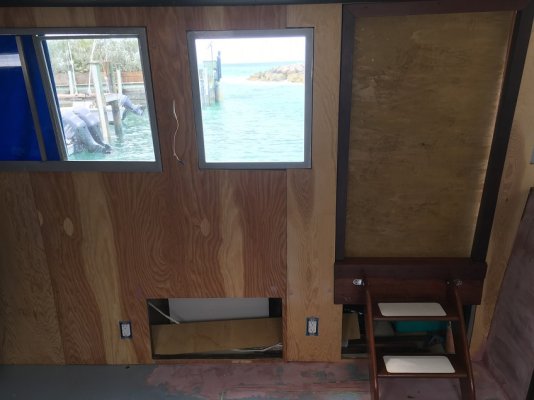
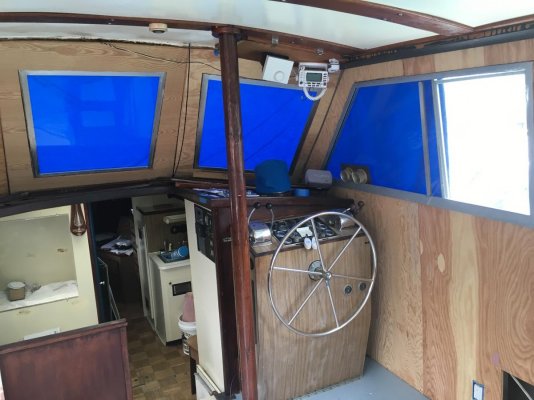
Fit new paneling in main cabin, including forward windowpaneling.
Install and wire 4 x new GPO’s main cabin
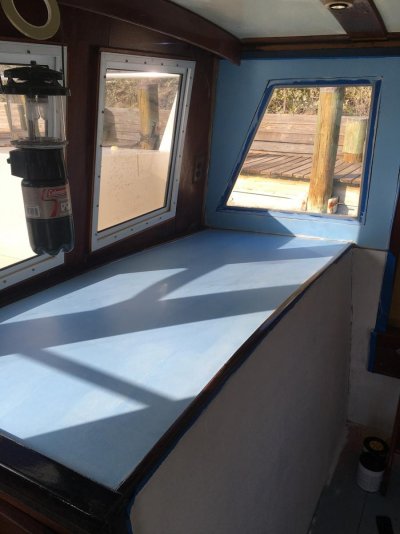
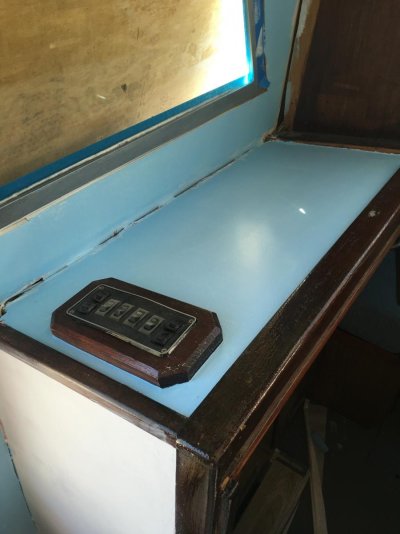
Fill and prime main cabin panels
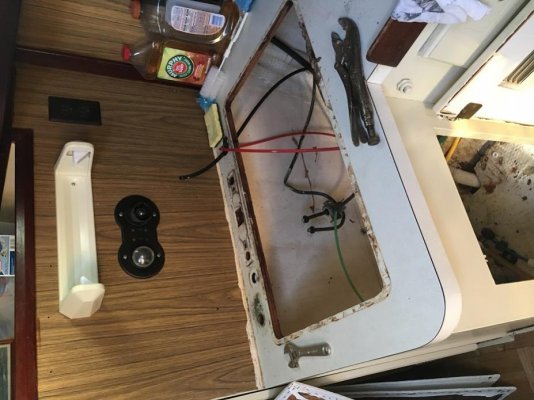
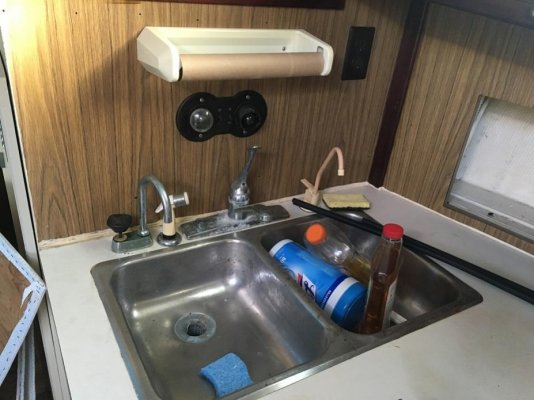
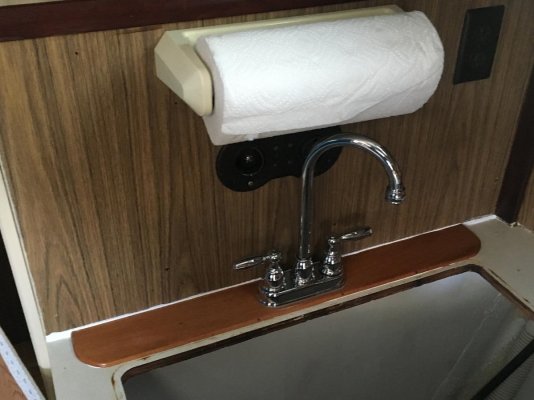
Remove galley sink + fixtures including copper tubing andplastic hoses.
Remove RO system
Prep and prime sink cupboard
Make teak base for faucet varnish and install
Remove 2 x heads for rebuild
Fill old screw holes in main cabin overheads and Galley andprime


Remove rotten timber under hatch in Galley from previousleak. Install new piece and fill
A couple of these jobs had been started before so if I have them down twice that would be the reason why - I think!
Hoping I get the boat to Lauderdale in the next month.
Found the new 3/8" Fresh water PEX tubing I bought does not fit with the 3/8" slip fittings I ordered!!!! That's the thing about ordering on line - there is no-one to say "no it's these that go with that!"
 

Attachments

  • Aft Cabin AC (1).JPG
    Aft Cabin AC (1).JPG
    125.4 KB · Views: 242
  • Aft Cabin AC (2).JPG
    Aft Cabin AC (2).JPG
    193.4 KB · Views: 248
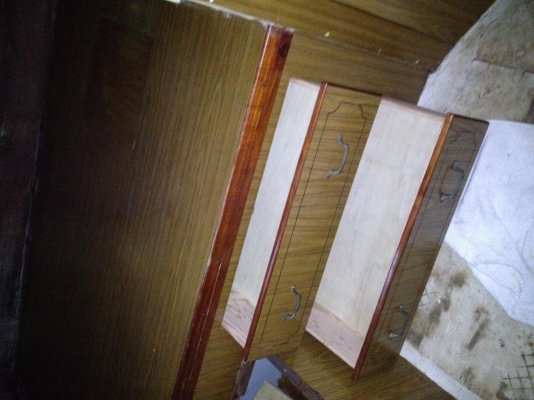
  • Aft Cabin Drawers (1).jpg
    Aft Cabin Drawers (1).jpg
    114.3 KB · Views: 243
  • Diesel fill install (2).JPG
    Diesel fill install (2).JPG
    157.5 KB · Views: 251
  • Diesel fill install (5).JPG
    Diesel fill install (5).JPG
    170.3 KB · Views: 241
  • Galley (1).jpg
    Galley (1).jpg
    85.4 KB · Views: 276
  • Galley (3).jpg
    Galley (3).jpg
    79.9 KB · Views: 236
  • Galley Faucet.jpg
    Galley Faucet.jpg
    102 KB · Views: 266
  • Handrails.jpg
    Handrails.jpg
    115.1 KB · Views: 274
  • Steps and supports reinstalled installed.JPG
    Steps and supports reinstalled installed.JPG
    139.7 KB · Views: 264
More.
While I was away a friend cut the new paneling and installed. Unfortunately he didn't seem to care about putting the finished side out. So my top marine ply has now to be painted, which isn't a problem. his heart was in the right place!!
 

Attachments

  • Swim Ladder.jpg
    Swim Ladder.jpg
    73.2 KB · Views: 250
  • Steps and supports reinstalled installed.JPG
    Steps and supports reinstalled installed.JPG
    139.7 KB · Views: 237
  • Railins and handrails (2).JPG
    Railins and handrails (2).JPG
    191.1 KB · Views: 240
  • Railins and handrails (1).jpg
    Railins and handrails (1).jpg
    94 KB · Views: 239
  • New paneling (1).jpg
    New paneling (1).jpg
    119.7 KB · Views: 245
  • Main Cabin Panoramic.jpg
    Main Cabin Panoramic.jpg
    49.8 KB · Views: 259
  • Diesel fill install (4).JPG
    Diesel fill install (4).JPG
    159.4 KB · Views: 237
Last edited:
Thought I would surprise the Boss for when she returns from vacation. Was thinking a little Bahamian flare!
Stop thinking and leave that to the Boss!!!!
 

Attachments

  • IMG_0479.jpg
    IMG_0479.jpg
    97.7 KB · Views: 219
  • IMG_0481.jpg
    IMG_0481.jpg
    88.9 KB · Views: 238
Very Happy today as I am taking the Bad Monkey on a casual 3 day voyage back to Lauderdale. Heading out tomorrow morning with my good mate Erik (The Viking)
Hoping all goes well!
Other friends went back through the pocket near Chub yesterday and scored the below Wahoo. The guy holding the fish is 6'5"
Still lots of good Wahoo and Dolphin around. We caught a 60lb Wahoo and 50lb Bull Dolphin off Highbourne 3 days ago. + other. Not Bad for 1 3/4 hour outing. Lot's of happy staff!
 

Attachments

  • Jason - Wahoo.JPG
    Jason - Wahoo.JPG
    143.1 KB · Views: 324
  • R,J,K and S.jpg
    R,J,K and S.jpg
    188.4 KB · Views: 310
Couldn't care less about sport fishing but I do love to eat fish. Those shots have me salivating. I can smell them on the gril from here :)
 
Where will you be docking in FLL?

Still waiting to hear from my friend about his dock out off Riverland Rd.
Hauling out at Art marine Sth 84 across from Bradfords but not sure when!!!
 
Successful trip! :dance:
A special thanks to my friend Erik for helping me get the Bad Monkey there safe and sound.
Weather was not what we wanted as we had anywhere from 10 to 20knots. (Mostly on the high side for the 1st 2 days!)
Just off our bow then on the beam for the 1st day from Exumas to Chub Cay. Once we cleared the West end of Nassau we had 6' to 8' seas. It was hard going, lots of green water, and we ran at approx. 2,300rpm the entire way.
Anchored the night and fueled in the morning. 105nm used 75 gallons. More than I had expected.
We left in the morning tried for some fish but only managed barracuda's. Once again Northerly to NNE 10 - 20 all day. We made for Great Isaacs Light and had a rolly night tucked in as close as possible to the rocks. Not a great anchorage but it set us up for a better angle across the Gulfstream to Lauderdale.
Next morning still blowing from NE which concerned us for the crossing but we ventured out and found the wind direction was OK and as long as the wind didn't get too strong, or veer back to a more Northerly direction we would be OK. Good crossing but 8' to 12' with, thankfully, a large period between swells.
Boarded by CBP on entrance to Lauderdale and driver managed to take paint off our hull! Very nice about it and they supposedly they will pay.
The engines ran perfect for the trip. I am sure that this 3 days of running, approx. 26 hours, is as much as they would have been run in the entire last 10 years.
Also with the conditions we were able to find a few small leaks that we wouldn't have known about if it was an easy crossing.
Approx 250nm. Have not refueled yet but suspect about 170 gallons for the trip.
Anyone else have the Perkins 6-354s and find this high/low compared to there consumption? Would appreciate some feedback on this.

Capstan
 

Attachments

  • For Erik (4).jpg
    For Erik (4).jpg
    154.1 KB · Views: 237
  • For Erik (5).JPG
    For Erik (5).JPG
    127.6 KB · Views: 243
  • For Erik (6).jpg
    For Erik (6).jpg
    87.1 KB · Views: 214
  • For Erik (7).jpg
    For Erik (7).jpg
    79.5 KB · Views: 225
  • For Erik (9).jpg
    For Erik (9).jpg
    195.1 KB · Views: 226
Week 61 / 62
Remove old linoleum tiles aft head
Strip varnish main saloon fwd.
Sand and varnish helm station main salon.
Clean and sort tools
Rip and mill teak planks
Start removal of old fresh water hosing and tubing
Prime main saloon
Deliver boat to Ft. Lauderdale
Replace light shades x 6
Buy new seal for hatch
Wash down.
Wash Stbd aft engine area. (Last time I tightened the stern gland I forgot to re-tighten the backing nut and so during the trip it backed off and threw some salt water around!

It seems my timing to go to Lauderdale was a little premature as the fabricator, upholsterer and painter are either behind or booked out for the coming month. So I will have to settle for some R and R from the Monkey. Obviously I can carry on with some organizing from here so that when the Lauderdale works have been completed we will be ready for the last few months of working to have her finished.
Until next time.
 
Last edited:
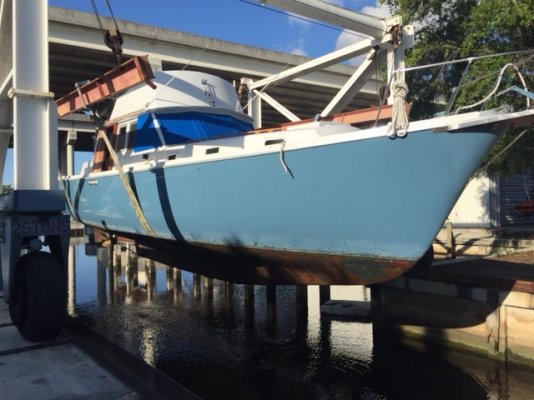
OK I know I have been very quiet but it took a while to get the boat out of the water. Finally it came out this morning. Will get to see it this afternoon.
Anyone know a reasonable priced surveyor? I just need an insurance inspection.


More soon.
 

Attachments

  • Out - Copy.JPG
    Out - Copy.JPG
    110.7 KB · Views: 191
Where is the boat hauled? That does not look like the Bahamas.
If you are in Fort Lauderdale give me a call or send a text at 954 801 3645
Tucker Fallon
 
Thanks Tucker for your help and info. Appreciate it.
 
Ft. Lauderdale
So below is roughly what we have accomplished over the past six weeks not very productive but that was my fault for not having my ducks in a row.
Where we are hauled out has just been sold so I don't know what will become of it. It is very cheap compared to a lot of places in Lauderdale and you can do your own work or have others come and go no problem or fees.
On the other side of that I did get another quote for haul out and bottom job from Vinny at Yacht Management, just East of Bradfords, and I thought it was a very good price. So that was my backup plan if I couldn't get out at my present location.
One of the fuel injection pumps had a leak hence the rebuilds. Expensive - hell yes but I wont have to worry about them for another 30 years or so!
CAV Fuel pumps removed and rebuilt
Replace fuel lines to Racors as needed
Stidd Helm chair strip and re-upholster
Tender and outboard purchase
Install 2 x Era conversion kits for heads
Sand and spray head seats
Purchase Raritran Electro Scan

Up haul vessel at Art Marine
Bottom pressure washed
Stern glands repacked
Running gear cleaned and checked
Replace Anodes
Though hulls checked and cleaned
 
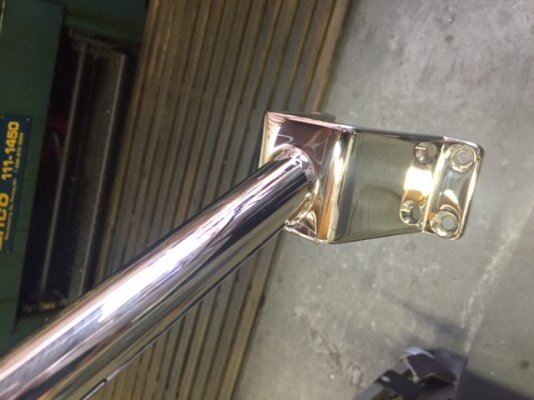
The main job I needed done and really the reason for a trip to the US was the railings. A and R marine is fabricating these and they will be welded as a single piece. Very strong and will be over the toe-rail so as to keep the whole walkway clear.
Only the one picture at the moment and just the Port side nearly finished..
Can't wait to go pick her up in August!!
 

Attachments

  • Railing 1.JPG
    Railing 1.JPG
    102.6 KB · Views: 210
Last edited:
How much was the custom rail bid? I am in need of new railing and would like to pick up the Three inches lost to my walkway by using the toe rail to anchor the railing to.
 
How much was the custom rail bid? I am in need of new railing and would like to pick up the Three inches lost to my walkway by using the toe rail to anchor the railing to.

Hi Bob,
It's not straight forward but I can tell you that if he were to quote for this boat, same size, same job it would be approx. $13,000
The amount of time is mainly taken up with the polishing. So if you don't want finished product the price would be significantly lower.
Also the yards in Lauderdale make contractors carry huge insurance etc.
My boat is right next to his workshop, which makes a huge difference, and this yard only charges a daily fee so there are no extras for contractors.
Not sure what is happening at the yard as I believe it was sold at the beginning of this month so I am sure changes are a coming!
A and R Marine is a small outfit but there work is very, very good.
They do a lot of S/S cabinetry on the Mega yachts which is where I 1st employed them. They built the underwater VW for Shark week and so on.
Andre is extremely good at solving a problem before it becomes an issue.
For instance:
the transom was to incorporate the ladder to the swim platform and he "suggested" to make the ladder independent and out of oval Aluminium (Yes I'm Australian and we mine the stuff so we know the correct spelling:socool:) so in the unlikely/unlucky event of being run into or backing into something/someone the damage would only be confined to the ladder not the rest of the railing - being twisted, ripping the bases out and so on.
I did a rough calculation a few months ago & for me to have bought the materials, 1" S/S tube, stanchion bases, railing/stanchion connectors, which is just to do a screw together S/S version, would have been around $2,000 that is before any bending, cutting, removal of overheads, base plates, bits and pieces and transom ladder made!
 
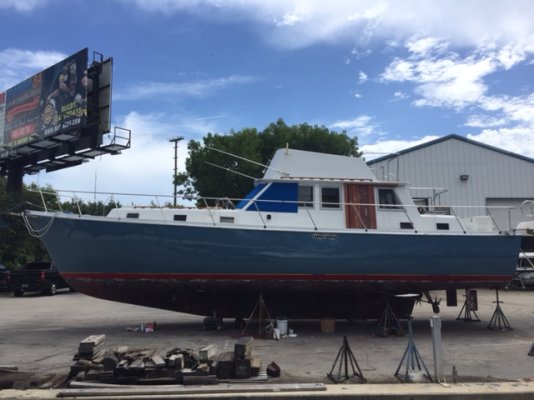
Some more photos.
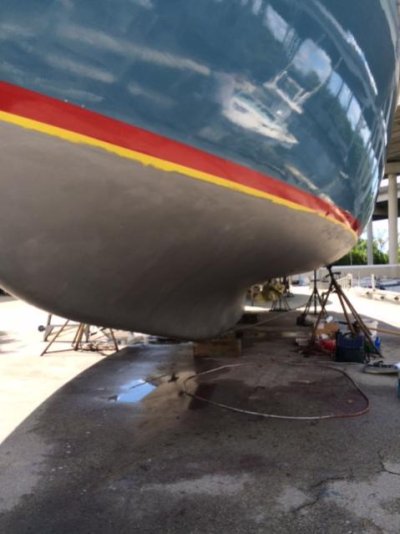
I am told the bottom was worse than it looked coming out of the water. The boys had to do some serious sanding. I don't believe any glass repair was needed but they did do quite a bit of filling. Lots of coats had been put on over the years with little removal.
Also cleaned all the through hole fittings internally. Good guys!!
These were all painted with the left over "Prop Flow" after the all running gear and props were coated. Apparently a great product and much cheaper than the "Prop speed."
The boot stripe has been completed. Anyone know where "Boot Stripe" comes from?
If it doesn't rain too much today they will complete Barrier coats and 1 of the antifoul coats!
Pics are from yesterday morning.
 

Attachments

  • IMG_1926.JPG
    IMG_1926.JPG
    92.5 KB · Views: 176
  • IMG_1928.JPG
    IMG_1928.JPG
    101 KB · Views: 175
  • IMG_1929.JPG
    IMG_1929.JPG
    89.6 KB · Views: 185
  • IMG_1931 - Copy.JPG
    IMG_1931 - Copy.JPG
    117.4 KB · Views: 182
  • IMG_1930 - Copy.JPG
    IMG_1930 - Copy.JPG
    117.5 KB · Views: 194
Last edited:
OK I know I have been very quiet but it took a while to get the boat out of the water. Finally it came out this morning. Will get to see it this afternoon.
Anyone know a reasonable priced surveyor? I just need an insurance inspection.


More soon.


DJ Clevenger, SA
DJC Marine Surveyors, LLC
954-300-7371
southfloridamarinesurveyor.com
 
DJ Clevenger, SA
DJC Marine Surveyors, LLC
954-300-7371
southfloridamarinesurveyor.com

Thanks Bill,
It looks like I have someone already. But if anything changes I will check them out.

Stan
 
Apparently the bottom is completed and looks really good.
Hopefully some side profiles and stern pictures early next week.
Railings and ladder should be completed by end of week.
Last photo is of applied barrier paint.
 

Attachments

  • Props.jpg
    Props.jpg
    79.3 KB · Views: 256
  • Prop stbd.jpg
    Prop stbd.jpg
    71.5 KB · Views: 271
  • MonkeyBootstripeJuly14.jpg
    MonkeyBootstripeJuly14.jpg
    39.3 KB · Views: 239
  • Port.jpg
    Port.jpg
    34.3 KB · Views: 265
Shafts have been checked and the stbd was pitted and burnt. So will find out today what the new one will cost.
Port side is fine
It is really the 1st "unexpected" repair of substantial cost during the project, so far.:blush:
Obviously bearing will be changed and both repacked.
You can see in one of the photos the shaft is out. No pics of shaft yet.
Latest pics of bottom.
Railing should be completed by end of week.
 

Attachments

  • IMG_1954.JPG
    IMG_1954.JPG
    90.8 KB · Views: 146
  • IMG_1956.JPG
    IMG_1956.JPG
    101.9 KB · Views: 154
  • IMG_1957.JPG
    IMG_1957.JPG
    86.3 KB · Views: 149
  • IMG_1958.JPG
    IMG_1958.JPG
    112.3 KB · Views: 161
There is something about that boat that just looks right.
I got a first hand look at it when I made a deliver to Capstan in Ft. Lauderdale.

On the subject of the worn shaft, isn't there a process where the metal is built back up and then machined round? I think propeller shops often offer the service. I may be wrong about that, but you guys will know.
 
Back
Top Bottom