Making wet storage area dry on OA Mark 1

The friendliest place on the web for anyone who enjoys boating.
If you have answers, please help by responding to the unanswered posts.

Peter Pegasus

Veteran Member
Joined
Aug 9, 2019
Messages
31
Location
United States
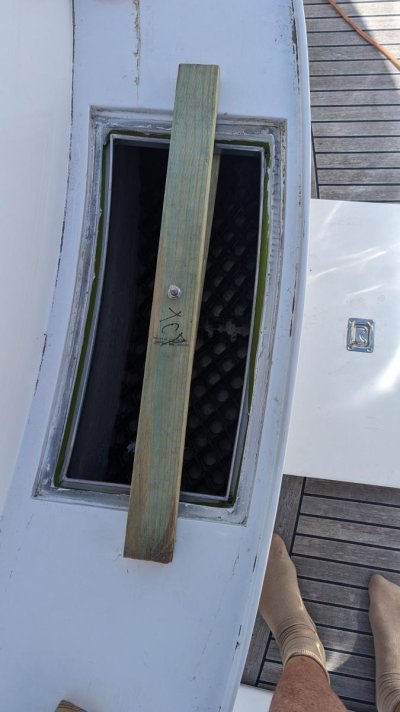
As a sailor who came over to the dark side by moving aboard M/V Aquabelle, I was surprised to find that the forward storage lockers on the Ocean Alexander Mark 1 under the flybridge, forward of the main cabin and aft of the Portuguese bridge, are wet lockers. No sailor puts up with wet lockers for long as they will lead to mildew and rot.
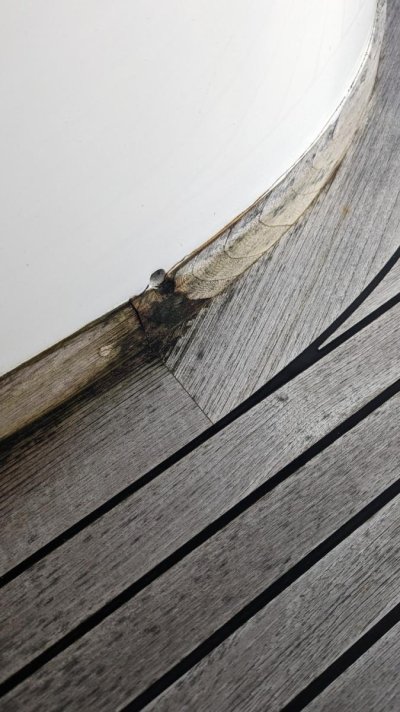
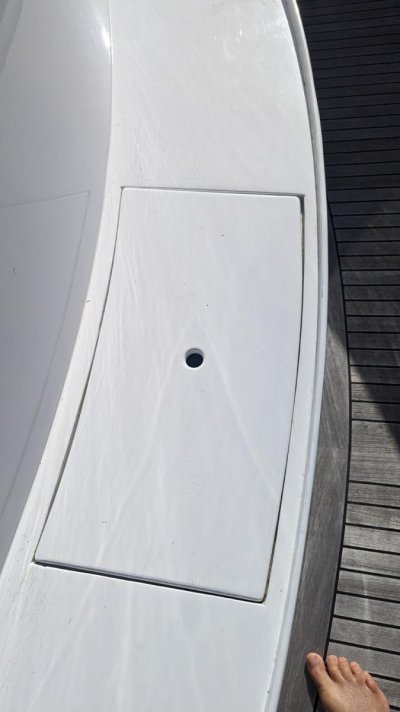
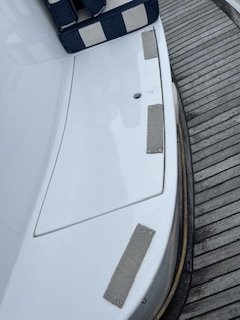
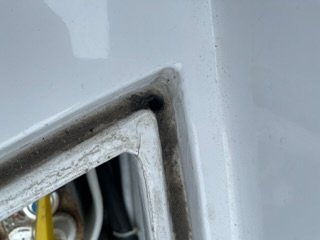
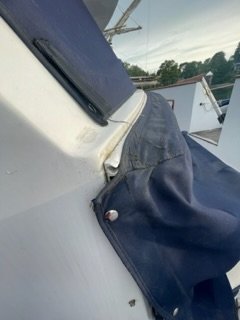
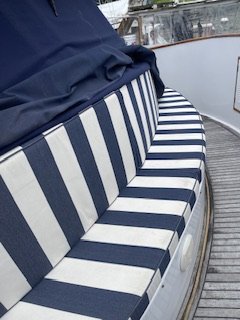
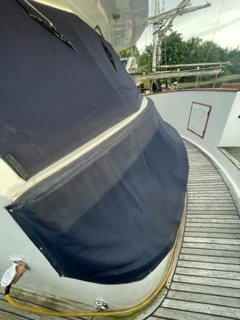
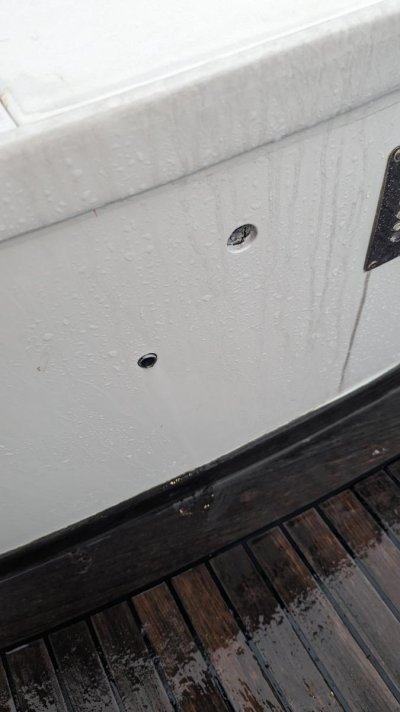
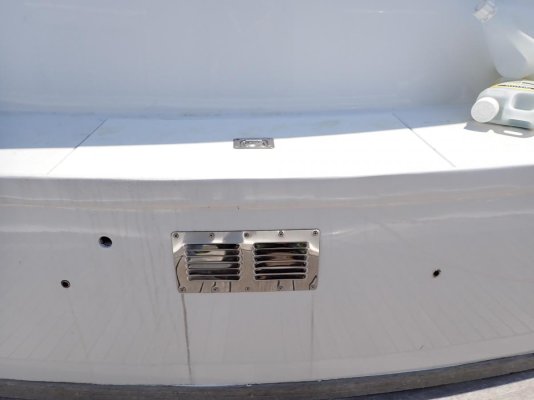
They seem to be wet by design-default or due to an oversight, with loosely fitting lifting lids that enable the water that falls from the cabin top and flybridge plus directly onto the surface of the seats to enter the storage area below. Some of this incoming water flows onto the deck and overboard via the port and starboard cutaways; but a lot flows into the lockers either through the finger-lift hole, or around the cut-away lid hole. This latter design is to allow the cushions to sit flat (but we never use the cushions, this whole seating arrangement seems more of a marketing fantasy). There are also three ventilation holes in the forward bulkhead that seem designed to catch slanting rain.
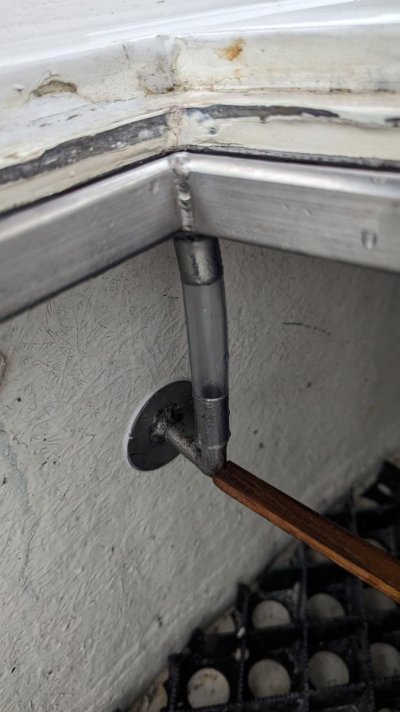
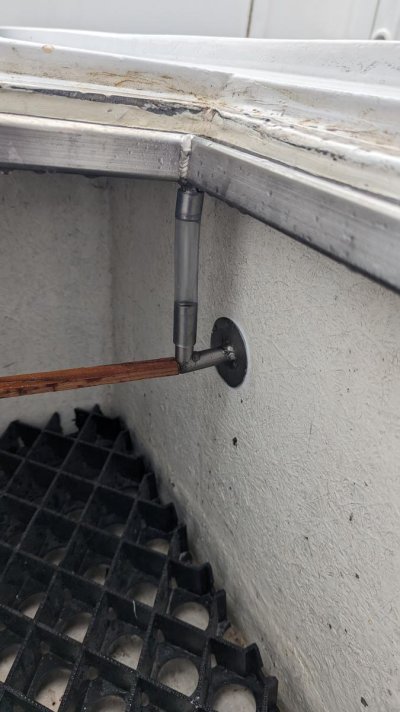
From the lid-hole, water flows along the floor to starboard where there is a limber hole. It is pretty much always damp and often wet. I installed a floor of gardening plastic trays cut to the curvature to allow stored items to be off the floor and ventilate-dry, but that’s a slow process, especially in the sub-tropics. I put buckets under the lids and they filled up in a remarkably short time. A lot of water flows through the area.
The port third of the storage is a closed volume that is used for internal systems, so the only drain is to starboard aft corner.
There doesn’t seem to be a Ocean Alexander Mark 1 owners’ on-line forum (rather, the existing one on Facebook is for modern OAs, not Mark 1s). So I thought I’d try TF OA sub-forum to see if any OA Mark 1 owners have tackled this or a similar problem: how to make it dry and easily accessible?
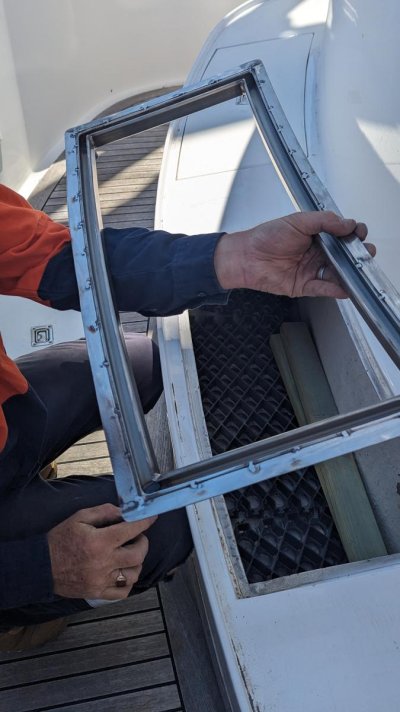
I can envision a number of approaches. Install a rim around the hole, make lids that are wider all around and lock down onto the new rim with latches; use a flat Wichard folding pad-eye to lift off when released. Cut new cushions to conform to the new lids raised above the deck. Close the overhead holes altogether and install locker doors that open forward and close tightly with gaskets? Install ventilators instead of the 3 small holes, if not dorades.
Any other creative ideas most welcome.
 

Attachments

  • PXL_20230410_224809313.jpg
    PXL_20230410_224809313.jpg
    76.9 KB · Views: 28
  • PXL_20230410_224758846.jpg
    PXL_20230410_224758846.jpg
    62.8 KB · Views: 26
  • PXL_20230410_224749400.jpg
    PXL_20230410_224749400.jpg
    28.6 KB · Views: 27
  • PXL_20230410_224841047.jpg
    PXL_20230410_224841047.jpg
    66.5 KB · Views: 25
  • PXL_20230410_224857588.jpg
    PXL_20230410_224857588.jpg
    131.9 KB · Views: 22
  • PXL_20230410_224815943.jpg
    PXL_20230410_224815943.jpg
    61.2 KB · Views: 26
Peter, you are a member of the OA Mark 1 facebook group, I just checked! Now it has not had any posts for a while, but you might still get some help there?
 
I have the same storage on Dream Weaver. My storage is dry. The supports for the lids form a gutter that is drained to the exterior via tubing. Also this area is cushioned and has canvass protection from just under the pilot house windows extending Dow past the cushions. I use this as my chemicals locker
 
Dear Dream Weaver, yes, that's the logical solution, on Aquabelle, make the flat shelves that support the cover boards into a gutter and drain via a tube. Can you please photograph and post your setup? Where do you run the tubing to for an exit? Thank you!
 
I’ll try to get some pics this afternoon. Busy donating platelets right now.
 
I took some pictures but I’m not smart enough to be able to put in with this message. I can email or text them to you
 
On the home page of TF there are different sections. One is how to use the forum. In it there is a sticky post that describes how to post photos. It is pretty easy to do once you have done it.
 
Fabricating gutters around the openings will be tough. A couple of thoughts offhand are to add some S/S vents in the face of the lockers to help them dry. Add some Dry Deck floor tiles to help air circulation under the items in the lockers and help water run out. You might make some canvas covers that snap on and cover the top hatches and let water run off before it gets into the compartment. You could, maybe, put a keder rail on the surface just above the hatch then run the canvas down over the top front edge of the compartment. That should keep most of the water out. I would use Stamoid Top fabric since it is waterproof and the Top is thicker than the regular Stamoid.
 
Commodave. I’m trying to do this from my iPhone. Did not find the sticky not that addresses that. I might have missed that. Don’t know how to get a URL from the pics on my phone. Your expert guidance would be appreciated.
Thanks
 
Top left of the page, click on Trawler Forum and it will pull up all the sections. Click on How to Use the Forum. The second topic is a sticky, it stays there forever, on how to post photos. Hope that helps.
 
Canvas cover over the top and wine corks in the front holes!
Stamoid is a great product, and the heavy is smooth both sides, easy to wipe off. The whites are nice, or maybe sand. But the selection of other colors leaves me blah.
Guaranteed 10 yrs, Sunbrella 15.
 
I suggested Stamoid because it is waterproof. Sunbrella isn’t waterproof, more water resistant if you keep it coated.
 
Here goes my attempts to post pictures. What you will see in one of the pics is a drain hole in the gutter. Another pic shows the tube connected to it. It is just a piece of copper tubing that was epoxied into the hole and a flexible tube attached. The tube drains out the stbd aft corner of the storage area. Not shown is tubing leading from the other hatch gutter Hope this helps. Thank you Commodave
 

Attachments

  • IMG_5892.jpeg
    IMG_5892.jpeg
    24.1 KB · Views: 135
  • IMG_5893.jpeg
    IMG_5893.jpeg
    20.1 KB · Views: 132
  • IMG_5894.jpeg
    IMG_5894.jpeg
    26.7 KB · Views: 129
  • IMG_5895.jpeg
    IMG_5895.jpeg
    29.7 KB · Views: 134
And now a few more pics of the canvas that is over the cushions. Sunbrella with waterproofing.
 

Attachments

  • IMG_5889.jpeg
    IMG_5889.jpeg
    24.7 KB · Views: 133
  • IMG_5896.jpeg
    IMG_5896.jpeg
    32.6 KB · Views: 132
  • IMG_5886.jpeg
    IMG_5886.jpeg
    33.9 KB · Views: 138
Dear Dream Weaver, I am pretty sure the photos didn't post--at least I can't see them on two different devices. If you can email them to me I can post them...thank you, Peter
 
Hi Peter. I was at a local rendezvous for OA Mk1 several weeks ago. There were six boats there this year. I did see the forward seating in front of the house that one boat complained that he could not use it for dry storage. I took a peek at it and it was as you described.
I still think you could creatively add gutters and a drain system. I would envision the gutters to mount below the current support for the lid but extend into the opening enough to capture any water that found its way there.

John Parvis
 
John as it happens I am currently hauled out at Harwood Marine on the Clarence River in NSW. A shipwright there is implementing a neat non-gutter solution next week. I will post photos when complete. In short it creates a "gutter" out of the existing platform on which the board rests that will drain out via hose. Should be cheaper faster and water tighter. We'll see how it goes..
 
Fabulous for you. I look forward to your solution and with your permission share with others here that have the same issue.
I just returned from a two week cruise into Canada. Destination was Princess Louisa Inlet. Pretty spectacular. Google it and see for yourself.
John
 
Dear Dream Weaver, Here's the solution implemented at Harwood Marine on our haulout. Similar in design philosophy but different in details.
First, our locker lids had a finger lift hole. These were plugged by installing watertight and recessed lift rings.
Second, Harwood lacks fibreglass mould capabilities but has strong metal working shop. It's an old 1950s style metal-bending, welding, sandblasting commercial shipyard.
The excellent shipwright Ken opted to create gutters in stainless steel. This was glued under the existing shelf on which the lid sits. The width of the existing shelf was reduced to maximize entry room thereby losing 2cm to the steel gutter once installed. I can live with that.
Each gutter system is drained via two hoses from the forward port & starboard corners to the forward exterior wall of the compartment.
I kept the black plastic grid (a nursery product) on the bottom,just in case. A ventilator was also installed on the front starboard wall.
That's it. So far, the drains have kept up with the worst that heavy storms have thrown at it, and it has made what was constantly wet-humid storage into dry storage.
A small victory, but heh, that's life on boats.
 

Attachments

  • PXL_20231012_031105837.LONG_EXPOSURE-01.COVER.jpg
    PXL_20231012_031105837.LONG_EXPOSURE-01.COVER.jpg
    96.2 KB · Views: 13
  • PXL_20231012_032241808.jpg
    PXL_20231012_032241808.jpg
    81.6 KB · Views: 11
  • PXL_20231012_032259005.jpg
    PXL_20231012_032259005.jpg
    94.6 KB · Views: 14
  • PXL_20231013_025744282.jpg
    PXL_20231013_025744282.jpg
    85.1 KB · Views: 17
  • PXL_20231027_032128542.jpg
    PXL_20231027_032128542.jpg
    85.5 KB · Views: 11
  • PXL_20231027_032144387.jpg
    PXL_20231027_032144387.jpg
    101.3 KB · Views: 11
  • PXL_20231027_031922754.jpg
    PXL_20231027_031922754.jpg
    45.3 KB · Views: 13
  • PXL_20231027_031936936.jpg
    PXL_20231027_031936936.jpg
    115.9 KB · Views: 11
  • PXL_20231027_032033947.jpg
    PXL_20231027_032033947.jpg
    178.7 KB · Views: 18
  • PXL_20231027_000746909.jpg
    PXL_20231027_000746909.jpg
    73.1 KB · Views: 15
I’m so glad you showed me the solution you came up with. It is both robust and elegant and most of all effective
I use that area as a seasonal paint, varnish and chemical locker. But thinking of reducing by half what I have in there and having that area as a secondary life jacket stashed. What plans do you have for your new found space?
 
teak cleaner, boat soap, cleaning tools, sponges, other chemicals, kayak paddles, windlass clutch handle...among other items! Lines go in the forward bridge lockers.
Here's the external ventilation as I ran out of photo space in last post, to complete the entire picture.
 

Attachments

  • PA300075.jpg
    PA300075.jpg
    73.5 KB · Views: 13
  • PA300077.jpg
    PA300077.jpg
    49.9 KB · Views: 12
Perfect place for those items. I still have the thumb hole in the top to let moisture out and have not seen a need for the ventilation. But will keep that in mind for the future.
 
Update: we have been through some serious rain storms in intensity and duration and so far, the storage has remained completely dry. Seems like this system works.
 
Thanks for the update. Glad it worked like a charm for you. Really nice craftsmanship in the modification.
 

Latest posts

Back
Top Bottom