Hendo's Randall 35 Cray Boat complete rebuild, Perth, Western Australia

The friendliest place on the web for anyone who enjoys boating.
If you have answers, please help by responding to the unanswered posts.
How did giving advice and discussing it get so bitter?
It`s Matt`s boat. If he wants to use a particular product it`s his call. If you think he contradicts himself, let him, he will have his reasons. If he errs he`ll be redoing his error, and from the experience of watching his build, he`ll accept it. None of us are perfect, all the time, or at all. Few things are all white or black, shades of grey are everywhere.


Good post, Bruce. I only take exception to one part. That's the part about, "none of us are prefect".:D
 
Good post, Bruce. I only take exception to one part. That's the part about, "none of us are prefect".:D

Don - You surely are an exception to the rule... just doubt it's that rule! :D:popcorn:
 
"For timber trawlers a mate of mine who has been in the game for 40 years swears by good quality house paints."

Don't get fooled all the time.I have used quality exterior house enamel on my boat a few time over the past 20 odd years with a modicom of success and then the second last time abject failure.
This last paint job only some 18 months after the previous application I have gone back to International Toplac and so far the results are proving very worth while.

The Dulux paint previously used was Dulux Professional but may be the formula has been changed.
 
He shitcans my comment about using NON marine product on a boat and claims they are not up to the job yet his boat is full of NON marine product.
Hypocrisy in its most pure form.

Quite possibly, but with over 30 years in the marine industry I have my fair share of knowledge as well.


Please do tell me exactly what "NON marine product I have "filled" my boat with.


Sent from my iPhone using Trawler Forum
 
Now back to our regularly scheduled program!

Matt those port lights are looking sweet. Are you painting the inside of the transitions hull color or something else? From experience, finally getting to slap on a little paint is a game changer.

Cheers,
Bob
 
That's thin-set cement. It's intended to go over concrete. Also intended to penetrate into the surface it's applied to - cement not your impermeable fiberglass deck. Really doubt if it's going to adhere to your less than rigid boat deck for very long.


Regarding deck coating item I'd sent PM to Matt about:


1. Expensive - $924.48 per 50 lbs. = approx. 70 sq. ft. 1/8" coverage = $13 + per sq. ft.
2. Pre coat-cleaner needed and top coat sealer recommended... did not find out cost of those two. However, I did speak with company owner John regarding product installation, quality, durability and its great surface-adherence value... always remaining non skid and easy to clean - Comes in white only; i.e. the color I want.
3. Glows amber/yellowish in the dark for added boat showing as well as night time sure-footed travel on decks. Evidently it glows pretty darn bright for about 12 hrs after fairly short charge from sun or even just incandescent lights... therefore might not be good idea to have on front deck for night travel, as the light might interfere with our eyes adjusting to night vision for seeing up ahead. I was told that there is no glow if any light is available; that it only glows in the dead-dark of night. Demarcation line could be established about mid ships wherein same color/texture coating could be continued forward but with no glow feature inherent.
4. So damn tough it's used on airport runways stripes and does not wear out.
5. Fore to now never used as deck coating on pleasure boats.
6. Glow feature is non radioactive.


Super-Krete: http://www.super-krete.com/products/


Glo-Kote: http://www.super-krete.com/s-9350-glo-kote/ See the video.


I plan to purchase small bag and try it out... within the next year, maybe??


Happy Deck-Cote Daze! - Art :speed boat:
 
I never recommended using much cheaper house paint and throwing in non skid beads.

What I said was using
: brand A urethane paint and adding non skid beads
Vs buying
: brand B urethane pain with non skid beads all ready mixed in

Brand A Urethane has pictures of commercial ships, oilrigs etc on tin and is a fraction of the cost of brand B Urethane with pictures of superyachts on the tin.
They are both urethane paints.

The other recommendation was to use
: Brand A durable, water-based acrylic polymer
Vs
: Brand B durable, water-based acrylic polymer
Same as above, one with pictures of yachts on the can is much more expemsive than the other
Both are durable, water-based acrylic polymer used for providing a waterproof textured membrane.

Yeah, I knew that Simi - was just yanking your chain - although you did actually mention...

"For timber trawlers a mate of mine who has been in the game for 40 years swears by good quality house paints." Just sayin'... :D
 
Good post, Bruce. I only take exception to one part. That's the part about, "none of us are prefect".:D

Looks like you need to keep check on your spellchecker there Don... :D

The word Bruce used we 'perfect', was it not..? But hey...you might have even been a 'prefect' at school, so what do I know..?
 
Last edited:
That's thin-set cement. It's intended to go over concrete. Also intended to penetrate into the surface it's applied to - cement not your impermeable fiberglass deck. Really doubt if it's going to adhere to your less than rigid boat deck for very long.

I've used other Super-Krete products. They adhere to nearly any surface... permanently, if surface is prepared correctly. BTW - "Thin set" (a trade name for tile underlayment) is completely different composition.
 
Last edited:

OK - You're correct. In this instance... John did use that term (thin-set); meaning a "thin overlayment". I now do recall passing over that sentence and feeling that term (thin-set) was incorrectly utilized, in that place anyway; and, I recall it bothered me - just a little. Reason: For many decades the term "thin-set" has been used for goopy notch-troweled underlayment to set tile onto for affixing tile to surfaces before grouting the joints.
 
Please do tell me exactly what "NON marine product I have "filled" my boat with.
I posted a pic earlier.
C and D grade ply is not marine quality, not even close neither is blue pressure treated framing ply.
You also said you use caravan and household gear in the boat.
Caravans and houses are not boats.

Not saying it cant and isnt used and the same goes for the paints I suggested.
Just found it funny that you had such a spit at my suggestion of not using "strictly" marine quality gear when you do the same yourself.
 
Don't get fooled all the time.I have used quality exterior house enamel on my boat a few time over the past 20 odd years with a modicom of success and then the second last time abject failure.
This last paint job only some 18 months after the previous application I have gone back to International Toplac and so far the results are proving very worth while.

The Dulux paint previously used was Dulux Professional but may be the formula has been changed.

Different boats mate.
Yours is a particular fine example and you have obviously spent a lot on her have a lot of income to support it.

We have retired early and income is there, but finite.
The one we are getting is a unloved and bit rough around the edges on the outer and to bring her back to pristine will cost more than she has cost to purchase therefore the outside will be treated more like a work-boat.
Plenty of paint, regularly applied, much like the Harbour Bridge.
Wont look as sharp, but she'll be clean and well protected.
 
Well that was interesting. Another user added to the Ignore list :)

Not sure why all the bitterness has arisen in the last few days. If you don't like what I'm doing then that's cool. No need to be snarly about it. Just click unsubscribe and move on.

There's bigger things to worry about than always having to be right.

Peace out :)


Sent from my iPhone using Trawler Forum
 
Now back to our regularly scheduled program!

Matt those port lights are looking sweet. Are you painting the inside of the transitions hull color or something else? From experience, finally getting to slap on a little paint is a game changer.

Cheers,
Bob


Hey Bob,
Yeah everything from the toe rail down will be gloss black, the exception being the transom. The black will stop at the corner of the hull extension angled supports and the white or silver (depending on what superstructure colour I use) will cut in from there.


Sent from my iPhone using Trawler Forum
 
Post # 2816 :thumb: I'm a big fan of nice folks , makes my day better . I'm with you all the way Matt . This thread is my "get off my arse and work on the boat "
motivator. Your work ethic and determination is second to none. Can't wait to see some paint going on . Are you planning on any high gloss wood anywhere next to the gloss black ?
 
I can't see it because I added the user to my ignore list but I've been pm'd a screen shot of a question raised in relation to the timber framework I am using and the plywood i have chosen, ultimately critiquing my work.

Just to clarify; the only difference between the plywood I used and the "A" grade marine plywood on the market are the face veneers. The plywood I bought has the odd knot in it whereas "A" grade plywood does not. The plywood I am using is structural F17 with a "A" glue bond.

What the original poster has failed to realise is this boat is not being built using traditional methods like cotton seams and allowing the water to penetrate the ply causing it to swell.

This is a composite construction boat

Buying a plywood panel with an "A" grade face then covering it with 10mm of high strength epoxy filler, 450gsm fibreglass cloth, 5mm of lightweight fillers and then high build primer and various coats of epoxy barrier coats makes absolutely no sense in my opinion instead opting for a structural plywood panel at less than half the cost with zero disadvantage was my choice.

In relation to the timber framework. The variety of structural timber i chose was MGP10 T2 blue pine.

I chose this because it is lightweight, is structural and is resistant to infestation. I'm really not sure what concerns the original poster has in relation to this timber or what he would have used instead but at the time of construction, the hardware store was fresh out of "timber to be used only on boats" haha.

The framework of the hull was 100x50 seasoned Jarrah which is a hardwood species unlike pine which is a softwood species and about two times as heavy.

Hope that help clears up everyone's concerns or questions. Please feel free to let me know if you need anymore info in relation to the timbers used.

Happy to clear up any concerns.

Cheers

ImageUploadedByTrawler Forum1468402394.186595.jpg


Sent from my iPhone using Trawler Forum
 
Post # 2816 :thumb: I'm a big fan of nice folks , makes my day better . I'm with you all the way Matt . This thread is my "get off my arse and work on the boat "

motivator. Your work ethic and determination is second to none. Can't wait to see some paint going on . Are you planning on any high gloss wood anywhere next to the gloss black ?


Gday mate. Thanks for your support. Your projects have driven me to get crackin mate lol.

No nothing planned at this stage mate however I am looking at adding highgloss timber sections on the transom and up the sides up to the roof support.

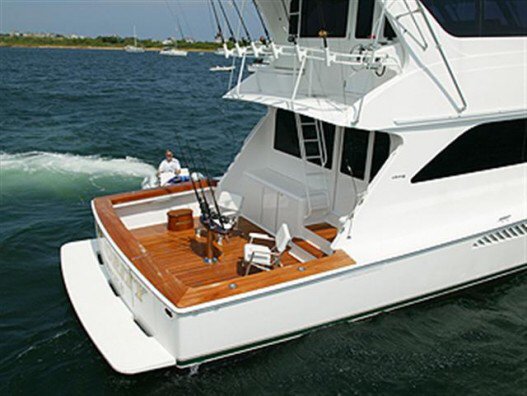
Similar to this

ImageUploadedByTrawler Forum1468403158.446846.jpg


Sent from my iPhone using Trawler Forum
 
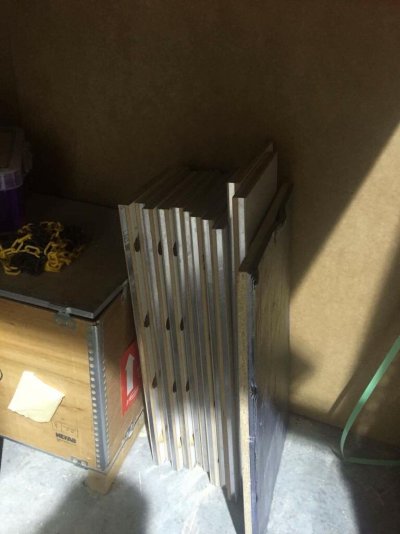
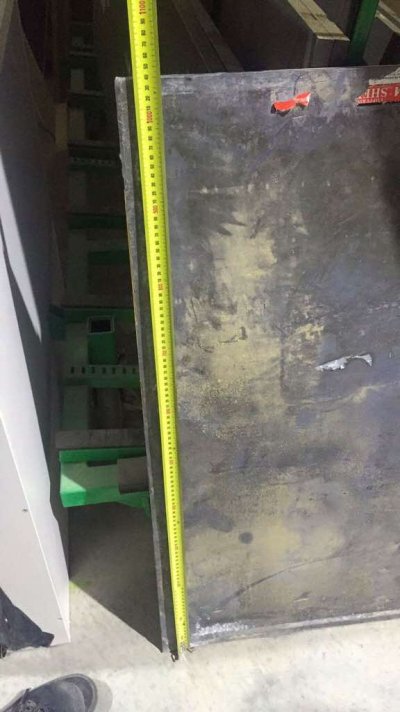
Ok so got some good news today courtesy of Facebook sale pages. I scored 510kgs of lead for $800. Massive savings. Even better is it is in flat sections so I'm thinking about fixing it to the outer faces of the keel. Kind of like cladding the keel in lead. If lead is no good for water then I'll fit it in the bilge instead.

Anyone know of any issues putting lead in salt water?

ImageUploadedByTrawler Forum1468405913.101722.jpg
ImageUploadedByTrawler Forum1468405946.104647.jpg


Sent from my iPhone using Trawler Forum
 
I believe lead would not corrode, however when it came to water blasting to renew antifoul, there might be some concerns. I'm not sure, but inside might be better..?
 
Sailboats have lead keels that are just painted.

Though the ones I owned were encapsulated in the glass so I neve paid attention too close to galvanic or disolving issues.

Here is a quick read from practical sailor...

http://www.practical-sailor.com/news/Keel-Maintenance-and-Repair-10067-1.html

"As a rule, lead keels require far less care than iron. Nevertheless, they are not maintenance free. While you don’t normally think of your lead keel as corroding away, lead keels can develop significant problems that both degrade performance and reduce the value of your boat.

The main culprit is bottom paints with a high copper content. Copper paint on a lead keel creates a galvanic couple, just as copper paint does on an iron keel. Fortunately, the difference in potential between lead and copper is far less than the difference between iron and copper, so that corrosion problems are commensurately smaller.

The wet spot on this lead keel indicates a pocket of porous material.

However, it is common to see lead keels with crumbly, whitish surface deposits, which when scraped away reveal a porous surface where the lead has corroded. Fortunately, the surface of a lead keel does not corrode and pit in the same manner as an iron keel, and reasonable repairs can be made without expensive equipment.

A drill-powered wire brush will usually grind away surface deposits and do an adequate job of cleaning out shallow corroded areas. It is important to remove as much of the crumbly oxidized lead as possible, to create a good surface for filler bonding.

With the lead clean and bright, fill corroded areas immediately with an epoxy filler. The best epoxy fillers for this purpose are the ones you make yourself from epoxy resin, such as the Gougeon Brothers West System epoxy, and a filler such as phenolic microballoons or microspheres. Remember that lead is pretty soft, and you don’t want your filler to be significantly harder than the surrounding material.

When filling, give the area to be faired a prime coat of unfilled epoxy before applying the thickened epoxy mixture. This will allow a better bond between the filler and the surface. You can allow the clear epoxy to partially kick off before over-coating with filler, but don’t let it cure completely or you’ll get a poor bond.

When the filler has cured, sand or plane it level and smooth. A belt sander or conventional hand bench plane can be used, since lead planes almost as easily as wood.

With all corroded areas and damaged areas cleaned and filled, sand or wire brush the rest of the keel to bright metal. A belt sander or disc sander works fine here, although proper use of either tool to avoid gouging the surface takes a little practice. A lead keel is far easier to bring to bright metal than an iron keel. The fin keel of a 30-footer can be done in an hour or so.

To make sure your keel doesn’t begin to corrode again, you must completely isolate the surface of the keel from the bottom paint with an epoxy barrier."
 
Yeah I was able to get flat pieces this time that I thought could go on the keel but the next lot will be roll off cuts so will be perfect for the bilge area. I'll look into it :)


Sent from my iPhone using Trawler Forum
 
Sailboats have lead keels that are just painted.

Though the ones I owned were encapsulated in the glass so I neve paid attention too close to galvanic or disolving issues.

Here is a quick read from practical sailor...

http://www.practical-sailor.com/news/Keel-Maintenance-and-Repair-10067-1.html

"As a rule, lead keels require far less care than iron. Nevertheless, they are not maintenance free. While you don’t normally think of your lead keel as corroding away, lead keels can develop significant problems that both degrade performance and reduce the value of your boat.

The main culprit is bottom paints with a high copper content. Copper paint on a lead keel creates a galvanic couple, just as copper paint does on an iron keel. Fortunately, the difference in potential between lead and copper is far less than the difference between iron and copper, so that corrosion problems are commensurately smaller.

The wet spot on this lead keel indicates a pocket of porous material.

However, it is common to see lead keels with crumbly, whitish surface deposits, which when scraped away reveal a porous surface where the lead has corroded. Fortunately, the surface of a lead keel does not corrode and pit in the same manner as an iron keel, and reasonable repairs can be made without expensive equipment.

A drill-powered wire brush will usually grind away surface deposits and do an adequate job of cleaning out shallow corroded areas. It is important to remove as much of the crumbly oxidized lead as possible, to create a good surface for filler bonding.

With the lead clean and bright, fill corroded areas immediately with an epoxy filler. The best epoxy fillers for this purpose are the ones you make yourself from epoxy resin, such as the Gougeon Brothers West System epoxy, and a filler such as phenolic microballoons or microspheres. Remember that lead is pretty soft, and you don’t want your filler to be significantly harder than the surrounding material.

When filling, give the area to be faired a prime coat of unfilled epoxy before applying the thickened epoxy mixture. This will allow a better bond between the filler and the surface. You can allow the clear epoxy to partially kick off before over-coating with filler, but don’t let it cure completely or you’ll get a poor bond.

When the filler has cured, sand or plane it level and smooth. A belt sander or conventional hand bench plane can be used, since lead planes almost as easily as wood.

With all corroded areas and damaged areas cleaned and filled, sand or wire brush the rest of the keel to bright metal. A belt sander or disc sander works fine here, although proper use of either tool to avoid gouging the surface takes a little practice. A lead keel is far easier to bring to bright metal than an iron keel. The fin keel of a 30-footer can be done in an hour or so.

To make sure your keel doesn’t begin to corrode again, you must completely isolate the surface of the keel from the bottom paint with an epoxy barrier."


Awesome thanks mate.


Sent from my iPhone using Trawler Forum
 
hendo, I would be more inclined to keep all the lead on the inside and lay it flat on the bottom where at all possible.
at least you won't be feeding or creating any stray currents on the outside around you shaft .prop etc.
 
Ok so got some good news today courtesy of Facebook sale pages. I scored 510kgs of lead for $800. Massive savings. Even better is it is in flat sections so I'm thinking about fixing it to the outer faces of the keel. Kind of like cladding the keel in lead. If lead is no good for water then I'll fit it in the bilge instead.

Anyone know of any issues putting lead in salt water?

Sent from my iPhone using Trawler Forum

Good find! BUT - 1124 lbs. lead must have cost a fortune in shipping! :eek: Just kidding... it must have been close enough for pick up - right?

Sooo... when SOLSTICE splashes are you planning to already have the lead fastened to the keel? Or are you just going to have the lead available for interior placement until you get a "feel of the deal" where ballast may be actually needed?

Without being on site at your boat build, I'm not able to really ascertain what my mind's eye would tell me as far as where/what the chances for ballast placements are. Do you have inkling as to where SOLSTICE may need ballast? Ya, Know... she might require less ballast than you think... that I hope for your sake!
 
Last edited:
hendo, I would be more inclined to keep all the lead on the inside and lay it flat on the bottom where at all possible.
at least you won't be feeding or creating any stray currents on the outside around you shaft .prop etc.


What a game tonight hey mate..! Go the blues woohoo lol.

Ah Ok cool. Something to consider.


Sent from my iPhone using Trawler Forum
 

Latest posts

Back
Top Bottom