Helmsman Hacks

The friendliest place on the web for anyone who enjoys boating.
If you have answers, please help by responding to the unanswered posts.
...The drawers in the galley are deep (5 1/4 inches interior height) which is great for pans and bigger stuff, but makes it hard to organize the drawer for kitchen stuff...

Love this idea Jeff, I hope to get to see it at the rendezvous!

Rick
 
Looking for a bug screen hack

Good evening. Starting to plan for extensive summer cruising to the Broughtons and Desolation Sound. On our last boat, we had evenings where it got a bit hot and buggy, and even with the windows open with screens, it might have been nice to have a lot of air flowing through the boat. Have any in the Helmsman cult/tribe put temporary bug screens over the cockpit and/or pilothouse doors? Who did you use or were you industrious and sewed them yourselves? Or did you just find the hassle not worth it?


Thanks!


Jeff
 
Two simple hacks

Just back from a week in the south Sound. It actually got warm (!), which was a complete shock. Summer is not supposed to arrive until July 5th. At the Rendezvous I noticed folks had built in fans. Inspired by this we added this inexpensive, USB rechargeable fan to the boat:

https://www.amazon.com/gp/product/B0BCQ76THB/ref=ppx_yo_dt_b_search_asin_title?ie=UTF8&psc=1

the reason is twofold. First, it just fits on the shelf adjacent to the bed in the stateroom (just clears the shelf above) and its low setting is virtually silent, allowing one of us to have a nice cooling fan that does not bother the other. It will run all night on a charge.

Second, when you need it to defog your pilothouse windows on a cool, wet day, you just put it in front of the window that is fogged and it clears thing up right away. No wiring needed, no plugging into an outlet, no nothing. Just a simple and cheap way to move air when needed and where needed.

The other hack is likely more controversial. Although we have a generator, we go out of our way not to use it (nickname is "the noisemaker"), especially in a crowded anchorage. We had one day where we only spent a bit more than an hour moving to the next anchorage. We do not have solar panels (yet), so the batteries were not fully charged. To deal with this we took advantage of the elaborate battery management system on the electrical panel. As voltage on the batteries dropped and the ACR's disconnected, we paralleled the house, windlass/bow thruster, and generator start batteries together (switch to On from Auto), leaving the engine start battery fully charged but not connected to the rest. That increased our available amp hours by 50%, which made it easy to deal with the draw overnight (Starlink...ouch!) even after limited recharging. Worst case is that you draw down your now very large house+gen+thruster battery bank due to some mishap, but still have sufficient capacity on your engine battery to get the engine started. Once that happens, the alternator eventually takes care of the rest.

I know there are lots of scenarios where this is a bad idea, but those are the exception and represent a risk/reward trade off. The paralleling of the three battery banks--excluding the main engine battery--expands your available amp hours dramatically and puts off firing up the generator.

Jeff

ps: we re-wired our Ranger Tugs in order to do this very thing which helped a lot on power management while still protecting the engine start battery.
 
While we are dealing with engine issues on our new 38E, we have been busy getting it ready for cruising with our visiting family.

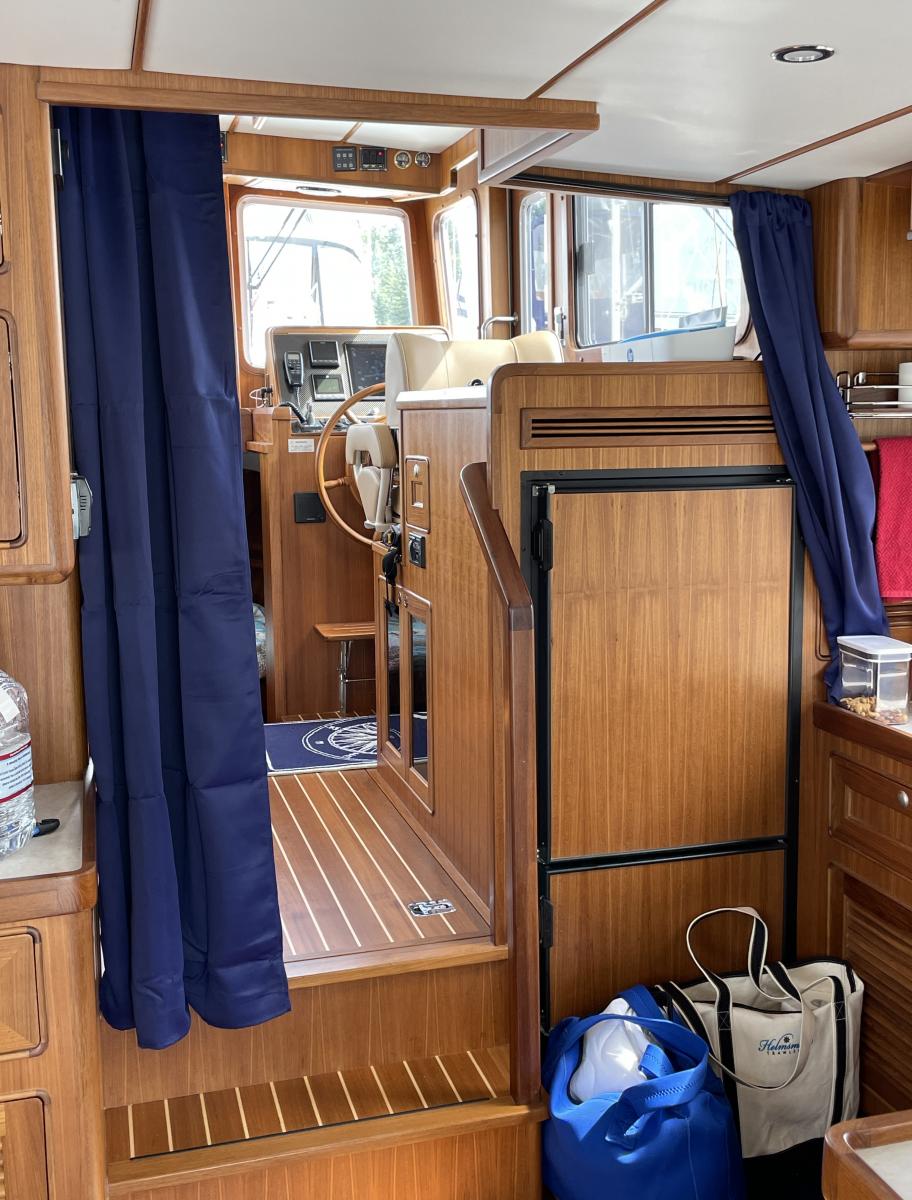
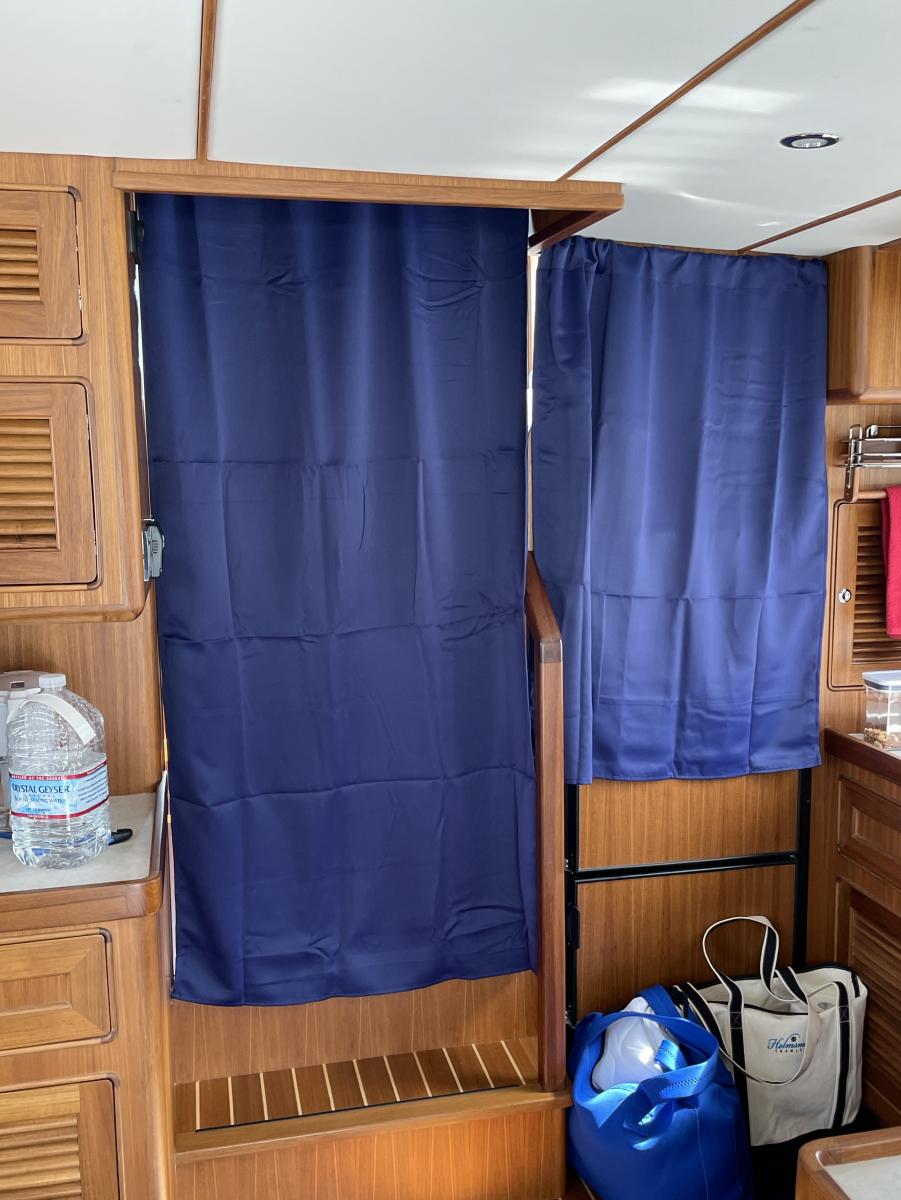
Our solution to guest privacy is to put up curtains at the opening to the pilothouse. I didn’t say install because the are hung on spring tension curtain rods. No holes and no wires. We still have to add some Velcro to close the small gaps and trim the short section. They are easy to setup and take down and take up minimal storage space.

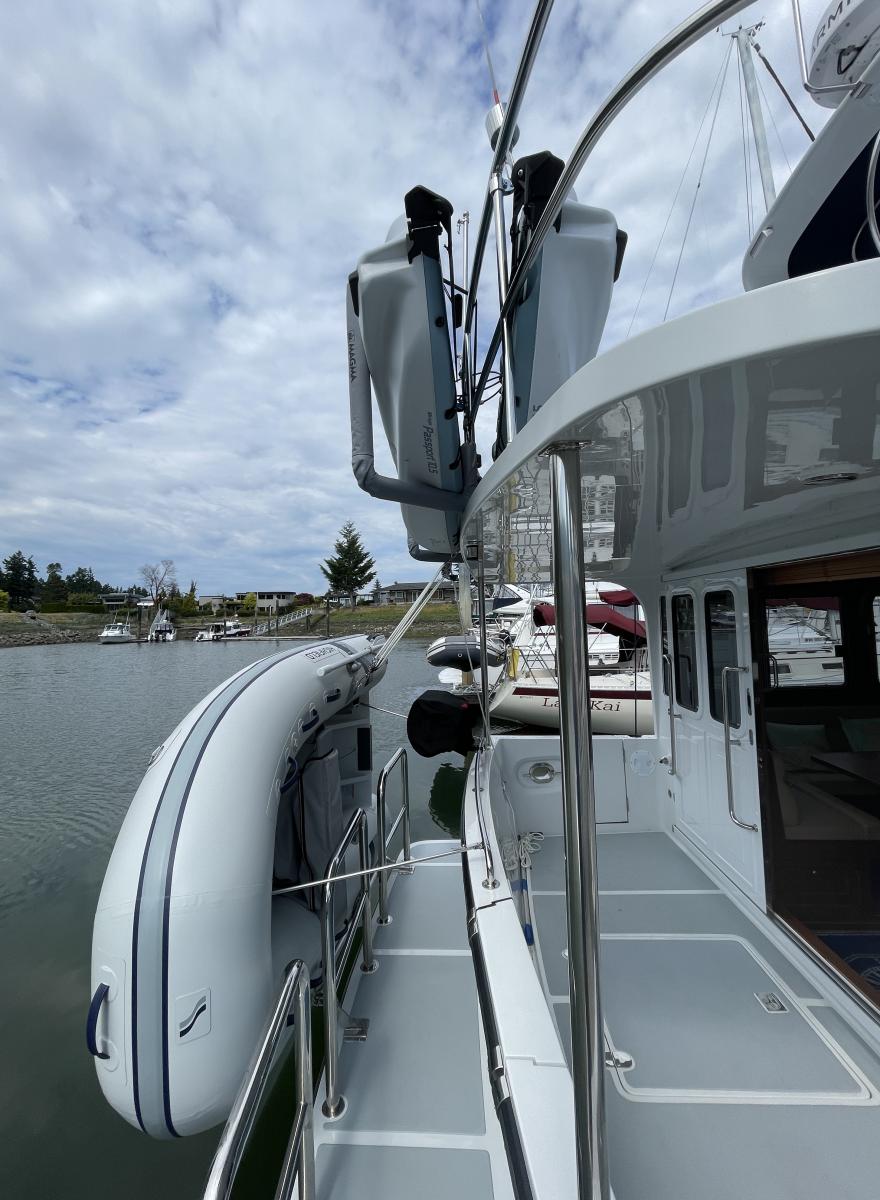
Our “toy deck” is ready to go with our two Hobie pedal kayaks mounted on the stern, one on a rack and one the deck lashed to the rail. We don’t have to worry about bumping them on pilings and we have plenty of deck left for lounging or other toys.


28403-albums1128-picture8036.jpeg


28403-albums1128-picture8037.jpeg


28403-albums1128-picture8038.jpeg
 
Last edited:
Looks nice Doug. You didn’t say what model the Hobie kayaks were. Obviously less than 14’. And the curtains look perfect. Great idea to make the rods removable since 99% of the time you will not have overnight guests.

And sorry to hear about your engine struggles. This on top of your delayed delivery. Hang in there. We are all pulling for you.

Jeff
 
While we are dealing with engine issues on our new 38E, we have been busy getting it ready for cruising with our visiting family.

Our solution to guest privacy is to put up curtains at the opening to the pilothouse. I didn’t say install because the are hung on spring tension curtain rods. No holes and no wires. We still have to add some Velcro to close the small gaps and trim the short section. They are easy to setup and take down and take up minimal storage space.

Our “toy deck” is ready to go with our two Hobie pedal kayaks mounted on the stern, one on a rack and one the deck lashed to the rail. We don’t have to worry about bumping them on pilings and we have plenty of deck left for lounging or other toys.


28403-albums1128-picture8036.jpeg


28403-albums1128-picture8037.jpeg


28403-albums1128-picture8038.jpeg

That separation of areas will work well for the occasional over night guest, and I like the idea of not putting more holes in the wood work. The only shortcoming is not being able to get to coffee. :) That can be managed by moving the coffeemaker to the PH, though. I really like the kayak set up, too. I am still trolling for the right dinghy davit set up, but can wait until a little later in the year, since we are reconsidering our travel plans for this year. I have a TakaCat dinghy whic I would prefer to have roll on davits for, but the height of the wake behind the boat may force me into having arms installed to pull it up higher.
 
Looks nice Doug. You didn’t say what model the Hobie kayaks were. Obviously less than 14’. And the curtains look perfect. Great idea to make the rods removable since 99% of the time you will not have overnight guests.


Jeff

Our Kayaks are Hobie Mirage Passport kayaks. They are 10'-6". We lift them off the dock or out of the water with the hoist. One person can do it with a little practice.
 
Great hacks you all. Here is another poco nada we have done on our boat. When we got the boat, the gauge on the blackwater tank was clearly stuck. Following the advice of Scott we let the tank get pretty full (a guess) and added a cup of Tide then went out and got beat up by a wind-against-tide day to shake things up. Clearly it broke the sending device loose, but we really can't say how full the tank is at any time based on the gauge. And based on a pretty awful experience of a stuck sending device on our Ranger Tug, we are hyper-cautious.

Here is our "calibration" technique. We bought two of these digital counters:
https://a.co/d/793RkXs
and mounted them with double sided tape right next to the flush control panel. Each flush, you add a count.

On our boat we have the Dometic Masterflush and leave it on the lower volume "dry flush" setting in both heads. This puts .45 gallons plus your additions into the 45 gallon waste tank. So conceptually, that is 100 flushes from empty to full, with a subtraction for whatever volume you have added. Conceptually. And testing that would be a disaster. So we just assume .66 gallons per flush and count them up. Then using the classic rule of thirds applied to fuel tanks, when we get to 30 gallons (roughly 45 flushes) combined it is time to pump out with room to spare.

And what we have found so far is the tank gage is non-linear and is not to be fully trusted until you measure it with the counter. And then, keeping track of flushes is useful to see if it is stuck again.

Scott has pointed out that cleaning the sending device is easy if unpleasant, so that is certainly an option. Not ready for that one just yet.

More hacks! Would love to hear rule of thumb relationships on differences between port side and starboard side fuel levels to level the boat (ours has a small list to starboard due to weight on that side of the boat) and how much to trust the fuel gauges.


Jeff
I would really appreciate you giving me the process for cleaning the holding tank sensor. I'd rather have a distasteful task than a non functioning sensor. Hand a 2008 Helmsman 38. sensor quit half way into last summer. suspect RV toilet paper. or is there an effective easy to mount external device?
 
This is an unpleasant task that I have not yet tackled, having been successful in freeing up the sensor using Tide. But, my next step was going to be to pull the sensor and clean it assuming that it was gunked up. But my first step was going to be making sure that the electrical connection to it is working. You will find the top of the poop tank when you open the bottom step into the stateroom and pull up the floor. You will see the sensor wires coming in to the top of the tank. You just undo the sensor and pull it out and clean it with a rag I presume (wear gloves!). Again, 1) I haven't actually done this and 2) make sure you have power to the sensor and the gauge. Good luck!
 
With Kiskadee, as the previous owner of Off Leash, I treated the waste tank content with other additives (e.g. Camco TST MAX RV Toilet Treatment-liquid or gel packs) periodically during a cruise. On return to home port, I filled (carefully) and emptied the tank every time. I left about 10 gallons of clean water, plus additive, in the tank for 48 hours and then pumped out. Sometimes the float was freed and other times not. You don't want an overflow of the waste tank! So monitor the tank level/flushes as you go.
 
On my boat, I put one of the Blue Sea ultrasonic sensors in the holding tank. It's been almost 4 years since install and it's still working nicely (with no moving parts to gum up).
 
Give up on the wetted sensor type unless you are content cleaning it every few months or using only thin single ply TP. Instead, replace the gauge and sensor with an external sensor type like the SCAD. Simple installation. No cleaning.
 
Thank you all for your replies. ILl start with some holding tank treatment we have some aqua kem, and then to some tide and when we have wifi start to search for the two alternatives mentioned. Last year we replaced the y valve as it was letting air in and hence not pumping out. So, yeah, we know about overflow. Don't ask. LOL. I j I st want to keep tabs. On my old sailboat had an inspection port which was great!
 
It is obvious that you haven't changed diapers for awhile!
My sensor was frozen solid with rust and junk when i first got the boat. Got the sensor out and took it home and completely disassembled it. Once cleaned the float should move easily up and down. The holes in the side of the tube allow liquid in and keep solids out so you should get many months of care-free use.
Some tips: use quick disconnects on the electrical ends and lubricate the thread. This way you only have to screw out the inner part and not remove the screws holding the base to the tank. Here is a picture of the model i have.
There is a spring wire on the bottom that when removed allows complete disassembly for cleaning.
Barrie
 

Attachments

  • Holding tank sensor.jpg
    Holding tank sensor.jpg
    46.1 KB · Views: 24
Indeed, it has been more than a few years since changing a diaper but last year I earned some experience points when, after we just got the boat, discovered the y valve was letting air leak so no suction. I took that to mean the holding tank was empty. When I took one of the in hoses off found out tank was over full. I put the cleaner in as per suggestions but need it to get fuller hoping if it is, maybe sloshing around will be magic. If not, will need to tackle the removal. Actually had a near perfect day so may wait a while,as we're out for the summer. I'll double check the model and use your instructions, which I'll save when we get wifi
Thank you! I sure wish it had a port at the top like on my Catalina. Good for viewing and emergency pump out
 
Mine looks like there's a gasket on top. Is that reusable?
 
OK, on the Tennessee we deal with river otters! Turns out the tailpipe is perfect position for the little critters to make a nest in there. We had the boat sitting for two weeks. Wind was blowing from the stern to the bow when we started her up. The most gosh awful mess you could think of came rushing out, and the stench was overwhelming. My wife thought the black water tank blew a line! It was worse than that.

Works with sea otters and muskrats, too.

I ordered an otter guard from Hurley Marine and installed it. Easy to do, while laying on the swim platform in the water. Might be something to do at delivery when the swim platform and depth finder gets installed.
 

Attachments

  • IMG_3121.jpg
    IMG_3121.jpg
    186.4 KB · Views: 32
Wow! Our opening in the back is about 5 inches. Most otters we see are too big to fit. Sounds like that's at least one problem we won't have. But what a good way to block entry.
 
Wow! Our opening in the back is about 5 inches. Most otters we see are too big to fit. Sounds like that's at least one problem we won't have. But what a good way to block entry.

Our opening is 5 13/16”
 
Add that back to the worry list, although most otters in the Pnw ocean seem pretty big. And the most we've sat in one place is two days or a very rare 3.
 
I haven’t seen muskrats or otters, but they are where we are. Escape has that same guard from Hurley. I secured it with a cable to a bolt on the swim platform above in case it ever works the Loctite loose.
 
Small hack, just a cough

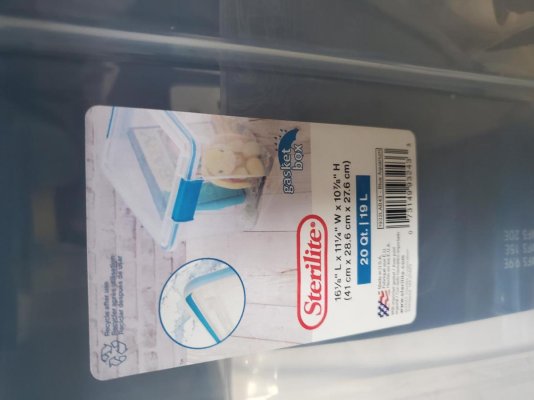
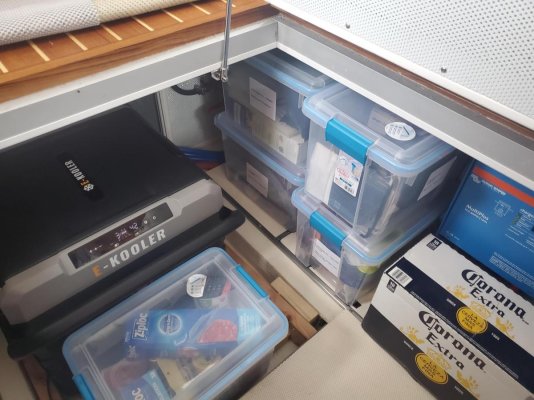
Not sure if this is a hack, or ever a cough, but if your looking to organize the engine room, or the "Garage" as I call it and/or the lazerette under the cockpit, I found the best container system with a gasket sealed lid for the 38.

I don't know the size of the Garage, or Engine room etc for the 43 or 46, but they make bigger ones as well.

20230729_142157.jpg

It's a bit pricing, but they will last forever and keep the moisture out.

Size dims are perfect for the 38. Really make storage efficient as the stake just right and don't impede to get around.
20230729_142150.jpg

I know the Corona isn't in a container but it's also not listed on my spare parts, filters, oils, etc.

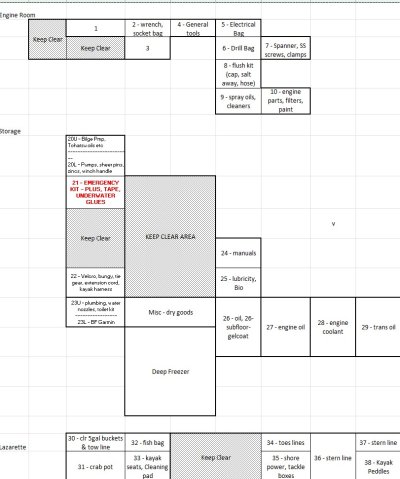
Most of the boxes (13) in my excel represent the containers (obviously the crab traps are just their location)

map.jpg
 
A hack, a cough, here is a sneeze

Were on an extended journey with the next port 2-3 weeks away.

The real subject is freshwater management.

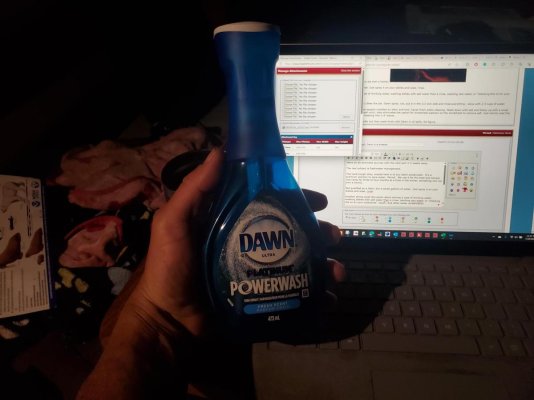
The hack/cough okay, sneeze here is to buy dawn powerwash. It's a premium solution to save water. Period. We use it for the boat and camper (we camp for three to four months at a time in the winter, wondering why we own a home).

20230729_231750.jpg

Not qualified as a Hack, but it saves gallons of water. Just spray it on your dishes and wipe, rinse.

Another string could discussion about storing a case of drinking water, washing dishes with salt water then a rinse, catching rain water, or "checking the oil on your outboards" :blush: and other water conservation.

But this and our 1 and 1/2 sink option (quasi hack) does the job. Dawn spray, rub, put it in the 1/2 sink side and rinse everything - done with 2-3 cups of water.

Also we had both high-pressure salt and freshwater spigots installed on stern and bow. Saves fresh water cleaning. Wash down with salt and follow up with a small rinse of fresh on anchors and sterns (LILLY gets fresh only). Also eliminates the option for windshield washers on the windshield to remove salt. Just ceramic coat the windows and a light spray of fresh works well after heading into 3-4' waves.

I don't know if Dawn is really environmentally friendly but they wash birds with Dawn in oil spills. Go figure.
 
I believe all of these qualify as hacks, Tom. We already have the Sterlite boxes. They are fantastic, although if you are rough with them the handles get knocked off. Nice hacks!
 
We use the space under the galley sink for trash and recycling. A regular plastic kitchen trash can works fine on the starboard side. The P trap makes it hard to fit a tall container for recycling below the small sink basin.

We found a sturdy plastic container that fits like it was made for the space.

https://www.zoro.com/quantum-storag...4-in-l-11-in-w-8-in-h-tub1711-8bl/i/G3748726/

28403-albums1199-picture8052.jpeg

This is what we use for our trash under the sink.

Rubbermaid Commercial Products 28QT/7 GAL Wastebasket Trash Container, for Home/Office/Under Desk, Beige (FG295600BEIG).

It fits perfectly. We got it from Amazon.
 
What have folks done to organize the bow locker?

It’s deep. Drop a spare dock line down there and it would be a tough retrieval.
 
Back
Top Bottom